Das Küsschen und die Sonne stritten sich …

Introduction

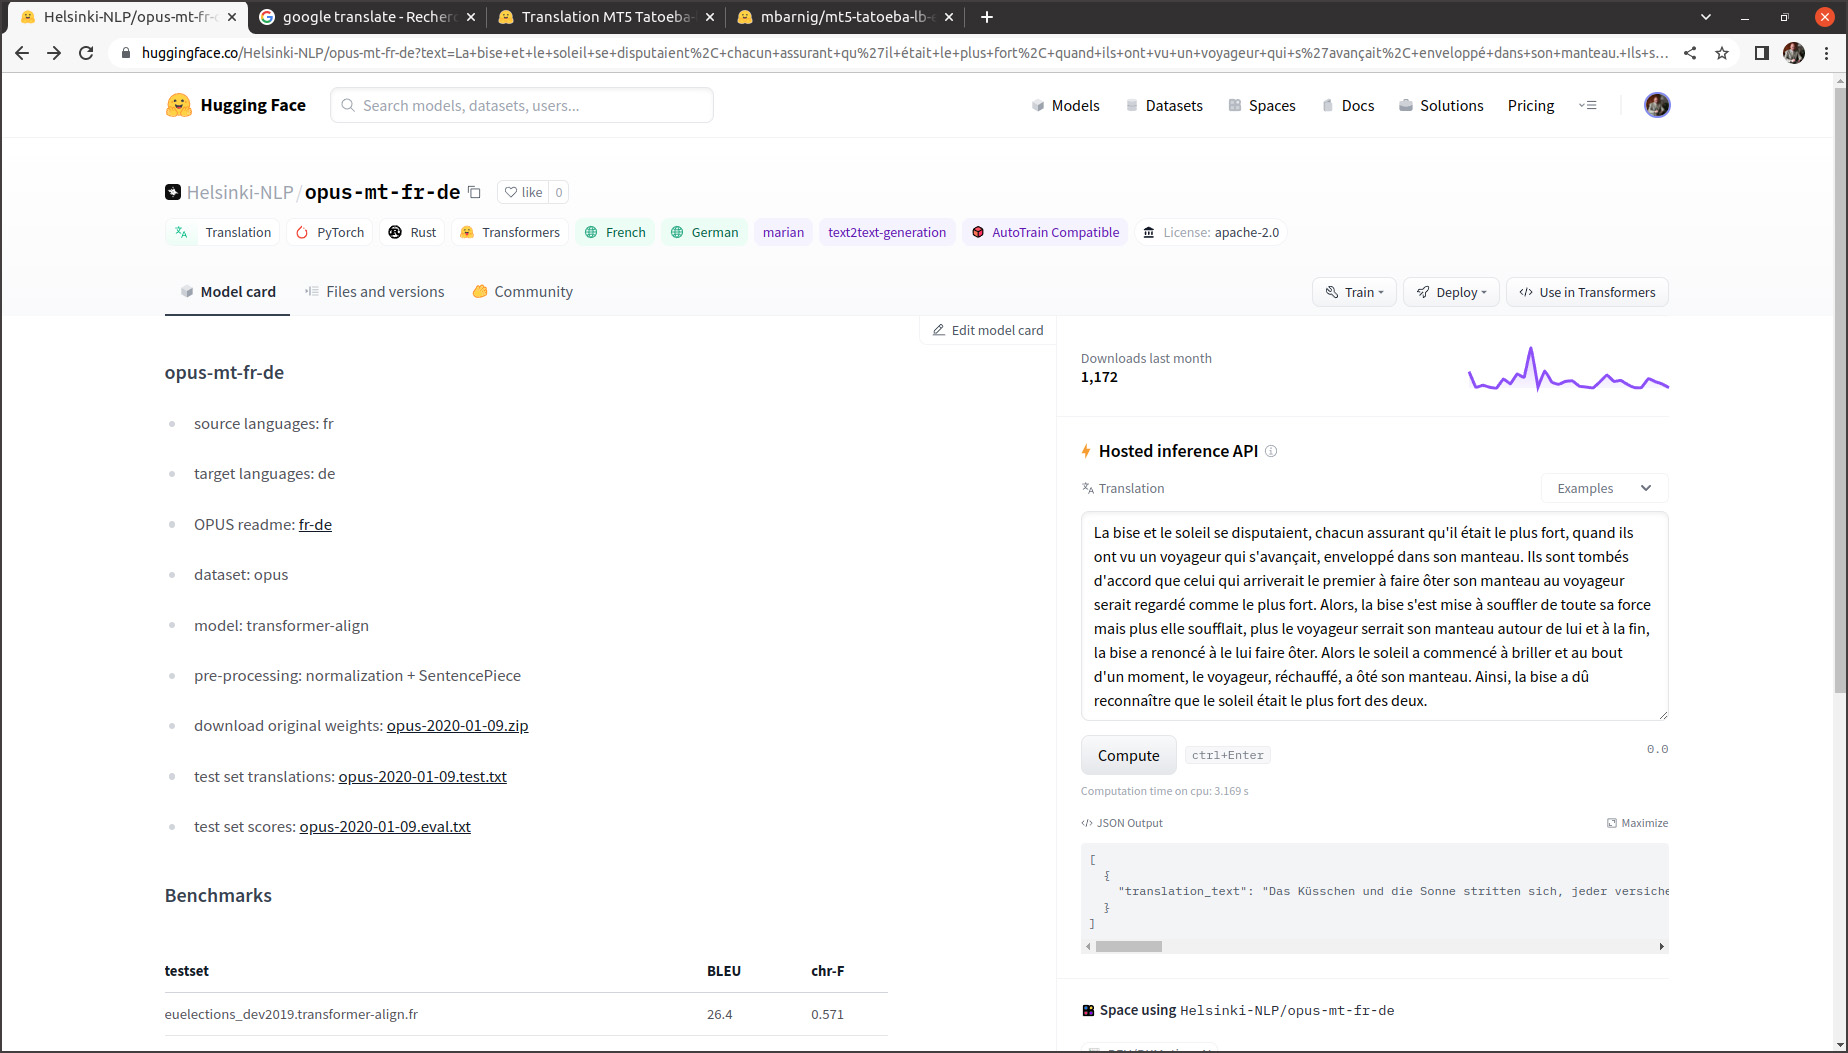
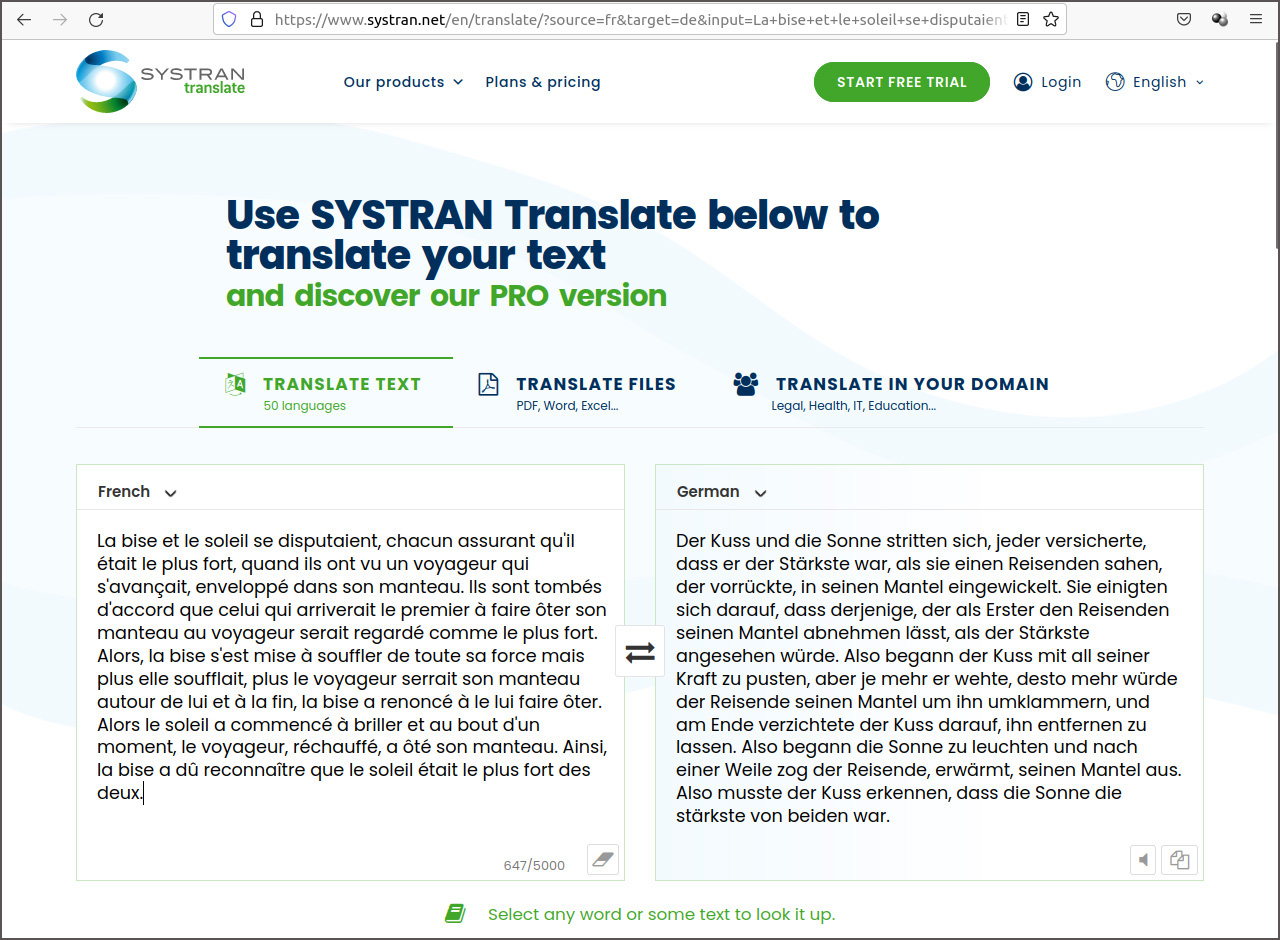
Le titre de ma présente publication est le résultat d’une traduction automatique française -> allemande du début de la phrase “La bise et le soleil se disputaient, chacun assurant qu’il était le plus fort, quand ils ont vu un voyageur qui s’avançait, enveloppé dans son manteau”.

Modèle Helsinki-NLP/opus-mt-fr-de publié sur la plateforme AI Hugginface

C’est le début d’une fable d’Ésope, extraite d’un ensemble de fables en prose qu’on attribue à l’écrivain grec Ésope. Le texte de la fable La bise et le soleil est utilisé régulièrement par des linguistes dans le cadre de projets de recherche sur le traitement du language naturel (NLP: Natural Language Processing). Cette fable a été traduite dans des centaines de langues mondiales et régionales. Comme je vais me référer plusieurs fois sur cette fable, je vais d’emblée présenter l’intégralité du texte dans les versions française, allemande, anglaise et luxembourgeoise ci-après.

Fables d’Ésope

Ls fables d’Ésope sont des centaines de textes et toutes sortes de récits qui circulaient oralement dans la Grèce antique et qui ont inspiré de nombreux auteurs comme Phèdre, Marie de France, Jean de la Fontaine. La fable d’Ésope La bise et le soleil est très courte, sa morale réside dans l’enseignement que la persuasion, plus lente, s’avère toutefois plus efficace que la violence.

Oeuvre d’art générée par le programme d’intelligence artificielle DALL*E2 avec l’introduction de la description “3D rendering of the fable The North Wind and the Sun were disputing which was the stronger, when a traveler came along wrapped in a warm cloak.”

La bise et le soleil

La bise et le soleil se disputaient, chacun assurant qu’il était le plus fort, quand ils ont vu un voyageur qui s’avançait, enveloppé dans son manteau. Ils sont tombés d’accord que celui qui arriverait le premier à faire ôter son manteau au voyageur serait regardé comme le plus fort. Alors, la bise s’est mise à souffler de toute sa force mais plus elle soufflait, plus le voyageur serrait son manteau autour de lui et à la fin, la bise a renoncé à le lui faire ôter. Alors le soleil a commencé à briller et au bout d’un moment, le voyageur, réchauffé, a ôté son manteau. Ainsi, la bise a dû reconnaître que le soleil était le plus fort des deux.

Norwind und Sonne

Einst stritten sich Nordwind und Sonne, wer von ihnen beiden wohl der Stärkere wäre, als ein Wanderer, der in einen warmen Mantel gehüllt war, des Weges daherkam. Sie wurden einig, daß derjenige für den Stärkeren gelten sollte, der den Wanderer zwingen würde, seinen Mantel abzunehmen. Der Nordwind blies mit aller Macht, aber je mehr er blies, desto fester hüllte sich der Wanderer in seinen Mantel ein. Endlich gab der Nordwind den Kampf auf. Nun erwärmte die Sonne die Luft mit ihren freundlichen Strahlen, und schon nach wenigen Augenblicken zog der Wanderer seinen Mantel aus. Da mußte der Nordwind zugeben, daß die Sonne von ihnen beiden der Stärkere war.

The northwind and the sun

The North Wind and the Sun were disputing which was the stronger, when a traveler came along wrapped in a warm cloak. They agreed that the one who first succeeded in making the traveler take his cloak off should be considered stronger than the other. Then the North Wind blew as hard as he could, but the more he blew the more closely did the traveler fold his cloak around him; and at last the North Wind gave up the attempt. Then the Sun shined out warmly, and immediately the traveler took off his cloak. And so the North Wind was obliged to confess that the Sun was the stronger of the two.

De Nordwand an d’Sonn

An der Zäit hunn sech den Nordwand an d’Sonn gestridden, wie vun hinnen zwee wuel méi staark wier, wéi e Wanderer, deen an ee waarme Mantel agepak war, iwwert de Wee koum. Si goufen sech eens, datt deejéinege fir dee Stäerkste gëlle sollt, deen de Wanderer forcéiere géif, säi Mantel auszedoen. Den Nordwand huet mat aller Force geblosen, awer wat e méi geblosen huet, wat de Wanderer sech méi a säi Mantel agewéckelt huet. Um Enn huet den Nordwand säi Kampf opginn. Dunn huet d’Sonn d’Loft mat hire frëndleche Strale gewiermt, a schonn no kuerzer Zäit huet de Wanderer säi Mantel ausgedoen. Do huet den Nordwand missen zouginn, datt d’Sonn vun hinnen zwee dee Stäerkste wier.

Histoire de la traduction automatique au Luxembourg et au delà

Le Luxembourg figure parmi les pionniers dans l’utilisation de la traduction automatique du fait que les nombreuses institutions européennes, ayant leur siège dans le pays, doivent gérer leurs documents dans les différentes langues officielles de la communauté européenne. Hélas, le luxembourgeois ne fait pas partie de ces languages et ce n’est que récemment que la langue luxembourgeoise est supporté par les systèmes de traduction automatique.

Tout a commencé au début des années 1950 avec la fondation de la Communauté européenne du charbon et de l’acier (CECA) par six nations européennes, dont le Luxembourg. La CECA a été dirigée par la Haute Autorité qui siégeait à Luxembourg et qui gérait quatre langues officielles: français, allemand, italien et néerlandais.

Bâtiment de la Haute Autorité de la CECA. Photo Tony Krier © Phototèque de la Ville de Luxembourg

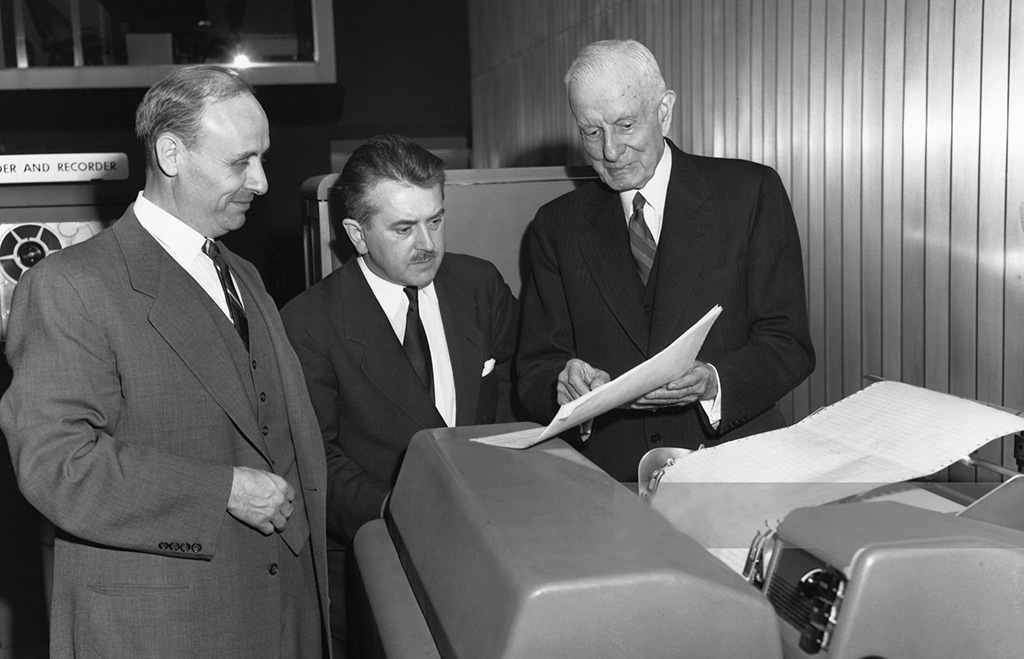
A la même époque, Warren Weaver, un mathématicien américain, concrétisait ses idées au sujet de la traduction automatique, communiquées en mars 1947 au cybernéticien Norrbert Wiener et publiées en juillet 1949 dans un mémorandum au sujet de la traduction. Sous l’influence de Warren Weaver dans sa qualité de directeur de la fondation Rockefeller, la première démonstration d’une traduction complètement automatique de 60 phrases russes en anglais a eu lieu en janvier 1954. Le développement a été conduit par l’Université de Georgetown, ensemble avec IBM.

Cuthbert Hurd, Léon Dostert et Thomas Watson lors de la 1ère démonstration de la traduction automatique

La même année, les premieres recherches en traduction automatique ont débuté en URSS. Elles se distinguaient des recherches américaines par leur caractère théorique et le choix d’une méthode faisant appel a une langue intermédiaire. Aussi bien du côté américain que du côté russe, la traduction automatique était une arme de la guerre froide. Mais le développement de la traduction automatique ne progressait pas comme prévue et au début des années 1960 les crédits publics de recherche investis dans ce domaine ont été sensiblement réduits des deux côtés.

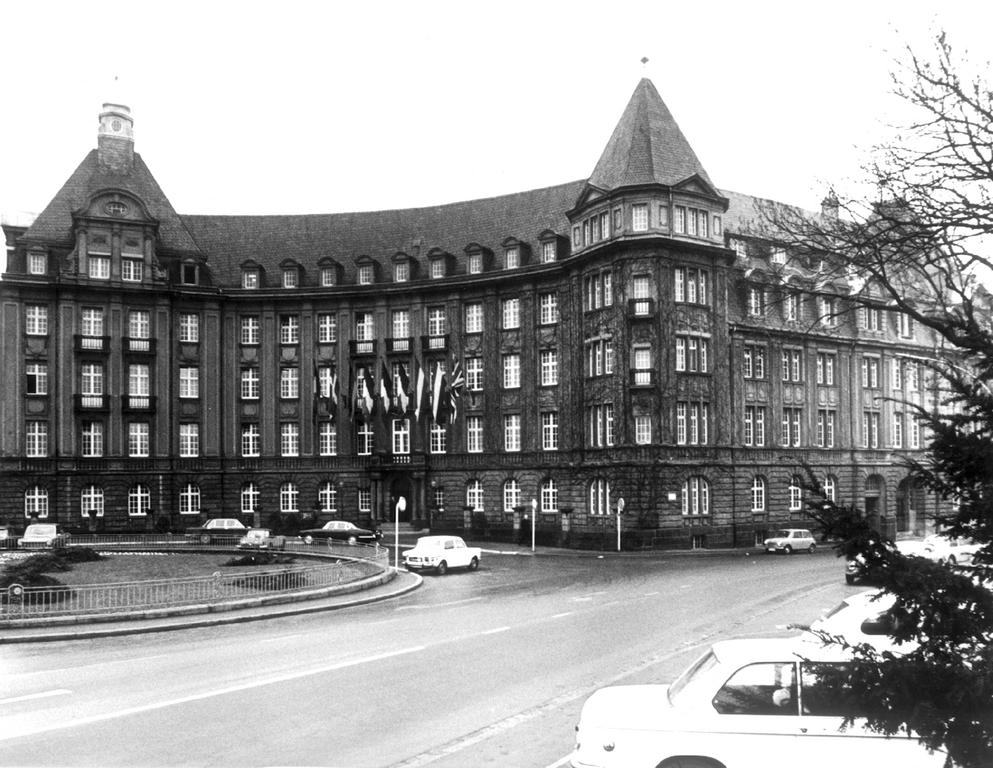
Retournons au Luxembourg. La Haute Autorité de la CECA fusionnait en 1965 avec les commissions de la Communauté économique européenne (CEE) créée en 1957, puis en 1967 avec la Communauté européenne de l’énergie atomique (Euratom), sur base du traité de fusion des exécutifs des trois communautés. En janvier 1969 l’Office des publications officielles des Communautés européennes, devenu en 2009 l’Office des publications de l’Union européenne, a été créé et domicilié à Luxembourg. L’Office des publications publie quotidiennement le Journal officiel de l’Union européenne dans les 23 langues officielles de l’Union et propose plusieurs services en ligne destinés et aux professionnels et au grand public du monde entier. Dans son rapport d’activités des années 1975 à 1977, la Direction Générale XIII de la Commission Européenne, en charge de la gestion de l’information et de l’innovation, dont le siège se trouvait également à Luxembourg, annonçait le démarrage d’un projet pilote de traduction automatique avec le logiciel SYSTRAN.

Pendant des dizaines d’années, la DG XIII et l’Office des Publications ont été le moteur de la traduction automatique au Luxembourg.

Systran

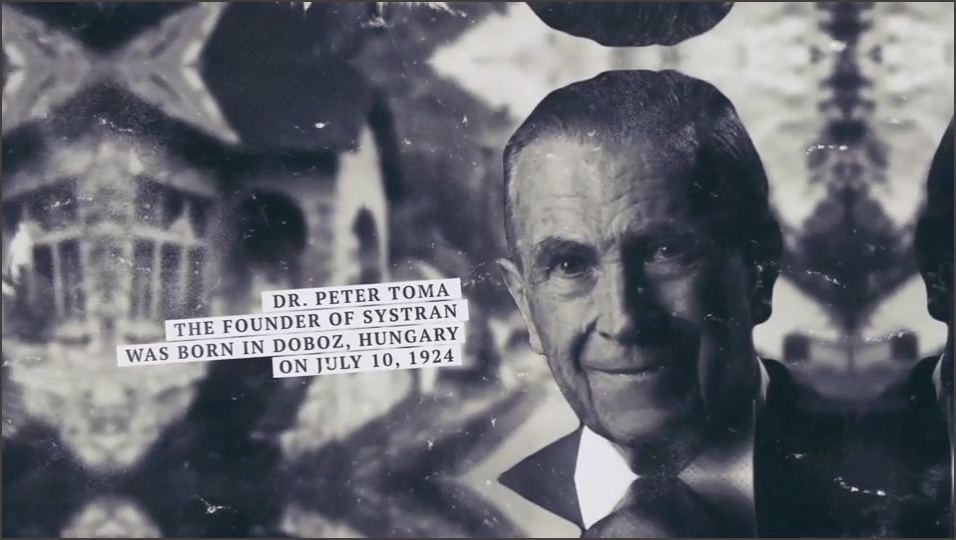
Le logiciel SYSTRAN a été développé par Peter Toma, né en juillet 1924 à Doboz, un petit village hongrois. Marqué par les misères de la deuxième guerre mondiale, il était persuadé que les barrières linguistiques constituaient un frein pour garantir la paix. Il voulait y remédier et apprenait le russe et l’anglais, à côté de l’hongrois et de l’allemand. Après avoir immigré aux Etats-Unis en 1952, il a travaillé à partir de 1956 comme assistant à l’Institut de technologie de Californie (Caltech). Lorsqu’un ordinateur Datatron 205 a été installé à l’Institut, il espérait pouvoir réaliser son rêve d’enfant: programmer une machine pour traduire un texte en plusieurs langues. Mais les premières tentatives n’étaient pas concluantes et il quittait le Caltech en 1957. Après quelques expériences auprès de firmes privées, il joignait en mars 1959 l’Université de Georgetown pour participer aux travaux du groupe GAT (General Analysis Technique), rebaptisé dans la suite Georgetown Automatic Translation, sur un ordinateur IBM 705. Le chef de projet était Michael Zarechnak. Il est le coauteur du livre Machine Translation publié en 1979. Peter Toma dirigeait une équipe de programmeurs qui réalisait un projet surnommé SERNA. Quand il quittait l’université en 1961, il présentait SERNA comme son invention, ce qui est contesté par ses pairs de l’époque.

Image extraite du film publicitaire de Systran

Peter Toma a été engagé ensuite par la société Computer Concepts à Los Angeles où il valorisait son savoir-faire pour réaliser les projets AUTOTRAN et TECHNOTRAN qui tournaient sur des ordinateurs IBM 7090. Bien que basée toujours sur des règles algorithmiques, la conception de ces programmes était complètement différente de celle du projet SERNA. En 1964 Peter Toma présentait les systèmes de traduction automatiques à des scientifiques européens à l’Université de Bonn en Allemagne. Le problème était toutefois que l’ordinateur IBM 7090 ne disposait pas de mémoire et de puissance de calcul suffisantes pour traduire plus que des courtes phrases.

Lors du vol vers l’Allemagne, Peter Toma avait lu le manuel d’instruction du nouvel ordinateur 360, annoncé par IBM. D’emblée il était persuadé que cet ordinateur permettait de réaliser vraiment ses rêves et il concevait dans sa tête l’idée comment transformer AUTOTRAN et TECHNOTRAN dans un nouveau produit qu’il nommait SYSTRAN. Comme l’environnement de travail était plus propice en Europe qu’aux Etats-Unis pour progresser avec la traduction automatique, Peter Toma décidait de rester en Allemagne. Il commençait à enseigner la programmation à l’université de Bonn, puis à l’Université de la Sarre. En parallèle, il émulait le fonctionnement de l’ordinateur IBM 360 sur le modèle IBM 7090 pour créer un modèle SYSTRAN embryonnaire. En même temps il s’était inscrit comme étudiant à Bonn où il achevait son doctorat en 1970 avec une thèse sur la traduction automatique.

IBM 360 – Computer History Museum ; Photo : Dave Ross, 2008, CC BY 2.0

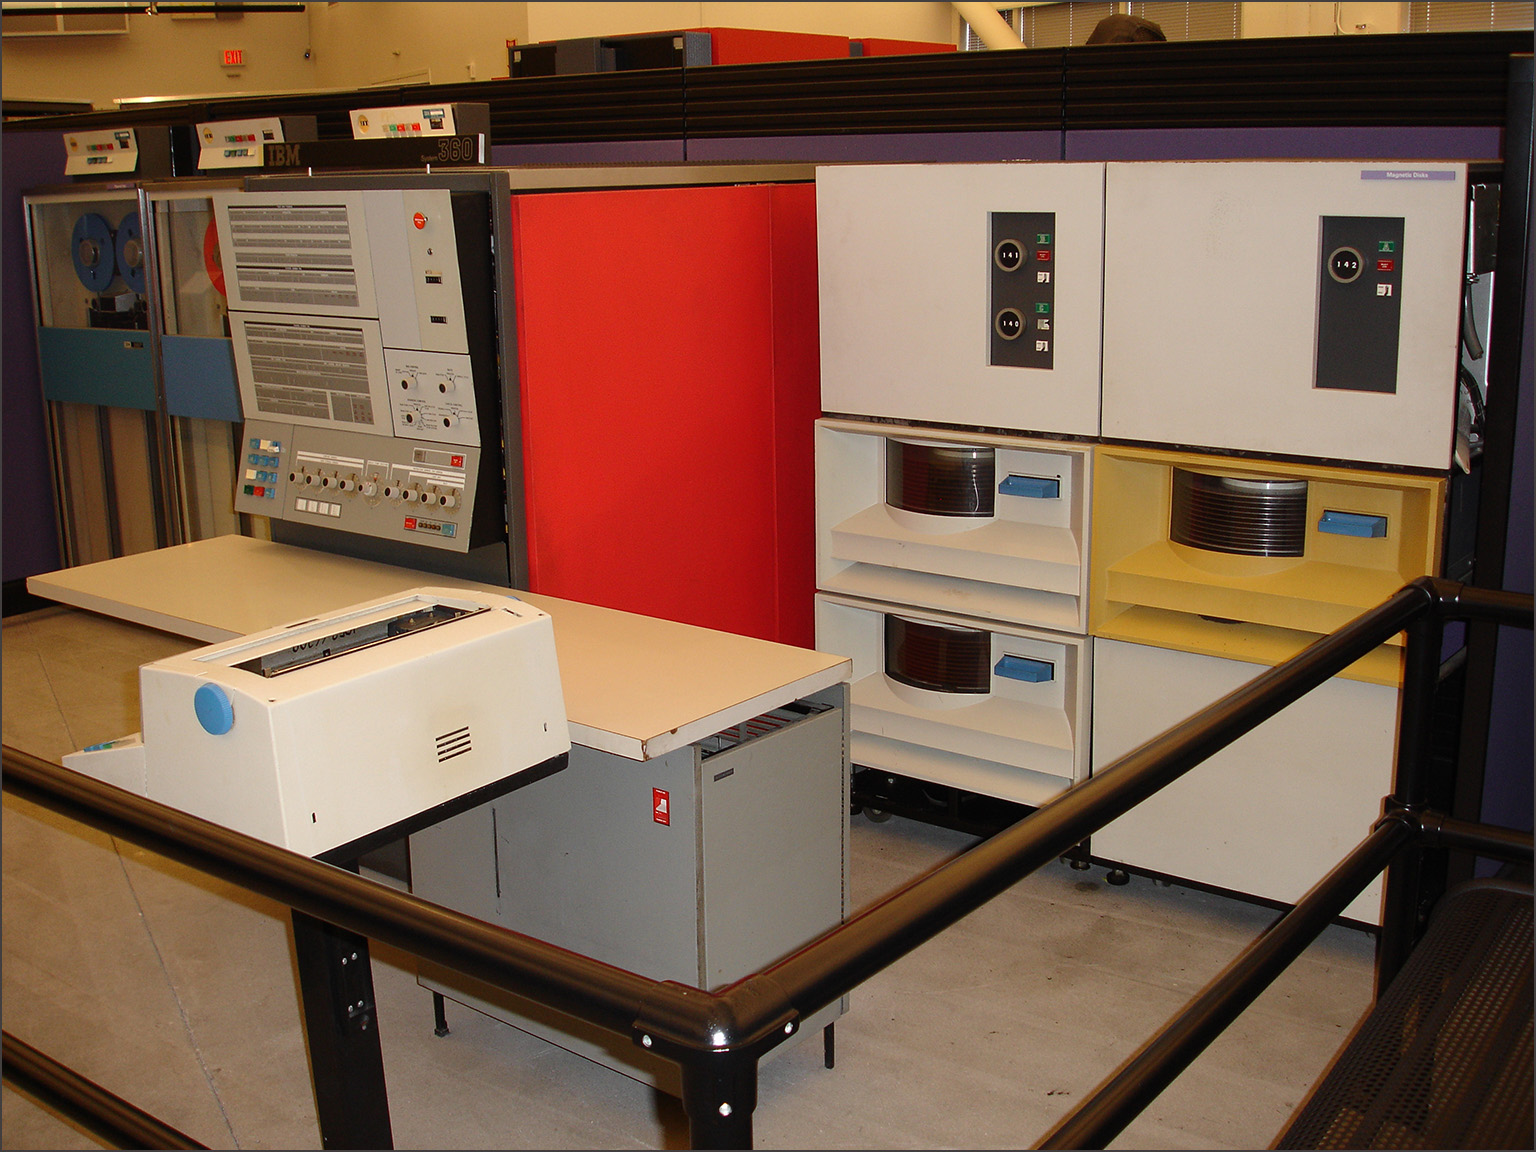
Lorsque Heinz Unger, le directeur du département mathématique à l’Université de Bonn, a obtenu les crédits pour l’installation et l’exploitation d’un ordinateur IBM 360 dans son institut, Peter Toma a pu montrer le fonctionnement correct de son système de traduction SYSTRAN. En 1965, la Fondation allemande pour la recherche (DFG: Deutsche Forschungsgesellschaft) avait invité les meilleurs informaticiens et linguistes allemands pour évaluer le projet SYSTRAN. Après une journée de test et de discussions, une bourse de recherche a été accordée à Peter Toma pour parfaire son système.

En 1967, le laboratoire de Rome, le centre de recherche et de développement de la Force aérienne américaine (RADC), lançait un appel d’offre pour la traduction de textes russes en anglais. Le responsable de ce projet était Zbigniew L. Pankowicz (Ziggy), un linguiste polonais et survivant du camp de concentration d’Auschwitz, qui est immigré aux Etat-Unis après la guerre. Il a été admis au temple de la renommé (Hall of Fame) du laboratoire de Rome en 2019. Peter Toma soumettait une offre pour son projet SYSTRAN qui a été retenue par le RADC, parmi des concurrents comme IBM et Thompson Ramo Wooldridge.

Ce succès a incité Peter Toma à créer sa propre société en 1968 pour continuer le développement de SYSTRAN, à La Jolla en Californie, sous le nom de Latsec (Language translation system and electronic communications). D’autres contrats ont été conclus avec des clients américains, par exemple avec la NASA. Avec des hauts et des bas, le projet SYSTRAN a été perfectionné, à Bonn et à La Jolla, jusqu’en 1975 quand Peter Toma a fondé le World Translation Center (WTC) pour gérer les contrats SYSTRAN en dehors des Etats-Unis.

En 1973, le Danemark, l’Irlande et le Royaume-Uni ont adhéré à la Communauté économique européenne. L’introduction de l’anglais comme langue majeure et du danois comme sixième langue officielle posait la Commission Européenne et l’Office des Publications Européennes devant des problèmes monstrueux. Il fallait engager des centaines de traducteurs diplômés additionnels pour gérer le nombre grandissant de documents à publier et à distribuer. C’était le démarrage de l’introduction d’un système de traduction automatique pour les besoins des institutions européennes et le départ pour la mise en service de SYSTRAN au Luxembourg. Il existe deux récits de la manière d’adoption de SYSTRAN. Le premier récit crédite aux institutions européennes le don d’une vue à longue distance en ayant cherché pro-activement un système sur le marché. Le deuxième récit dit que c’était l’initiative de Peter Toma qui cherchait un marché européen pour son produit SYSTRAN. La vérité se trouve probablement au milieu. Il est toutefois établi que Peter Toma présentait en juin 1975 un prototype SYSTRAN anglais-français (développé par sa filiale canadienne WTC-C) à la Commission Européenne à Luxembourg et que celle-ci évaluait un deuxième produit appelé TITUS, conçu par l’Institut Textile de France. Le projet TITUS a été retiré pendant les négociations du fait qu’il ne pouvait pas traduire des textes complets. Comme SYSTRAN pouvait être utilisé sans modification sur un IBM 360, ordinateur que la Commission possédait à cette époque, un premier contrat pour l’utilisation du système SYSTRAN par les institutions européennes a été signé fin 1975 avec WTC. Il portait sur l’adaptation du projet-pilote anglais-français aux besoins de la Commission, et le développement d’un début de système français-anglais. Le chef de projet de la Commission était Loll Rolling, responsable des développements linguistiques et technologiques dans le domaine de l’information à la DG XIII, la direction générale qui gérait également le projet Euronet-Diane à l’époque.

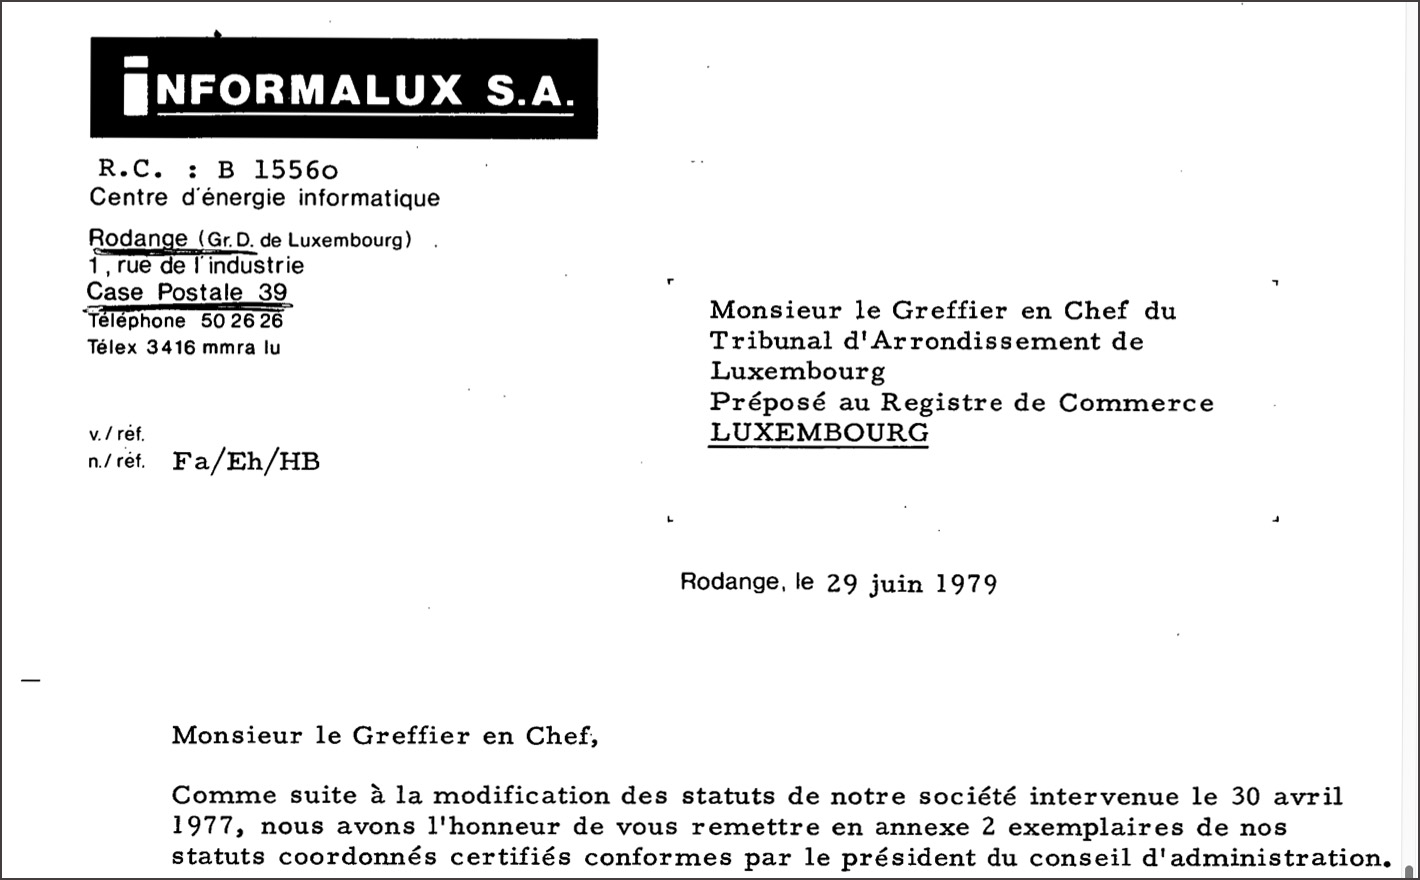
Un des premiers contractants externes de la Commission Européenne pour le projet SYSTRAN était la société Informalux S.A. domiciliée à Rodange. Elle a été constituée en 1977 avec le slogan centre d’énergie informatique. Les actionnaires majoritaires étaient InfoArbed et la Banque Générale, Léonard Siebenaler était le directeur général.

Six traducteurs diplômés des institutions européennes ont été affectés au projet pour assister les informaticiens au développement. Après quelques mois, il ne restait qu’un seul traducteur qui faisait confiance au projet, Ian M. Pigott. Les autres étaient retournés à leurs anciens postes de travail et s’étaient solidarisés avec la majorité des traducteurs et du personnel administratif des institutions européennes qui contestait l’utilité du projet de traduction automatique. Dans la suite Ian M. Pigott a été désigné comme chef de projet SYSTRAN et il contribuait à faire évoluer le système sensiblement. Au début des années 1980 le système permettait de traduire des textes anglais en français et en italien et des textes français en anglais, avec un taux d’erreurs suffisamment bas pour faciliter la tâche des traducteurs humains à produire des traductions avec la qualité voulue. De plus en plus d’employés des institutions européennes commençaient à apprécier cet outil.

Une licence SYSTRAN a été vendu au Japon en 1980, combinée avec la création d’une société locale Systran Corporation. En juin 1982, une société luxembourgeoise Systran International GmbH a été constituée pour commercialiser le système de traduction automatique SYSTRAN. Le registre de commerce et des sociétés luxembourgeois nous renseigne que les 500 parts de la société étaient détenues par le professeur universitaire allemand Helmut Fischer (495 parts) et l’informaticien Cay-Holger Stoll (5 parts), résidant à Gonderange. Ce dernier était membre de l’équipe projet SYSTRAN comme linguiste et figurait comme gérant de la nouvelle société qui a cessé ses activités en 1987.

En 1983, InfoArbed et Informalux ont créé la joint-venture ECAT – European Center for AutomaticTranslation s.à r.l. Chaque actionnaire détenait 2000 parts. En juillet 1984 le capital de cette société a été doublé et les 4000 nouvelles parts ont été souscrites par Systran International GmbH. Après la liquidation de cette société quelques années plus tard, la dénomination sociale de ECAT a été changé en TELECTRONICS s.à r.l. en 1991.

En février 1986, une conférence mondiale SYSTRAN a eu lieu à Luxembourg. Dans l’introduction, Peter Toma racontait pourquoi il avait demandé un faible montant pour la mise à disposition du logiciel SYSTRAN à la Commission Européenne. Il soulignait que son principal objectif était le maintien de la paix et qu’une meilleure communication entre les pays européens, grâce à la traduction automatique, constituait un moyen pour y parvenir. Il annonçait également qu’il avait vendu récemment l’ensemble de ses sociétés et des droits et licences SYSTRAN (à l’exception de la filiale japonaise) à un fabricant de robinets industriels en France, la famille Gachot, qui souhaitait diversifier ses activités. Avec les revenus de cette vente Peter Toma comptait organiser deux projets de taille dans l’intérêt du maintien de la paix. Le premier projet était l’organisation d’un symposium international au sujet de la résolution de conflits prévu le 28 octobre 1986 à l’Université d’Otago en Nouvelle-Zélande. Le deuxième projet était la création de l’université internationale Aorangi privée à Dunedin en Nouvelle-Zélande. Le symposium a effectivement eu lieu, toutefois une année plus tard que révue, du 26.10 au 5.11.1987. Quant à l’université privée, la seule référence que j’ai trouvé est le nom marqué sur le brevet européen accordé à Peter Toma pour son application SYSTRAN. C’est le premier brevet accordé dans le domaine de la traduction automatique. En 1997, on retrouve Peter Toma avec une contribution My First 30 Years with MT où il figure comme président de Voxtran Inc, avec une adresse en Allemagne. Il est décédé en 2010, la même année où la mise hors service de SYSTRAN auprès des institutions européennes a eu lieu.

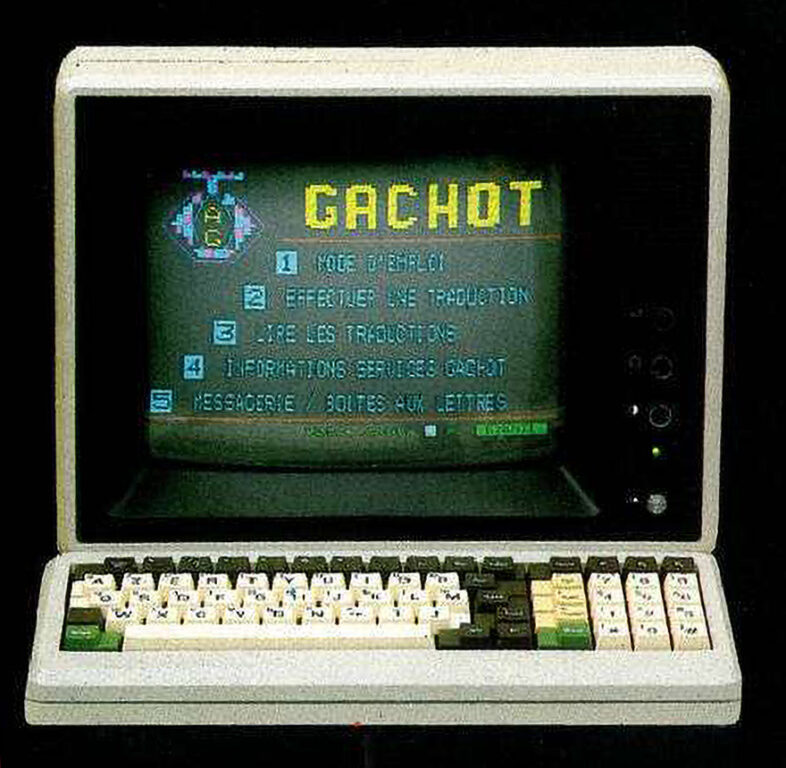
Il est temps de retourner en Europe. En 1986, le siège sociale de Systran a été transféré à Paris et la gestion de la société mère Systran S.A. a été assurée par Jean Gachot. Son fils Denis Gachot était déménagé en Californie pour diriger les filiales Latsec et WTC à La Jolla. En 1989, Denis Gachot a présenté The SYSTRAN Renaissance avec l’annonce de plusieurs nouveautés, entre autres des versions SYSTRAN pour PC, la location du logiciel SYSTRAN, l’accès à distance par Telenet et même un accès Minitel pour le grand public en France.

Traduction automatique en ligne sur Minitel proposée par Gachot

Malgré ces innovations, la réussite financière n’était pas au rendez-vous pour la famille Gachot. En 1993 les activités SYSTRAN ont été cédées à quelques anciens actionnaires minoritaires, parmi eux Dimitrios Sabatakakis qui dans la suite a dirigé le groupe Systran pendant vingt ans.

En 1996 l’équipe de développement et de maintenance SYSTRAN à Luxembourg, composée de linguistes, traducteurs et informaticiens, était passée de deux personnes à une quarantaine. La Commission Européenne planifiait de confier l’exploitation du système au Centre de traduction des organes de l’Union Européenne (CdT) qui a été établi à Luxembourg en 1994. Le CdT n’est pas attaché à la Direction Générale Traduction de la Commission Européenne, mais il dispose de sa propre personnalité juridique. Dans ce contexte le député européen Ben Fayot avait posé la question écrite E-2286/96 à la Commission au sujet de l’obligation morale d’incorporer l’équipe SYSTRAN dans le CdT. La Commission précisait que le personnel était mis à disposition par des firmes privées depuis vingt ans, sous contrats temporaires renouvelés, et que le recrutement d’agents relevait de la seule compétence du CdT.

En mars 1996, une société TELINGUA s.à r.l. a été constituée par Telindus, probablement dans le contexte du remaniement des contrats par les institutions européennes. En septembre 1997 cette société a été convertie en société anonyme Systran Luxembourg par les actionnaires Systran S.A. France (250 parts), Telindus (175 parts), Norbert von Kunitzki (50 parts) et Piere Musman (25 parts). Le contrat SYSTRAN avec la Commission Européenne a été cédé à Systran Luxembourg.

Au niveau international, le groupe Systran avait réussi à décrocher des contrats auprès de plusieurs clients prestigieux comme la NASA, Ford, Price Waterhouse Coopers, Xerox. En décembre 1997, Digital Equipment Corporation et Systran S.A. avaient lancé le premier service de traduction automatique sur le web, AltaVista Translation Service, au surnom de Babelfish. Les langues française, allemande, italienne, espagnole, portugaise et anglaise ont été supportés. Jusqu’en 2007 le service Google Translate était également basé sur le système SYSTRAN.

Au Luxembourg les sociétés Informalux S.A. et Telectronics s.à r.l. ont fusionné en 2001 la nouvelle entité a été dénommée TELECTRONICS S.A. Elle est restée active pendant presque vingt ans et a été absorbée par Proximus Luxembourg S.A. en 2020.

En 2004 Pierre Musman est sorti du Conseil d’Administration de Systran Luxembourg S.A. et Norbert Kunitzki est décédé en 2005 suite à une chute dans les montagnes. A partir de ce moment Systran Luxembourg a été administré uniquement par Denis Gachot et par Dimitrios Sabatakakis (PDG de Systran S.A France). Guillaume Naigeon de Systran S.A France assurait la fonction de commissaire aux comptes.

En 2013 la société coréenne SLCI a lancé avec succès une offre publique d’achat (OPA) pour acquérir Systran. Avec l’obtention de 85% des actions de Systran par SLCI, l’acquisition a été conclue à Seoul en mai 2014. Les administrateurs français ont quitté la société Systran Luxembourg S.A. et ont été remplacés par les administrateurs coréens Ji Changjin, Kim Dong Pil et Park Ki-Hyun.

Dimitrios Sabatakakis et Park Ki-Hyun à la conférence de presse à Seoul en 2014

Pendant une année Chang-Jin Ji et Guillaume Naigeon assuraient l’intérim de PDG. En juillet 2015, Jean Senelart, un ingénieur et informaticien linguistique de renom, a pris les rênes du groupe Systran. Il avait rejoint Systran en 1999, d’abord comme chef de projet, ensuite comme directeur des équipes R&D, avec lesquelles il avait lancé quatre générations de produits SYSTRAN. En 2008 il est devenu Chief Scientist et en 2014 Global CTO du groupe. Mais le jeu des chaises musicales n’était pas encore fini. En août 2020, la majorité des actions du groupe Systran a été achetée par un consortium d’investisseurs institutionnels coréens: STIC Investments, SoftBank Korea, Korea Investment Partners et Korea Investment Securities. La présidence et direction du groupe ont été confiées en mai 2022 à Vincent Godard. De formation ingénieur, il avait occupé le poste de Directeur Commercial de 2009 à 2013 auprès de Systran, ce qui facilitait sa prise de fonction. Jean Senelart continue de siéger au Conseil d’administration de Systran en tant que conseiller scientifique.

En 2022 Systran Luxembourg S.A. est administrée complètement par Systran S.A. France, le commissaire aux comptes est la société luxembourgeoise F.C.G. S.A. La filiale luxembourgeoise et la maison mère semblent se porter bien. Systran est toujours considéré comme pionnier et leader du marché de la traduction automatique, avec des technologies basées sur l’intelligence artificielle très innovantes.

page d’accueil sur le site web de Systran

Litige Systran – Commission Européenne

Une épisode dans l’histoire farfelue de Systran au Luxembourg s’est déroulée en dehors des activités techniques et commerciales et mérite d’être racontée. Comme les institutions européennes ne pouvaient pas conclure des contrats de longue durée avec des firmes privées pour la mise à disposition de personnel spécialisé en linguistique et en informatique, ces spécialistes ont été transférés tous les quelques années à une autre entreprise qui signait un nouveau contrat. Comme le groupe Systran faisait partie d’une façon ou d’une autre de ces différents contractants, il y avait toujours moyen de régler des problèmes éventuels au niveau des licences SYSTRAN.

Tout changeait lors d’un appel d’offre lancé en octobre 2003 par les institutions européennes sans la prise en compte des intérêts du groupe Systran. L’appel d’offres at été remporté par la société luxembourgeoise Gosselies S.A. qui n’avait aucune expertise en matière de linguistique informatique. La société anonyme Gosselies a été constituée en 1994 et liquidée en 2011. Dans un article du Lëtzebuerger Land du 23.12.2010, la journaliste Sophie Mosca estimait que le fait que le ministre luxembourgeois de l’Économie de l’époque, Henri Grethen, était actionnaire de Gosselies et que son épouse assurait la gestion, avait pesé dans ce choix. Ce contrat a incité la société Systran S.A. France et sa filiale luxembourgeoise à déposer de suite une plainte pour violation des droits d’auteur contre la Commission Européenne. Ce n’est qu’en janvier 2007 que le groupe Systran a réussi à introduire une action en réparation devant la Cour de Justice Européenne. Et il fallait attendre presque 3 ans jusqu’à la réception d’une réponse. Le 16 décembre 2010 le Tribunal de l’union européenne a condamné la Commission à verser au groupe Systran une indemnité forfaitaire de 12 001 000 euros. C’était une première. Le PDG de Systran Dimitrios Sabatakakis s’est félicité et tirait son chapeau à la justice européenne. Mais il s’était réjoui trop tôt. Deux mois plus tard la Commission Européenne a introduit un pourvoi dans ce litige. Et comme les rouages de la justice sont lents, ce n’est que le 18 avril 2013 que la Cours de Justice européenne a annulé son jugement antérieur et qu’elle a renvoyé l’affaire devant les tribunaux nationaux.

Il semble que dans la suite un arrangement à l’amiable a été négocié en 2017 entre les institutions européennes et le groupe Systran et qu’une somme de quelques millions euros a été versée à Systran comme dédommagement. Cette transaction était à l’origine d’un autre procès judiciaire, cette fois entre la société coréenne SLCI et les anciens actionnaires de Systran. Les conditions de l’OPA, finalisée en 2014, stipulaient que SLCI devait reverser aux vendeurs des actions une partie d’une éventuelle indemnisation par la Commission Européenne. Comme SLCI, respectivement ses héritiers, avaient manqué à cette obligation, l’affaire s’est terminée devant les tribunaux. Le complément de prix dû aux anciens actionnaires a été payé en mars 2020.

Cette épisode termine mon récit sur l’histoire de Systran durant un demi-siècle. Dans les prochains chapitres nous allons découvrir les autres projets de traduction automatique qui touchent le Luxembourg et qui ont également une histoire passionnante. Il reste à souligner que même en 2022 Systran continue à traduire bise en Kuss au lieu de Nordwind.

Traduction en temps réel sur la plateforme SYSTRAN Translate en 2022

EUROTRA

Lors de la mise en place de SYSTRAN en 1976, il n’y avait pas seulement de la résistance auprès du personne des services de traduction des institutions européennes, mais également beaucoup de critiques de la part de linguistes dans les universités en Europe qui reprochaient à la Commission Européenne d’acheter un produit américain au lieu de promouvoir le savoir-faire européen. Le directeur général de la DG XIII, Raymond Appleyard, et le directeur responsable pour la gestion de l’information à la DG XIII, Georges J. Anderla, étaient sensibles à ces arguments et proposaient le lancement d’un projet européen de traduction automatique, tout en continuant à supporter la solution pragmatique SYSTRAN. Le projet, appelé EUROTRA, n’a été approuvé qu’en 1982 par le Conseil Européen et par le Parlement Européen et il n’a démarré qu’en 1985. Malgré un investissement de 70 millions euros pendant 10 ans, le système n’est jamais devenu opérationnel. Bryan Oakley a expliqué les raisons de cet échec dans sa contribution To Do the Right Thing for the Wrong Reason; the EUROTRA Experience.

MT@EC

Le nombre de paires de langues supportées par SYSTRAN ne cessait de croître, mais le travail lexicographique sous-jacent rendait difficile l’extension de la couverture aux nouvelles langues résultant des élargissements successifs de l’Union européenne. En décembre 2010 le système SYSTRAN a été arrêté et remplacé en 2013 par MT@EC, un système de traduction automatique basé sur les statistiques et exploitant les énormes corpus bilingues et multilingues des institutions européennes tels qu’Euramis. S’appuyant sur le système à source ouverte Moses, développé à l’Université d’Edimbourg, MT@EC supportait en 2016 plus que 500 paires de langues, avec des degrés divers de fiabilité et de qualité. Mais la durée de vie du projet MT@EC était largement inférieure à celle de SYSTRAN, le système a été rapidement remplacé par eTranslation.

eTranslation

Comme la technologie de l’intelligence artificielle se développait à un rythme stupéfiant, la méthode de traduction automatique fut surpassée par une nouvelle méthode dès 2017. La traduction automatique neuronale était arrivée, rendue possible par les progrès en matière de puissance de calcul faisant sortir l’intelligence artificielle des laboratoires. Cette nouvelle technologie exigeait encore davantage de puissance de calcul, et plus spécifiquement, des processeurs graphiques. Testé depuis 2019, un nouveau service en ligne appelé eTranslation a été ouvert en mars 2020, non seulement pour les institutions européennes, mais également pour les entreprises européennes et pour des professionnels, et ceci à titre gratuit. Markus Foti est le responsable de ce projet.

J’ai testé le service eTranslate avec la traduction française-allemande de la phrase “La bise et le soleil …”. eTranslate propose 3 termes différents pour traduire la bise en fonction du contexte: der Kuss, die Knie et der Bise. Le modèle de traduction utilisé pour eTranslate ne semble donc pas encore être à la hauteur de ses compères Google, Facebook ou IBM. Une copie écran et le texte traduit complet sont affichés ci-après:

Traduction de la fable “La bise et le soleil …” par eTranslation

Der Kuss und die Sonne stritten, und jeder versicherte, er sei der Stärkste, als sie einen Reisenden sahen, der in seinem Mantel vorrückte. Sie waren sich einig, dass derjenige, der es als Erster schafft, dem Reisenden seinen Mantel ausziehen zu lassen, als der Stärkste angesehen wird. So begann der Kuss mit seiner ganzen Kraft zu blasen, aber je mehr sie wehte, desto mehr würde der Reisende seinen Mantel um ihn spannen, und am Ende verzichtete die Knie darauf, ihn zu entfernen. Dann fing die Sonne an zu leuchten und nach einer Weile zog der Reisende, der erwärmte, seinen Mantel aus. So musste der Bise erkennen, dass die Sonne die stärkste von beiden war.

Si vous souhaitez traduire des textes étrangers en luxembourgeois, c’est en vain. La langue luxembourgeosie n’est pas encore supporté. Il faut s’adresser à Google Translate.

Google Translate

Le service de traduction en ligne Google Translate a été lancé en avril 2006. Il était d’abord basé sur la technologie SYSTRAN. En octobre 2007 Google a remplacé SYSTRAN par sa propre technologie de traduction automatique statistique, supportant 25 languages. En janvier 2010 Google a introduit une version mobile pour Android, une année plus tard une application pour iOS.

Une application de réalité virtuelle pour traduire des mots ou textes, photographiés avec un smartphone ou une tablette, appelée Word Lense, a été intégrée dans Google Translate suite à l’acquisition par Google en mai 2014 de la startup américaine Quest Visual qui avait développé ce système.

En février 2016 Google avait ajouté 13 langues additionnelles à son service Google Translate, dont le luxembourgeois, pour supporter alors un total de 103 langues. Au début ce n’était pas parfait, par exemple Lëtzebuerg ass mei Land a été traduit en Irland ist mein Land.

En novembre 2016 Google a introduit la version neuronale Google Neural Machine Translation (GNMT) de son service de traduction automatique pour 40 langues. GNMT fait partie  du projet Google Brain, lancé en 2011 par Jeff Dean et Greg Corrado des laboratoires de recherche Google X et par Andrew Yan-Tak Ng de l’université de Stanford. En août 2017 le nouveau système a été étendu aux autres langues et le support du luxembourgeois a été bien amélioré.

La traduction de la fable “La bise et le soleil avec Google Translate” est sans fautes

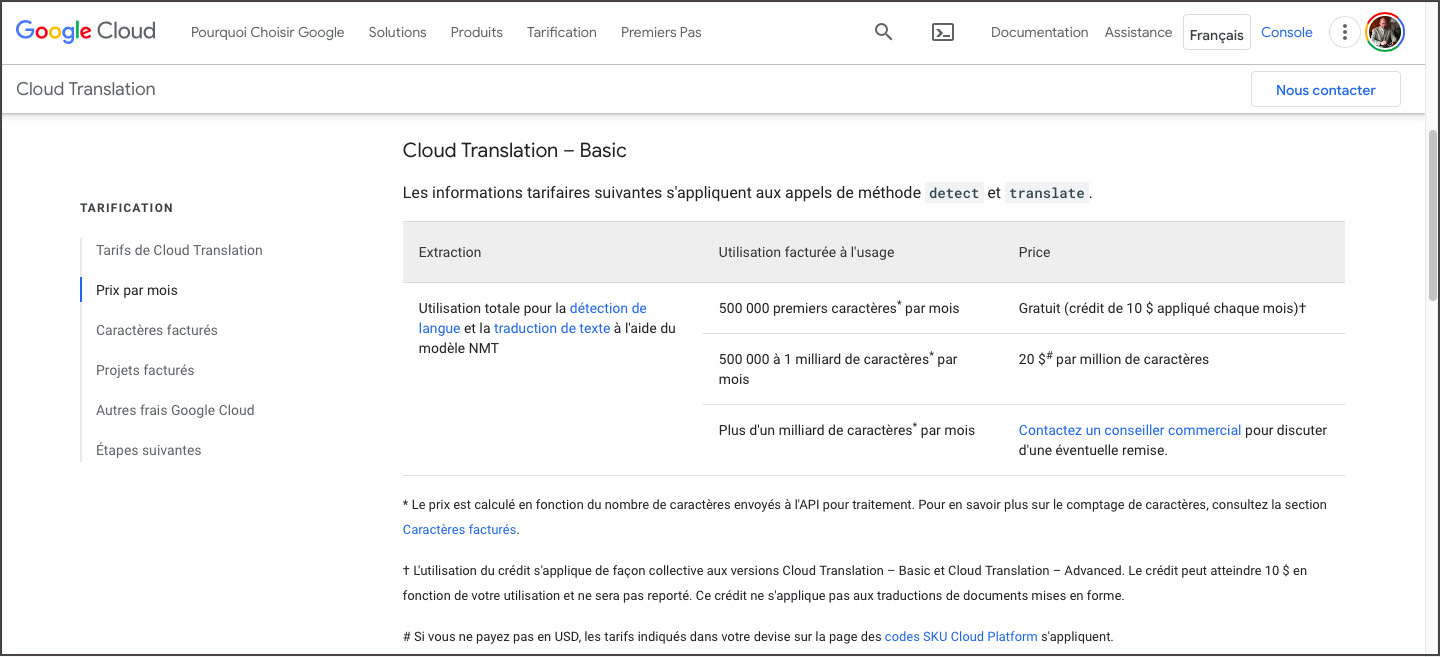
Le service Google Translate est gratuit pour des traductions en ligne de textes courts, mais c’est un service payant qui fait partie des produits Google Cloud pour des traductions de taille.

Prix du service Google Translate Basic

Quelques développeurs indépendants de Google publient sur la plateforme Github des logiciels permettant la traduction gratuite de documents volumineux, en contournant les barrières et restrictions intégrées dans les interfaces publics de Google Translate. Deux exemples sont les projets google-translate-php et google-trans-new.

Mon conseil est de ne pas recourir à de telles solutions qui ne sont pas fiables, illégales et qui portent le risque de voir son adresse IP bloquée par Google pour tous ses services proposés, y inclus la recherche sur le web. Il vaut mieux de passer son temps à explorer des services de traduction amusants comme Fabricius, le service en ligne de Google pour déchiffrer des hiéroglyphes. Cette application fait partie de l’espace dédié à l’Égypte ancienne au sein de sa section Google Arts & Culture, dévoilé le 15 juillet 2020 pour célébrer l’anniversaire de la découverte de la Pierre de Rosette.

Yandex Translate

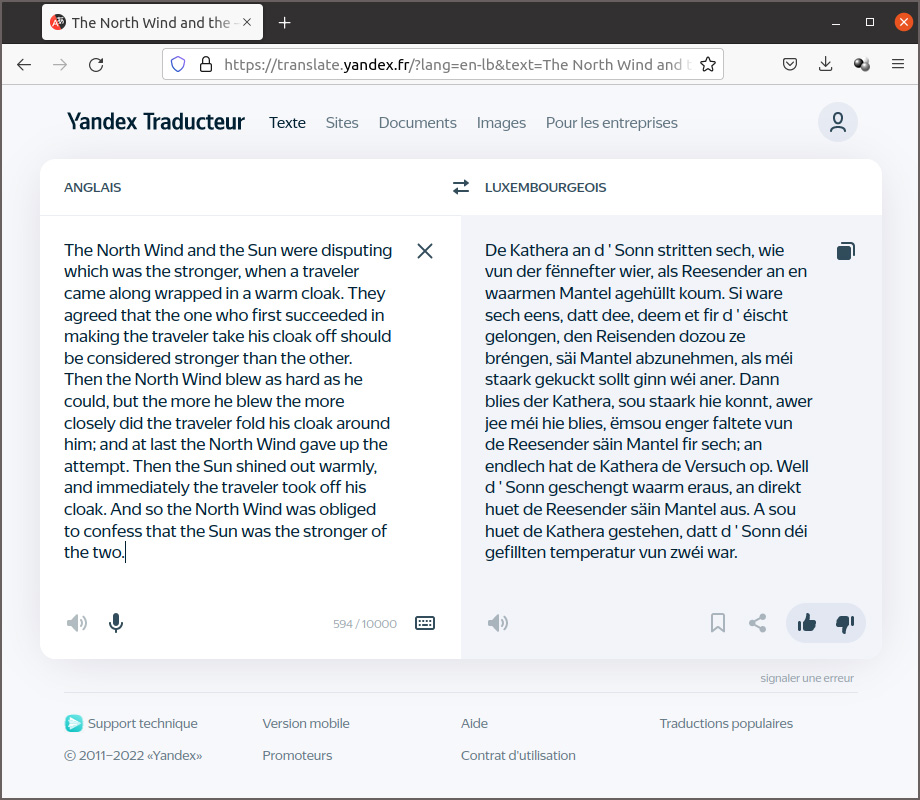
Les internautes en Russie et dans différents autres pays de l’Est préfèrent utiliser Yandex Translate au lieu de Google Translate. Le service est intégré dans le moteur de recherche de même nom créé en 1997 par Arkadi Voloj. Yandex est une socitété russe dont la maison mère est basée à Amsterdam. Yandex Translate utilise un système statistique de traduction automatique par auto-apprentissage. Ce qui surprend c’est que le service supporte la langue luxembourgeoise. Les résultats de la traduction anglais-luxembourgeois de la fable d’Esope, affichés ci-après, montrent que la qualité de la traduction n’est pas très élevée.

Dans les prochains chapitres nous allons découvrir les projets de traduction automatique à source ouverte de Systran (OpenNMT), de Microsoft (MarianNMT, de Facebook (NLLB), d’Amazon (Sockeye) et de Google (T5, mt5) .

OpenNMT

OpenNMT est le projet de traduction automatique à source ouverte le plus ancien. Yoon Kim, membre du groupe NLP de l’université de Harvard, a lancé en juin 2016 le projet seq2seq-attn sur Github qui est à l’origine du projet. Yoon Kim est aujourd’hui maître assistant au MIT. En collaboration avec Systran, un premier modèle OpenNMT a été publié en décembre 2016. L’auteur principal était Guillaume Klein de Systran. Une première version OpenNMT pour PyTorch a été publiée en mars 2017 (OpenNMT-py), en collaboration avec Facebook Research. Une version pour TensorFlow suivait en juin 2017 (OpenNMT-tf). Le projet OpenNMT est actuellement maintenu par Systran et Ubiqus. L’ancien PDG de Systran, Jean Senellart, est un des administrateurs du forum OpenNMT.

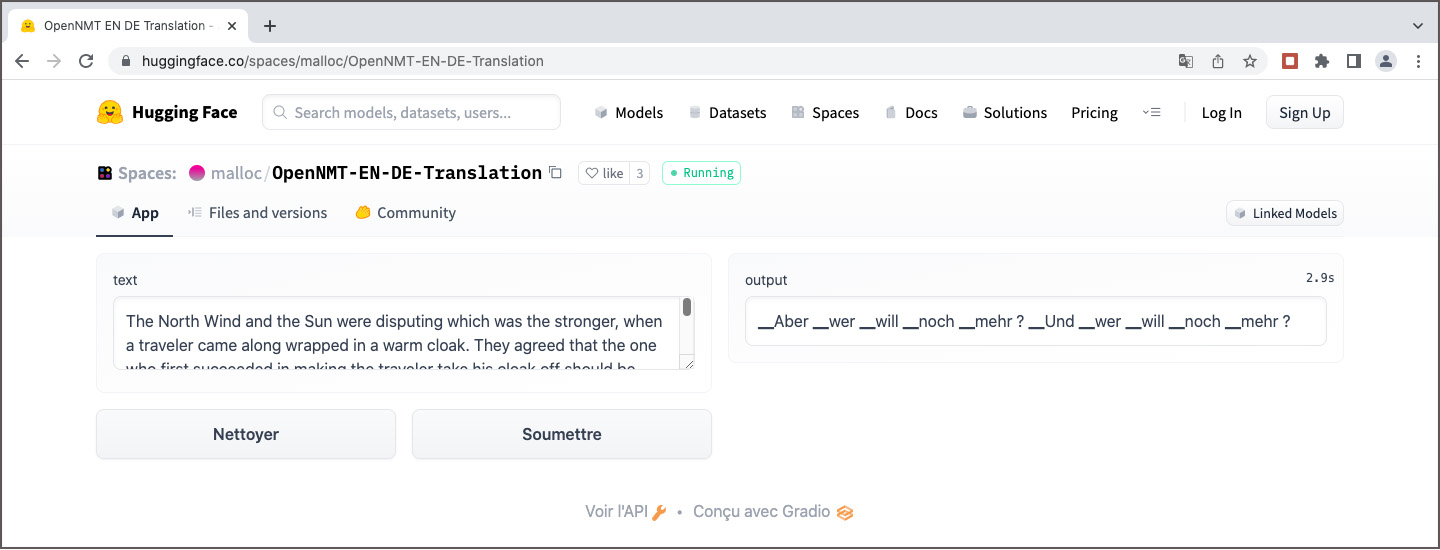
Des modèles de traduction pré-entraînés pour OpenNMT sont rares. Sur le site web OpenNMT on trouve seulement deux modèles : un modèle Transformer anglais-allemand et un modèle BiLSTM allemand-anglais. Le premier est disponible sur la plateforme huggingface.co comme espace de démonstration. J’ai essayé de l’évaluer, mais sans succès. Il semble que le fichier de configuration manque, ce qui peut expliquer la traduction farfelue.

Traduction farfelue anglais-allemand avec OpenNMT sur Huggingface

MarianNMT

MarianNMT est un outil neuronal de traduction automatique entièrement programmé en C++. Pour cette raison il est deux fois plus rapide que OpenNMT si on effectue des tests dans les mêmes conditions. Le projet a été développé à l’Université d’Edimbourg et à l’Université Adam Mickiewicz à Poznań en Pologne, en collaboration avec Microsoft, à partir de 2017.

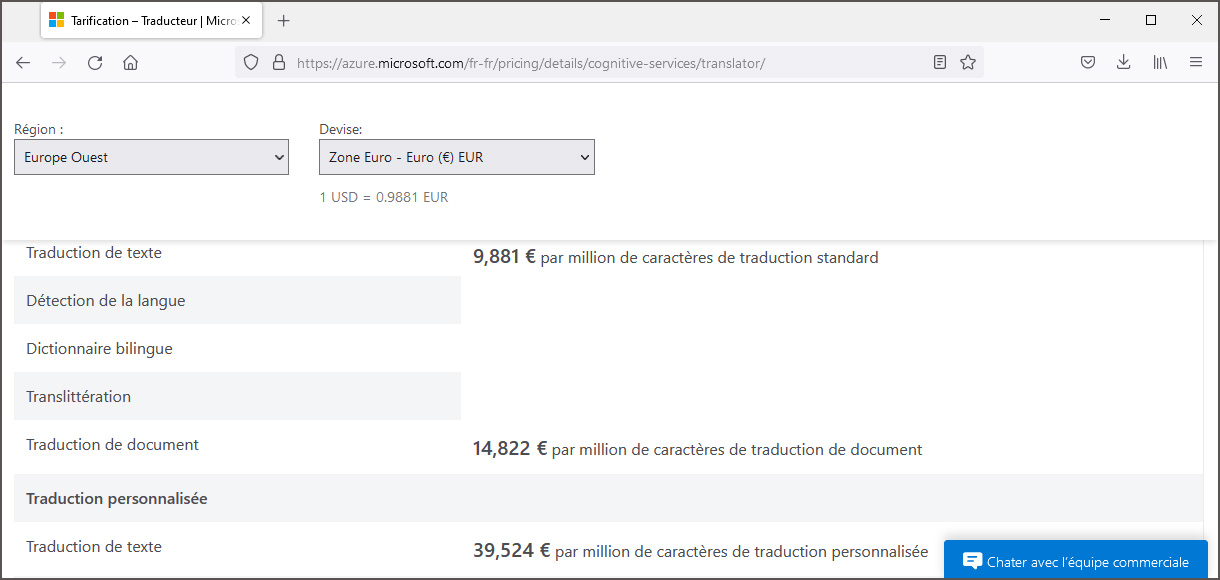
Le chef de projet était Marcin Junczys-Dowmunt, actuellement scientifique NLP principal auprès de Microsoft. Il est né à Bydgoszcz en Pologne, la ville natale de Marian Rejewski, un mathématicien et cryptologue polonais renommé. En hommage à ce scientifique, Marcin Junczys-Dowmunt a utilisé son prénom comme nom de travail du projet et le nom n’a jamais été changé. La technologie Marian est utilisée par Microsoft pour son service de traduction commercial Microsoft-Translator sur la plateforme Azure. A l’exemple de Google, une version légère est intégrée sans le moteur de recherche Bing de Microsoft pour traduire gratuitement des textes courts. Mais la langue luxembourgeoise n’est pas supportée par Microsoft.

prix de Microsoft pour la traduction sur la plateforme Azure

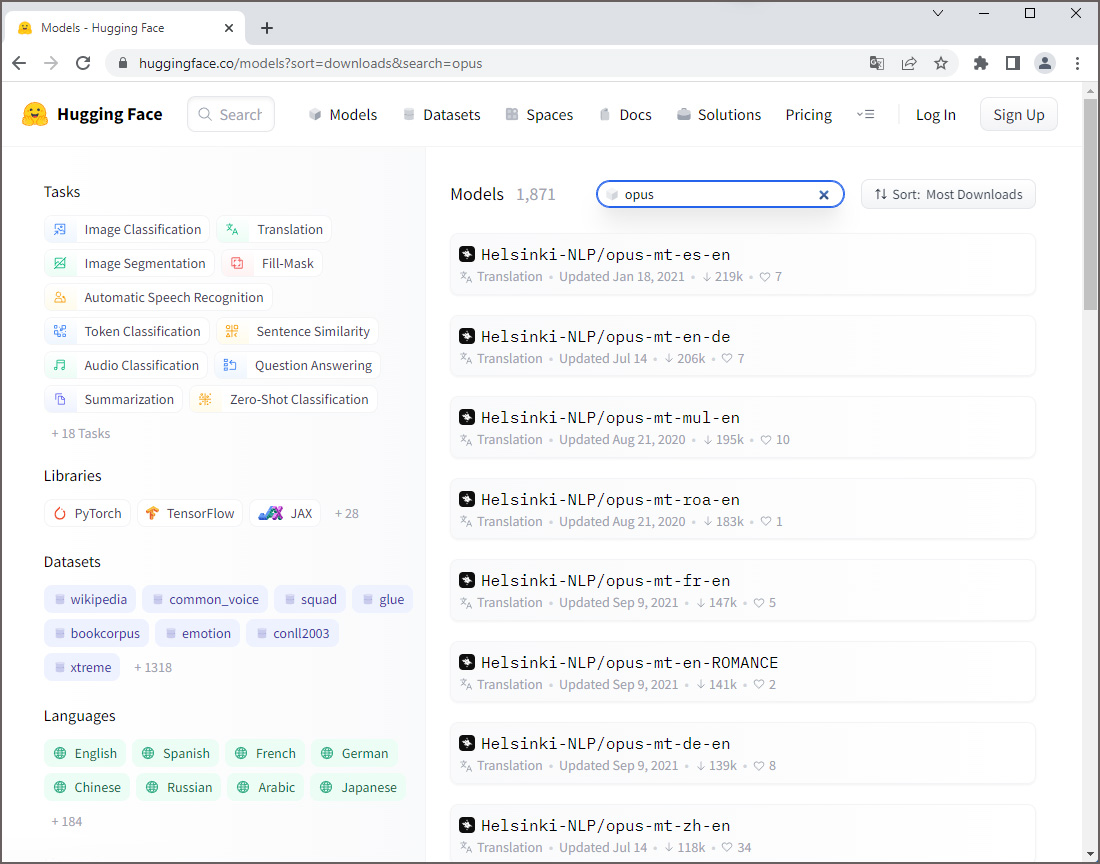
Une multitude de modèles de traduction pour différentes paires de langues a été publiée par l’Université d’Helsinki sous l’initiative de Jörg Tiedemann, professeur des technologies de language au département des humanités numériques (HELDIG). Ces modèles neuronaux sont connus sous les noms de Helsinki-NLP/opus-mt-xx-yy (xx = langue source, yy = langue cible). Ils ont été entraînés avec les données du corpus public ouvert OPUS, respectivement avec les données de la collection Tatoeba. Sur Huggingface 1.466 modèles sont disponibles, parmi eux le modèle opus-mt-fr-de qui est à l’origine du titre de la présente publication.

Présentation des modèles Helsinki-NLP/opus-mt-xx-yy sur Huggingface

Dans la liste des modèles MarianMT entraînés moyennant le corpus Tatoeba luxembourgeois on trouve un modéle anglais-luxembourgeois et un modèle luxembourgeois-anglais. Après conversion en format PyTorch, j’ai téléchargé les fichiers afférents comme bases de données et comme modèles sur la plateforme Huggingface. J’ai programmé en outre une application pour un espace de démonstration. Hélas le corpus Tatoeba luxembourgeois n’a ni la taille ni la qualité pour obtenir des résultats de traduction valables. Dans l’attente de la découverte d’une base de données plus appropriée pour pouvoir entraîner un meilleur modèle de traduction anglais-luxembourgeois, et éventuellement des modèles luxembourgeois avec d’autres langues comme source ou cible, je laisse la présente version en place sur Huggingface comme preuve de concept.

NLLB (No Language Left Behind)

Précédé par son modèle pytorch/translate, Facebook Research a présenté en 2019 son outil de modélisation de séquences fairseq en source ouverte qui permet, entre autres, de faire de la traduction automatique. A l’instar de OpenNMT et de MarianNMT, des modèles de traduction automatique pré-entraînés pour quelques couples de langues ont été mis à la disposition des chercheurs.

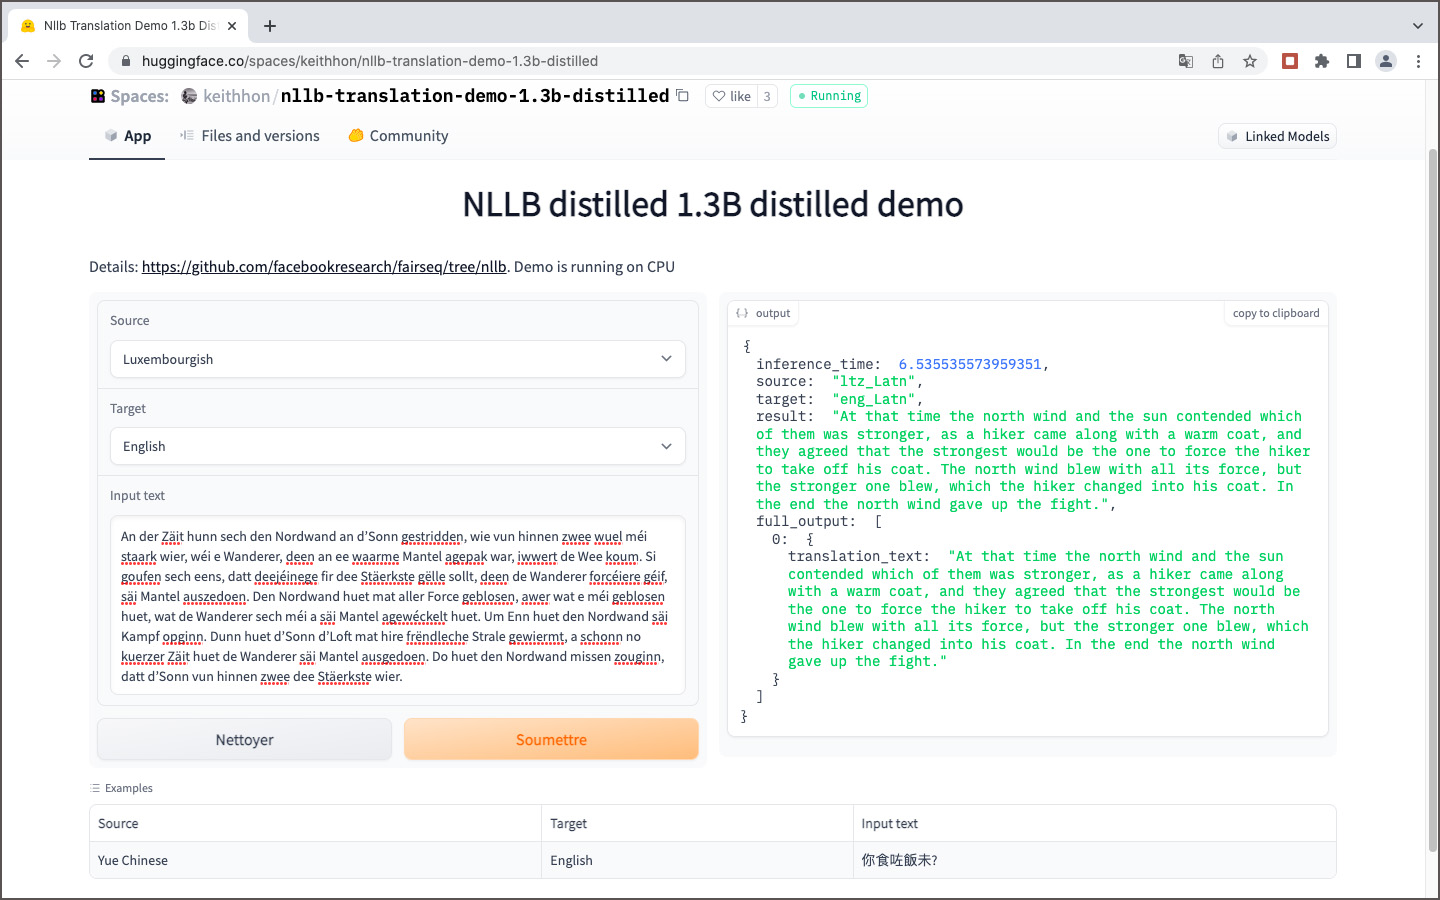
En octobre 2021 Facebook Inc., la maison mère des services Facebook, Instagram, WhatsApp et Messenger, a changé son nom en Meta Platforms Inc. et Facebook AI est devenu Meta AI. Récemment, le 6 juillet 2022, Meta AI a annoncé la mise au point du premier modèle d’intelligence artificielle unique qui permet la traduction en 200 langues différentes avec une qualité de pointe. Ce modèle, appelé NLLB-200, fait partie de l’initiative No Language Left Behind de Meta. Une publication détaillée de 190 pages sur le projet est disponible sur arXiv.

Le modèle NLLB-200 est disponible en plusieurs versions, avec des tailles allant de 4,4 GB (600 millionsde paramètres) jusqu’à 404 GB (54,5 milliards de paramètres. Pour tester NLLB, on a plusieurs possibilités :

  • moyennant un notebook sur Google Colab
  • moyennant l’espace NLLB Translatior sur Huggingface, développé par Narrativa
  • moyennant l’API de Narrativa
  • moyennant la librairie Transfomers de Huggingface
  • à partir du code source NLLB sur Github
Traduction en temps réel luxembourgeois – anglais avec NLLB sur Huggingface

Le code Python pour traduire un texte anglais en luxembourgeois avec la librairie Transformers de Huggingface est montré ci-après comme exemple:

from transformers import AutoModelForSeq2SeqLM, AutoTokenizer

tokenizer = AutoTokenizer.from_pretrained("facebook/nllb-200-distilled-600M", use_auth_token=False, src_lang="eng_Latn")
model = AutoModelForSeq2SeqLM.from_pretrained("facebook/nllb-200-distilled-600M", use_auth_token=False)

article = "The North Wind and the Sun were disputing which was the stronger, when a traveler came along wrapped in a warm cloak."
inputs = tokenizer(article, return_tensors="pt")

translated_tokens = model.generate(**inputs, forced_bos_token_id=tokenizer.lang_code_to_id["ltz_Latn"], max_length=100)
tokenizer.batch_decode(translated_tokens, skip_special_tokens=True)[0]
Exécution du code Python pour la traduction anglais – luxembourgeois. Cliquez pour agrandir l’image.

Amazon Translate et Sockeye

Le service de traduction automatique commercial de Amazon repose également sur un projet à source ouverte, appelé Sockeye, disponible sur Github. Les origines du projet remontent à 2017; plus que 70 versions ont été publiées depuis, la version la plus récente ( 3.1.14.) date du 5 mai 2022. Si on passe le test de La bise et le soleil se disputaient … au traducteur Amazon Translate, on s’étonne que la traduction allemande Der Nordwind und die Sonne stritten sich … est correcte. Mais à la deuxième vue on découvre que dans les autres phrases la bise devient der Kuss comme dans la majorité des autres systèmes de traduction.

Traduction en temps réel français – allemand avec Amazon Translate

En été 2022 la langue luxembourgeoise n’était pas encore supportée par Amazon Translate.

Google T5 et mt5

Les premiers modèles neuronaux entraînés pour la traduction automatique étaient basés sur une architecture de réseau de neurones récurrents. Tout a changé en juin 2017 lorsque Google a présenté une nouvelle architecture de réseau neuronal, appelée Transformeur, dans sa publication Attention is All You Need. D’un jour à l’autre les transformeurs, qui sont conçus pour gérer des données séquentielles telles que le langage naturel, sont devenus le modèle de choix pour la traduction automatique. Cela a conduit au développement de systèmes pré-entraînés tels que BERT (Bidirectional Encoder Representations from Transformers) par Google et GPT-1 (Generative Pre-Training Transformer) par OpenAI en 2018.

Fin 2019 Google a introduit son transformeur T5, pré-entraîné avec un vaste ensemble de données C4 (Colossal Clean Crawled Corpus), publié ensemble avec le modèle. Le modèle T5 supporte 4 langues (anglais, allemand, français et roumain) et existe en cinq versions:

  • T5-Small (60 millions de paramètres)
  • T5-Base (220 millions de paramètres)
  • T5-Large (770 millions de paramètres)
  • T5-3B (3 milliards de paramètres)
  • T5-11B (11 milliards de paramètres)

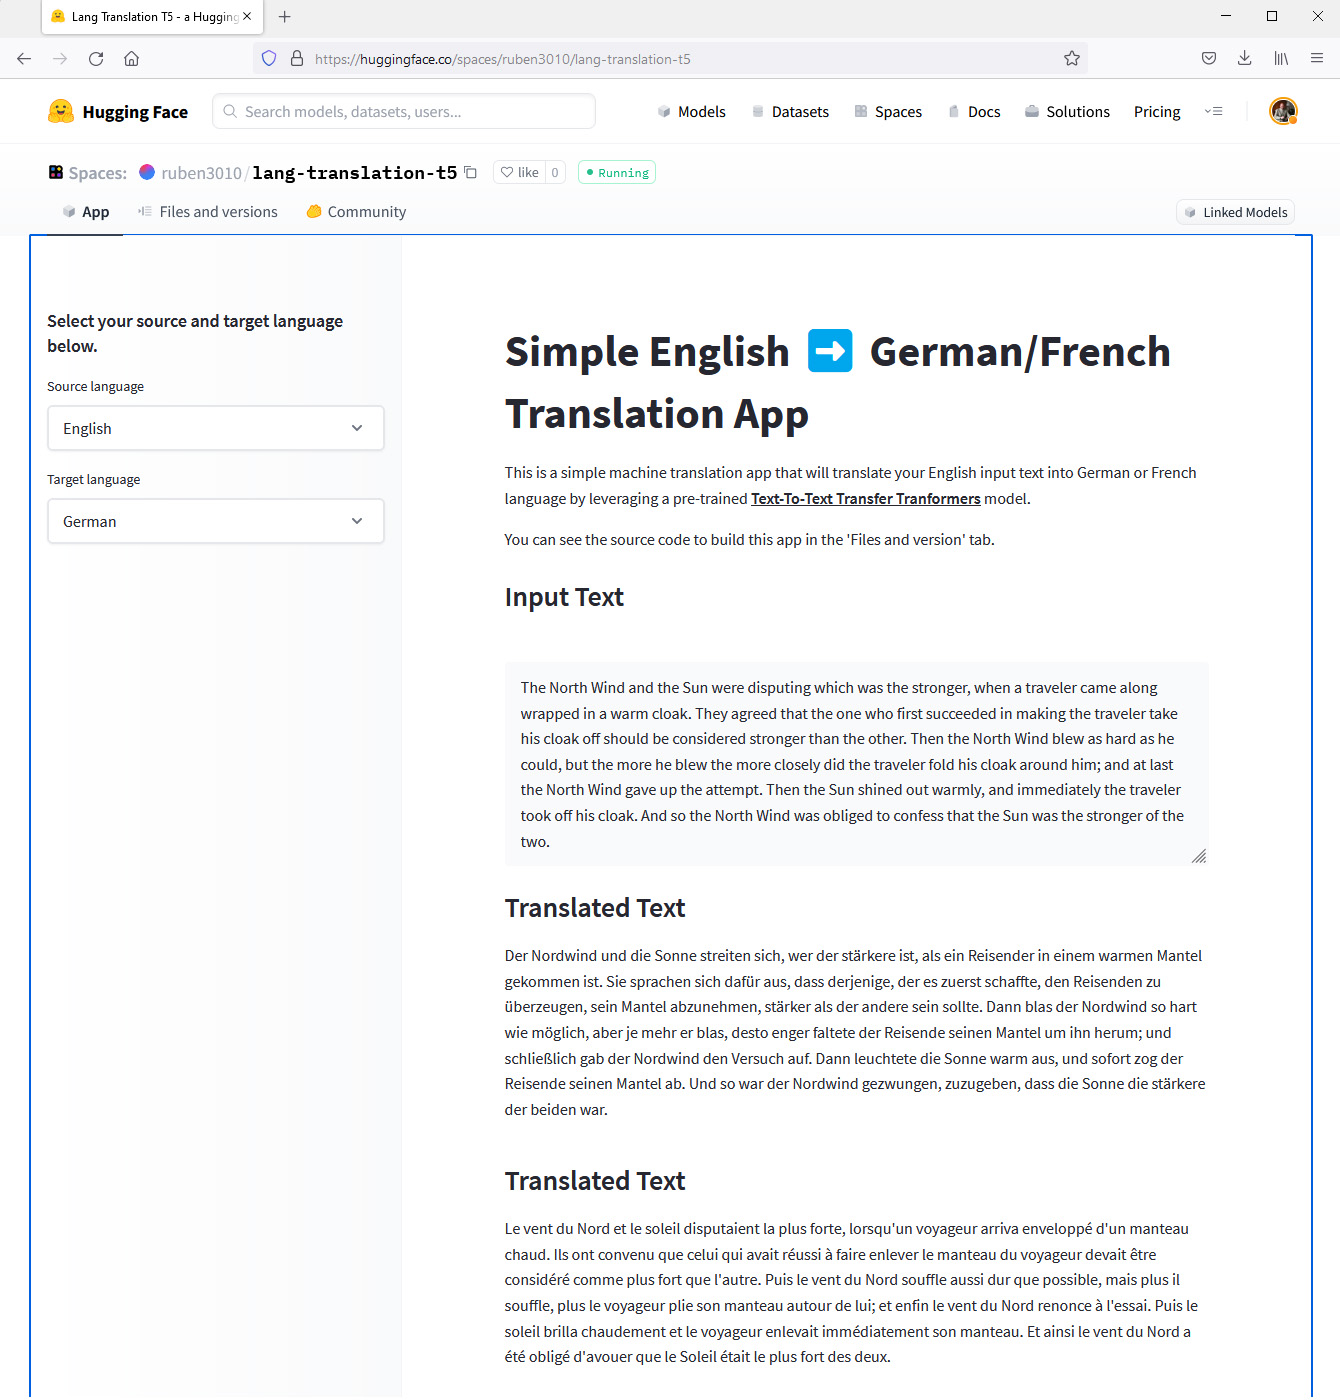
Même si l’application principale du modèle T5 n’est pas la traduction, celle-ci fonctionne entre les quatre langues supportées. Une démonstration de traduction de textes anglais en allemand ou en français est accessible sur Huggingface.

Traduction en temps réel anglais-allemand et anglais-français avec le modèle T5 sur Huggingface

Un modèle multilingue mt5 supportant 101 langues, dont le luxembourgeois, a été présenté par Goggle une année après le modèle T5, en octobre 2020. Comme le modèle mt5 nécessite un réglage fin (finetuning) avant de pouvoir servir pour des applications de traitement du langage, comme la traduction automatique, Shivanand Roy a développé l’outil simpleT5 qui facilite l’entraînement du modèle pour une langue, ou pour un couple de langues déterminées. Un autre chercheur, Thilina Rajapakse, a développé un outil similaire appelé simpletransformers. L’auteur a mis en place un site web dédié pour SimpleTransformers et a publié la contribution How to Train an mT5 Model for Translation With Simple Transformers qui explique comment entraîner le modèle mt5 pour la traduction automatique du paire des langues anglais – cingalais.

Comme le réglage fin des modèles T5 et mt5 nécessitent des puissance de calcul et des tailles de mémoire très élevées, typiquement une TPU (Tensor Processing Unit) comme accélérateur sur Google Colab, je me suis limité à l’entraînement du modéle mt5-small qui a une taille de 1,2 GB. J’ai utilisé le corpus Tatoeba anglais-luxembourgeois pour la formation avecl le script Python affiché ci-après:

import logging
import pandas as pd
from simpletransformers.t5 import T5Model, T5Args

import torch.multiprocessing
torch.multiprocessing.set_sharing_strategy('file_system')

logging.basicConfig(level=logging.INFO)
transformers_logger = logging.getLogger("transformers")
transformers_logger.setLevel(logging.WARNING)

train_df = pd.read_csv("dataset/train.tsv", sep="\t").astype(str)
eval_df = pd.read_csv("dataset/eval.tsv", sep="\t").astype(str)

train_df["prefix"] = ""
eval_df["prefix"] = ""

model_args = T5Args()
model_args.max_seq_length = 72
model_args.train_batch_size = 10
model_args.eval_batch_size = 10
model_args.num_train_epochs = 5
model_args.evaluate_during_training = True
model_args.evaluate_during_training_steps = 30000
model_args.use_multiprocessing = False
model_args.fp16 = False
model_args.save_steps = -1
model_args.save_eval_checkpoints = False
model_args.no_cache = True
model_args.reprocess_input_data = True
model_args.overwrite_output_dir = True
model_args.preprocess_inputs = False
model_args.num_return_sequences = 1
model_args.wandb_project = "MT5 Luxembourgish-English Translation"

model = T5Model("mt5", "google/mt5-small", args=model_args)

# Train the model
model.train_model(train_df, eval_data=eval_df)

Le graphique enregistré sur la plateforme Weights & Biases qui suit montre l’évolution des scalaires pendant l’entraînement dont l’objectif principal est de minimiser les pertes.

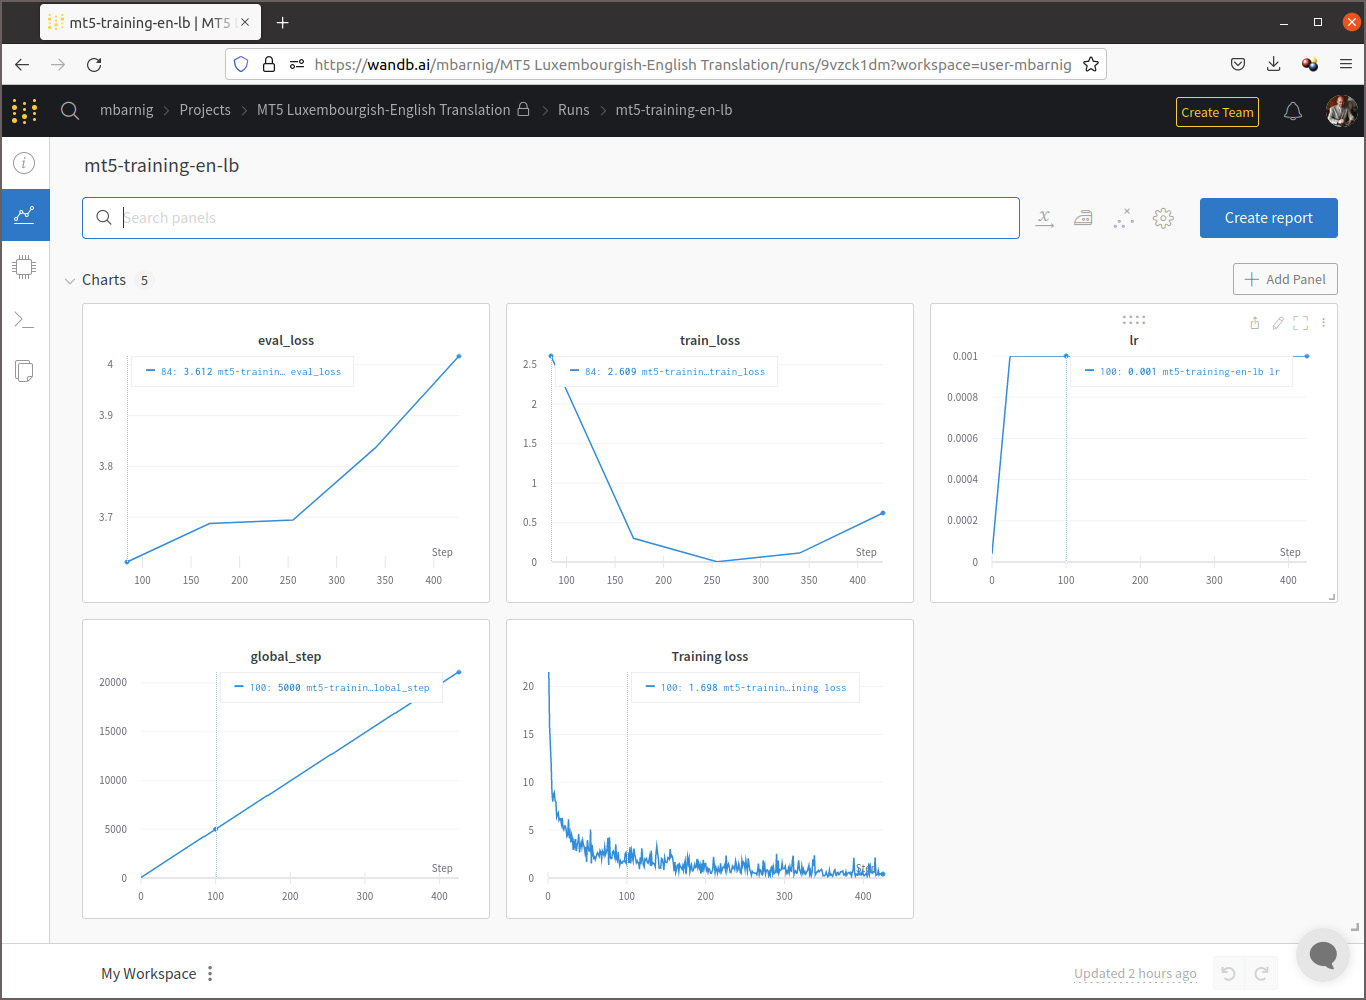
On constate que le coefficient de perte train est au début en baisse pour ensuite inverser sa pente, tandis que le coefficient de perte eval augmente continuellement, ce qui signifie qu’il y a un overfitting du modèle du fait que la taille du fichier d’entraînement est trop petit. Cela se confirme si on examine les résultats de la traduction dans mon espace de démonstration sur Huggingface. J’ai programmé une application commune pour comparer les résultats de la traduction anglais-luxembourgeois et vice-versa avec les trois modèles NLLB, MarianNMT et T5/mt5.

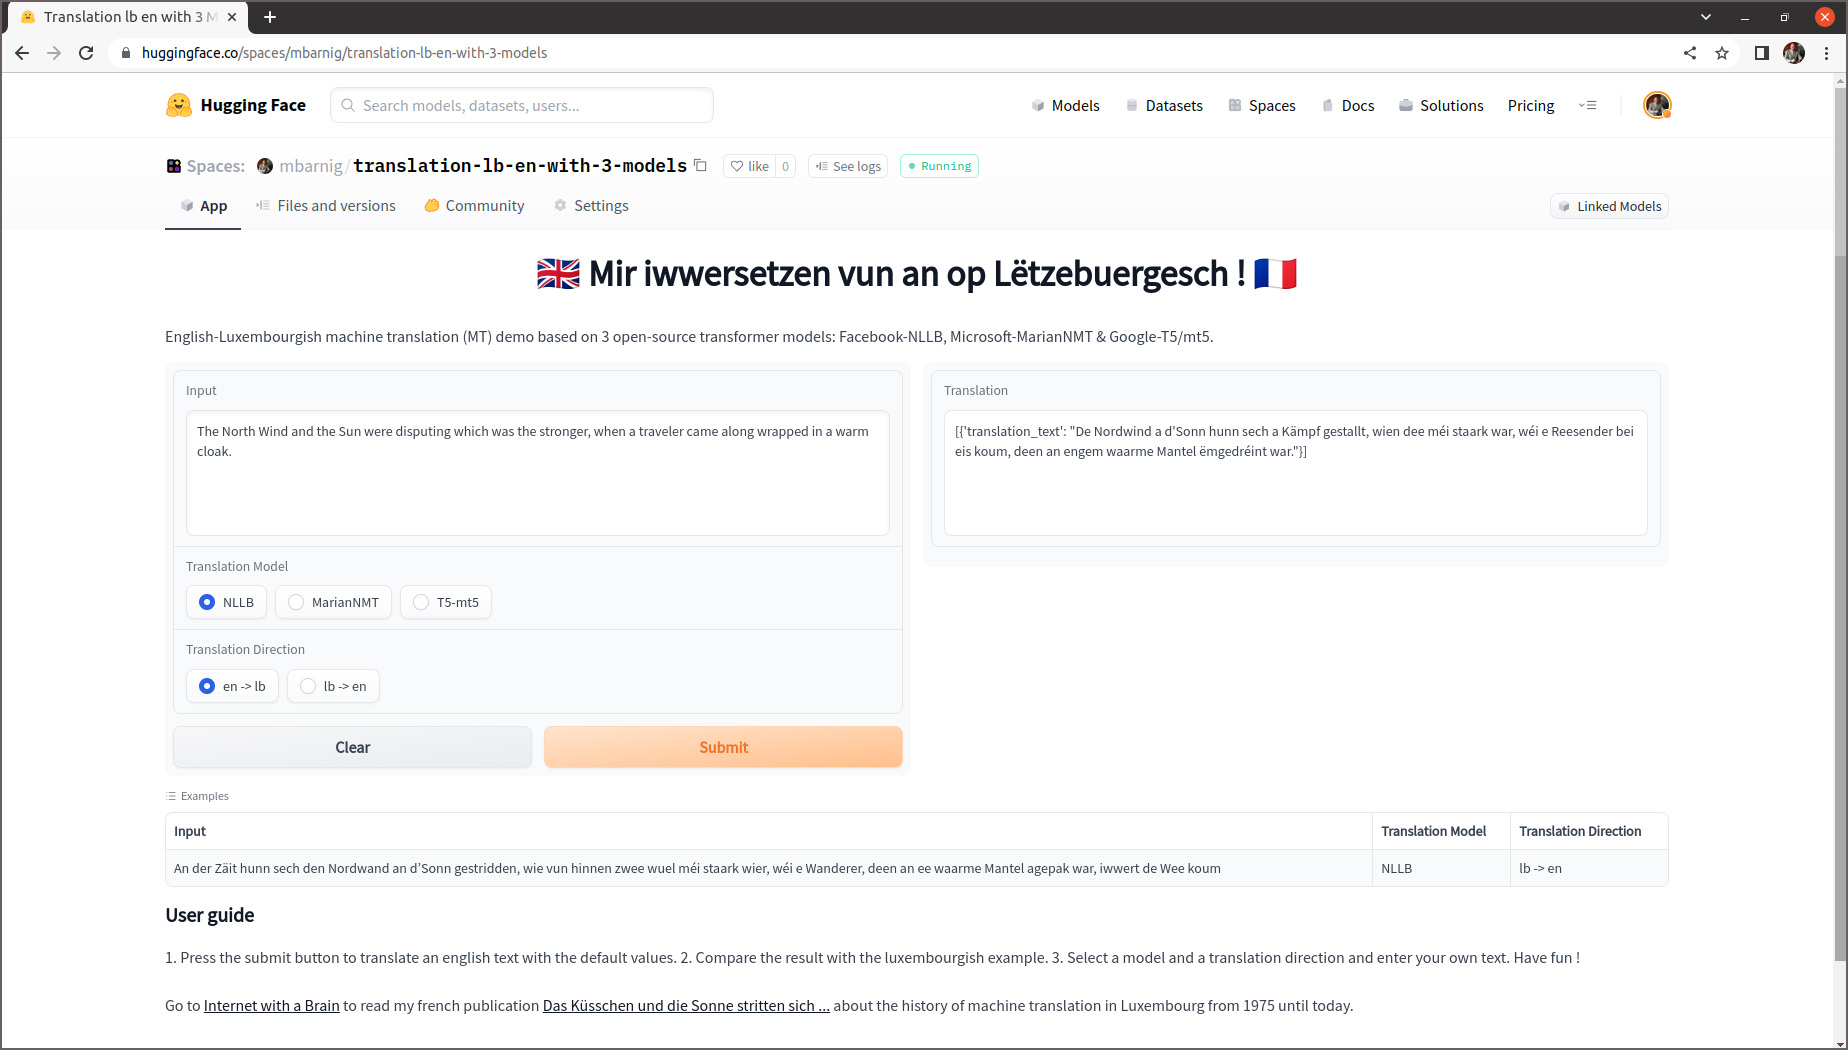
En entrant les mêmes textes dans l’application Goggle Translate, on se rend compte de la performance supérieure de ce modèle dont le code est fermé et propriétaire.

Métriques

Dans les chapitres précédents nous avons procédé à une évaluation subjective de la qualité de traduction des différents modèles basés sur l’intelligence artificielle. Il existe toutefois de nombreuses métriques pour procéder à une évaluation objective. Quelques exemples sont relevés ci-après :

  • BLEU (Bilingual Evaluation Understudy)
  • ROUGE (Recall-Oriented Understudy for Gisting Evaluation)
  • METEOR (Metric for Evaluation of Translation with Explicit Ordering)
  • NIST (National Institute of Standards and Technology)
  • LEPOR ((Length Penalty, Precision, n-gram Position difference Penalty and Recall)
  • chrf++ (Character n-gram F-score)

Pour exprimer la qualité d’une traduction automatique, on mesure la différence entre la traduction machine et une, ou plusieurs, traductions de référence créées par l’humain pour une même phrase source. Il faut donc disposer d’un corpus de phrases pour la langue source et pour la langue cible. Facebook a publié récemment sur Github un corpus public de référence appelé Flores-200. Il se compose d’un fichier csv pour chacune des 200 langues supportées par le modèle NLLB. Chaque fichier inclut 998 phrases présentées dans le même ordre, ce qui permet d’automatiser aisément l’évaluation d’un nouveau modèle de traduction machine pour un couple de langues déterminées. Les trois premières phrases en anglais et en luxembourgeois du corpus Flores-200 sont affichées ci-après à titre d’exemple.

On Monday, scientists from the Stanford University School of Medicine announced the invention of a new diagnostic tool that can sort cells by type: a tiny printable chip that can be manufactured using standard inkjet printers for possibly about one U.S. cent each.
Lead researchers say this may bring early detection of cancer, tuberculosis, HIV and malaria to patients in low-income countries, where the survival rates for illnesses such as breast cancer can be half those of richer countries.
The JAS 39C Gripen crashed onto a runway at around 9:30 am local time (0230 UTC) and exploded, closing the airport to commercial flights.
……………..
E Méindeg hu Wëssenschaftler vun der Stanford University School of Medicine d’Erfindung vun engem neien Diagnosgeschier ugekënnegt, dat Zellen no Typ sortéiere kann: e klengen dréckbaren Chip, dee mat Hëllef vun engem Standardtëntestraldrécker fir méiglecherweis ongeféier een US-Cent d’Stéck hiergestallt ka ginn.
Féierend Fuerscher soen, datt dëst d’Fréierkennung vu Kriibs, Tuberkulos, HIV a Malaria bei Patienten a Länner mat nidderegem Akommes brénge kéint, wou d’Iwwerliewenstauxe bei Krankheeten ewéi Broschtkriibs hallef esou héich kënne sinn ewéi a méi räiche Länner.
D’JAS 39C Gripen ass géint 9.30 Auer Lokalzäit (0230 UTC) op eng Rullbunn gestierzt an explodéiert, wouduerch de Flughafe fir kommerziell Flich gespaart gouf.
……………..
Trois premières phrases du corpus Flores-200 anglais et luxembourgeois

Après la comparaison des résultats, un score est attribué pour chaque phrase traduite. Puis une moyenne est calculée sur l’ensemble du corpus afin d’estimer la qualité globale du texte traduit. Parmi la multitude des métriques d’évaluation MT, BLEU constitue la métrique la plus populaire et la moins coûteuse. Elle a été développée en 2002 par Kishore Papineni pour IBM. La formule mathématique pour générer les scores se base sur des unigrammes, bigrammes, trigrammes et quadrigammes (n-grammes), mais je vais vous épargner les explications afférentes qui dépassent le cadre de la présente description. Je me limite à présenter quelques résultats représentatifs extraits des métriques pour la traduction automatique des 200 x 200 couples de langues supportés par les modèles NLLB. Les scores afférents sont exprimés avec la métrique chrf++ qui fournit des évaluations plus pertinentes que la métrique BLEU.

Direction TraductionMétrique chrf++
en -> de62,8
en -> fr69,7
en -> lb56
de -> en67,5
de -> fr61,4
de -> lb52
fr -> en68,4
fr -> de56,3
fr -> lb49,6
lb -> en69,6
lb -> de60,1
lb -> fr62,4
lb -> zho12,9
lb -> ja24,6
Métriques mesurées avec corpus Flores pour modèle de traduction automatqiue NLLB

La meilleure qualité a été calculée pour la traduction luxembourgeois – anglais (chrf++ = 69,6), la plus basse pour la traduction luxembourgeois – chinois (chrf++ = 12,9).

Conclusions

J’utilise la traduction automatique depuis plus de 10 ans dans le cadre de mes projets de recherche dans le domaine de l’intelligence artificielle pour lire des informations publiées sur le web dans des langues exotiques, comme le coréen, le chinois, le russe etc. Même si la qualité de la traduction n’est pas parfaite, elle est suffisante pour comprendre l’essentiel du contenu. J’apprécie la traduction de documents étrangers en luxembourgeois sur Google Translate lors de la rédaction d’articles techniques en luxembourgeois que je partage, de temps en temps, sur les réseaux sociaux. Le support de la langue luxembourgeoise dans les modèles de traduction machine à source ouverte récents, en combinaison avec la mise à disposition d’outils de programmation libres sur les plate-formes Github et Huggingface, facilitera le fin réglage des modèles de traduction luxembourgeois pour des domaines spécifiques, par exemple pour la biologie, la médecine, les finances etc. Si on passe en revue l’histoire de la traduction automatique, on constate une évolution exponentielle. Il y a eu plus d’innovations et de changements au courant des deux dernières années que pendant la période de 50 ans (de 1970 à 2019) précédente.

Bibliographie

Livres

Magazines

Couverture de l’édition 100 du magazine MultiLingual, décembre 2008

Articles sur le web

Evolution of character encoding

In computing, character encoding is used to represent a repertoire of characters by some kind of encoding system. Character encoding started with the telegraph code. The numerical values that make up a code space are called code points (or code positions).

ASCII

One of the most used character encoding scheme is ASCII, abbreviated from American Standard Code for Information Interchange. ASCII comprises 128 code points in the range 00hex to 7Fhex. Work on ASCII standardization began in 1960 and the first standard was published in 1963. The first commercial use of ASCII was as a seven-bit teleprinter code promoted by Bell Data Services in 1963. ASCII encodes 128 specified characters into seven-bit integers. The characters encoded are numbers 0 to 9, lowercase letters a to z, uppercase letters A to Z, basic punctuation symbols, a space and some non-printing control codes. The eight bit in an ASCII byte, unused for coding, was often used for error control in transmission protocols.

Extended ASCII

Extended ASCII uses all 8 bits of an ASCII byte and comprises 256 code points in the range 00hex to FFhex. The term is misleading because it does not mean that the ASCII standard has been updated to include more than 128 characters or that the term unambiguously identifies a single encoding. There are hundreds of character encoding schemes, based on ASCII, which use the eight bit to encode 128 additional characters used in other languages than american english or used for special purposes. Some of these codes are listed hereafter:

  • EBCDIC : Extended Binary Coded Decimal Interchange Code, used mainly by IBM
  • ISO 8859 :  a joint ISO and IEC series of standards, comprising 15 variants; the most popular is ISO 8859-1 (called Latin 1)
  • ATASCII and PETSCII : introduced by ATARI and Commodore for the first home computers
  • Mac OS Roman : launched by Apple Computer

Unicode

Unicode Logo

Unicode Logo

Unicode is a computing industry standard for the consistent encoding, representation, and handling of text expressed in most of the world’s writing systems and historical scripts. The standard is maintained by the Unicode Consortium, a non-profit organization. The most recent version of Unicode is 9.0, published in June 2016. Unicode comprises 1.114.112 code points in the range 00hex to 10FFFFhex. The Unicode code space is divided into seventeen planes (the basic multilingual plane, and 16 supplementary planes), each with 65.536 (= 2 exp 16) code points. Unicode provides a unique number for every character, no matter what the platform, no matter what the program, no matter what the language. The Unicode Standard has been adopted by all industry leaders in the information technology domain..

Emoji

Emoji are ideograms and smileys used in electronic messages and web pages. The characters exist in various genres, including facial expressions, common objects, places and animals. Originating on Japanese mobile phones in the late 1990s, emoji have become increasingly popular worldwide since their international inclusion in Apple’s iPhone, which was followed by similar adoption by Android and other mobile operating systems. The word emoji comes from Japanese and means pictogram, the resemblance to the English words “emotion” and “emoticon” is just a coincidence. Emoji are now included in Unicode.

Emoji Candidates

Anyone can submit a proposal for a new emoji character, but the proposal needs to have all the right information for it to have a chance of being accepted. The conditions and the process is described on the Submitting Emoji Character Proposals webpage of the Unicode Consortium. The following figure shows the 8 Emoji candidates for the next meeting (Q4 2016) of the Unicode Technical Committee (UTC). When approved, these characters will be added to Unicode 10.0, for release in June, 2017.

New Emoji Candidates 2016

New Emoji Candidates 2016

Unicode Adapt-a-Character

Unicode launched the initiative Adopt-a-Character to help the non-profit consortium in its goal to support the world’s languages. There are three sponsorship levels : Gold, Silver and Bronze. All sponsors are acknowledged in Unicode’s Sponsors of Adopted Characters and their public Twitter feed with their level of support, and they receive a custom digital badge for their character. Donation for a bronze adoption are only 100 US$.

Unicode Encoding

Unicode can be implemented by different character encodings. The most commonly used encodings are UTF-8, UTF-16, UTF-32. A comparison of the encoding schemes is available at Wikipedia.

UTF-8

UTF-8 is a character encoding capable of encoding all possible characters, or code points, defined by Unicode. UTF-8 was originally designed by Ken Thompson and Rob Pike. The encoding is variable-length and uses 8-bit code units. UTF-8 uses one byte for any ASCII character, all of which have the same code values in both UTF-8 and ASCII encoding, and up to four bytes for other characters. There are three sort of units in a variable-width encoding (multibyte encoding).

  • Singleton : a single unit (one byte)
  • Lead : a lead unit comes first in a multibyte encoding
  • Trail : a trail unit comes afterwards in a multibyte encoding

UTF-8 was first presented in 1993.

UTF-16

UTF-16 is a character encoding capable of encoding all 1,112,064 possible characters in Unicode. The encoding is variable-length, as code points are encoded with one or two 16-bit code units. UTF-16 are incompatible with ASCII files. UTF-16 was developed from an earlier fixed-width 16-bit encoding known as UCS-2 (for 2-byte Universal Character Set) once it became clear that a fixed-width 2-byte encoding could not encode enough characters to be truly universal.

UTF-32

UTF-32 is a protocol to encode Unicode code points that uses exactly 32 bits per Unicode code point. This makes UTF-32 a fixed-length encoding, in contrast to all other Unicode transformation formats which are variable-length encodings. The UTF-32 form of a code point is a direct representation of that code point’s numerical value.

The main advantage of UTF-32, versus variable-length encodings, is that the Unicode code points are directly indexable. This makes UTF-32 a simple replacement in code that uses integers to index characters out of strings, as was commonly done for ASCII. The main disadvantage of UTF-32 is that it is space inefficient.

Unicode Equivalence

Unicode equivalence is the specification by the Unicode character encoding standard that some sequences of code points represent the same character. This feature was introduced in the standard to allow compatibility with preexisting standard character sets. Unicode provides two such notions, canonical equivalence and compatibility.

Code point sequences that are defined as canonically equivalent are assumed to have the same appearance and meaning when printed or displayed. Sequences that are defined as compatible are assumed to have possibly distinct appearances, but the same meaning in some contexts. Sequences that are canonically equivalent are also compatible, but the opposite is not necessarily true.

Unicode Normalization

The Unicode standard also defines a text normalization procedure, called Unicode normalization, that replaces equivalent sequences of characters so that any two texts that are equivalent will be reduced to the same sequence of code points, called the normalization form or normal form of the original text. For each of the two equivalence notions, Unicode defines two normal forms, one fully composed (where multiple code points are replaced by single points whenever possible), and one fully decomposed (where single points are split into multiple ones). Each of these four normal forms can be used in text processing :

  • NFD : Normalization Form Canonical Decomposition
  • NFC : Normalization Form Canonical Composition
  • NFKD : Normalization Form Compatibility Decomposition
  • NFKC : Normalization Form Compatibility Composition

All these algorithms are idempotent transformations, meaning that a string that is already in one of these normalized forms will not be modified if processed again by the same algorithm.

Combining characters

In the context of Unicode, character composition is the process of replacing the code points of a base letter followed by one or more combining characters into a single precomposed character; and character decomposition is the opposite process.

NFC character: C é l i n e
NFC code point 0043 00e9 006c 0069 006e 0065
NFD code point 0043 0065 0301 006c 0069 006e  0065
NFD character C e ◌́ l i n e

Unicode support in OS X Swift

In Swift, strings are comprised of a special data structure called Characters (with capital C), which are made of Unicode scalar values (unique 21-bit numbers). We have seen in the above chapter that ” é ” can be described in two ways :

  • let eAcute = ” \ u {E9} ”                                         // é
  • let combinedEAcute = ” \ u {65} \ u {301}            //  e followed by ´

The accent scalar (U+0301) is called ” COMBINING ACUTE ACCENT “. A Swift Character can contain multiple Unicode scalars, but only if those scalars are supposed to be displayed as a single entity. Otherwise Swift throws an error.

The swift function Process( ) (formerly NSTask) used to run Unix excecutables in OS X apps encodes characters using decomposed unicode forms (NFD). This can be a problem when handling special characters in Swift (hash, dcmodify, …).

The following example shows the use of the DCMTK function dcmodify where the arguments to insert a new tag are handled with the argument

 let argument = ["-i", "(4321,1011)=Ostéomyélite à pyogènes"]

The accented characters are passed in the decomposed form. A workaround is to save the value Ostéomyélite à pyogènes in a first step in a text file (Directory/Temp.txt) into a temporary folder and to use the dcmodify “if” option to pass the text file in the argument:

 let argument = ["-if","(4321, 1011)=" + Path to Directory/Temp.txt]

The accented characters are now passed in the composed form as wanted.

UTF-8 support in DICOM

Today UTF-8 characters are supported in most DICOM applications, if they are configured correctly. The Specific Character Set (0008,0005) identifies the Character Set that expands or replaces the Basic Graphic Set for values of Data Elements that have Value Representation of SH, LO, ST, PN, LT or UT.  The defined term for multi-byte character sets without code extensions is ISO_IR 192.

The next figure shows the use of UTF-8 characters in the Orthanc DICOM server.

Orthanc Explorer in 3 Web-Browsers : Safari, Firefox and Microsoft Edge

Orthanc Explorer “Patient Page” in different Web-Browsers : Safari, Firefox and Microsoft Edge

Orthac Explorer "Instance Page in different Web-Browsers : Safari, Firefox and Microsoft Edge

Orthanc Explorer “Instance Page” in different Web-Browsers : Safari, Firefox and Microsoft Edge

Links

Some links to websites providing additional informations about character encoding are listed hereafter :

OrthancMac OS X El Capitan

Last update : February 28, 2018

Introduction

I started the edition of this contribution in June 2015 when I did my first trials with the Orthanc server. In the meantime I created OrthancPi, a mini headless PACS server which is used to host the DICOM teaching files for RadioLogic, an educational tool for radiologists which is currently in alpha test state. It’s now time to update and finalize my post about the installation of the Orthanc server on my MacBookAir computer. The goal is the development of OrthancMac, a midi PACS server for RadioLogic which is more powerful and user-friendly than OrthancPi. Some figures included in the present post refer to earlier versions of Orthanc and to OS X Yosemite because it would be waste time to replace them all with current screenshots.

Some informations provided in the present post are trivial and redundant with my other posts about DICOM and Orthanc. I assembled them for my own needs to get familiar with Orthanc and OS X developments.

Orthanc

Orthanc is a open-source, lightweight DICOM server for healthcare and medical research. It’s now also called a VNA (Vendor Neutral Archive). Orthanc can turn any computer running Windows, Linux or OS X into a PACS  (picture archiving and communication system) system. Orthanc provides a RESTful API and is built on the top of DCMTK (collection of libraries and applications implementing large parts of the DICOM standard). Orthanc is standalone because all the dependencies can be statically linked.

The developer of Orthanc is Sébastian Jodogne, a belgian medical imaging engineer (2011) of the CHU of Liège (University Hospital) who holds a PhD in computer science (2006) from the University of Liège (ULG).

Orthanc source code

The Orthanc source code is available at Bitbucket. The latest stable Orthanc version is 1.3.1 released on November 2, 2017. Some changes have been done since that date. I downloaded the default (mainline) zip file from the Bitbucket project page and saved the unzipped orthanc folder into a directory named orthancmac located at the Mac OSX (El Capitan) desktop. My configuration is slightly different than the assumed structure in the Darwin compilation instructions, but I prefer this development setup.

The following folders and files are included in the orthanc folder :

  • Core/
  • OrthancExplorer/
  • OrthancServer
  • Plugins/
  • Resources/
  • UnitTestSources/
  • .travis.yml  (to trigger automated builds)
  • CMakeLists.txt
  • README, AUTHORS, COPYING, INSTALL, NEWS, THANKS
  • LinuxCompilation.txt and DarwinCompilation.txt

The build infrastructure of Orthanc is based upon CMake. The build scripts are designed to embed all the third-party dependencies directly inside the Orthanc executable. Cmake uses the concept Out of source Build where the build directory is separated from the source directory.

I created a folder build inside the orthanc directory and opened a terminal window inside this build folder.

cd desktop/orthancmac/orthanc/build

To prepare the build process (configuration) on Mac OS X El Capitan, I entered the following command in the terminal window :

cmake .. -GXcode -DCMAKE_OSX_DEPLOYMENT_TARGET=10.11
-DSTATIC_BUILD=ON -DSTANDALONE_BUILD=ON -DALLOW_DOWNLOAD=ON
~/desktop/orthancmac/build

The cmake options are :

-G : specify a makefile generator
-D : create a cmake cache entry

The cmake cache entries are :

CMAKE_OSX_DEPLOYMENT_TARGET : 10.11
STATIC_BUILD : ON
STANDALONE_BUILD : ON
ALLOW_DOWNLOAD : ON

The following figure shows the configuration process when using the CMake-GUI :

Orthanc

Orthanc configuration with CMake GUI

During the configuration process, the following files have been downloaded from the website http://www.montefiore.ulg.ac.be/~jodogne/Orthanc/ThirdPartyDownloads/ :

All the files have been saved in a new folder orthancmac/orthanc/ThirdPartyDownloads. The programs SQlite3 and Python 2.7.10 have been found installed.

Configuration messages, warnings and errors

During the configuration process, the following messages, warnings and errors have been stated :

Files not found

The following files and definitions have not been found during the processing of DCMTK : fstream, malloc, ieeefp, iomanip, iostream, io, png, ndir, new, sstream, stat, strstream, strstrea, sync, sys/ndir, sys/utime, thread, unix, cuserid, _doprnt, itoa, sysinfo, _findfirst, isinf, isnan, uchar, ulong, longlong, ulonglong

Patching

The following files have been patched :

  • dcmtk-3.6.0/dcmnet/libsrc/dulfsm.cc
  • dcmtk-3.6.0/dcmnet/libsrc/dul.cc

Cmake policies

– policy CMP0042 not set
– policy CMP0054 not set
To avoid the cmake_policy warning, I added the following command to the  CmakeLists.txt file at the beginning :

if(POLICY CMP0042)
cmake_policy(SET CMP0042 NEW)
endif()
if(POLICY CMP0054)
cmake_policy(SET CMP0054 NEW)
endif()

INFOS

DCMTK’s builtin private dictionary support will be disabled
Thread support will be disabled
OS X Path not specified for the following targets:
– ModalityWorklists
– ServeFolders

DOXYGEN

Doxygen not found. The documentation will not be built.

Orthanc Xcode Building

The Build directory contains the following folders and files after the configuration and generation process :

  • AUTOGENERATED/
  • boost_1_60_0/
  • curl-7.50.3/
  • dcmtk-3.6.0/
  • gtest-1.7.0/
  • jpeg-9a/
  • jsoncpp-0.10.5/
  • libpng-1.5.12/
  • lua-5.1.5/
  • mongoose/
  • openssl-1.0.2d/
  • pugixml-1.4/
  • zlib-1.2.7/
  • CMakeFiles/
  • CMakeTmp/
  • CMakeScripts/
  • CMakeCache.txt
  • cmake_install.cmake
  • cmake_uninstall.cmake
  • Orthanc.xcodeproj

To build the project, I entered the following command in the terminal window inside the build folder :

xcodebuild -configuration Release

The build was successful, the following warnings have been issued :

  • 3 -> curl
  • 1 -> lua
  • 4 -> monggose
  • 5 -> zlib
  • 3 -> openssl
  • > 100 -> DCMTK
  • 1 -> Orthanc

The following figure shows the building process when using the Xcode GUI.

Orthanc

Orthanc Building with Xcode GUI

The eight targets are show at the left in red. To build the Release version, I modified the scheme in the Xcode-GUI. Building with the command line is much easier.

After the succesfull  build, the following folders and files were added to the Build folder :

  • Release/
  • Orthanc.build/

The Release folder contains the executables Orthanc, UnitTest and OrthancRecoverCompression, the libraries libCoreLibrary.a, libOpenSSL.a, libServerLibrary.a, libServeFolders.mainline.dylib and libModalityWorklists.mainline.dylib. These files are the targets of the Xcode building process.

Running the Orthanc server

The Orthanc configuration file Configuration.json is located in the folder orthanc-default/Resources. I copied this file into the Release folder and started the DICOM server with the command

./Orthanc Configuration.json

inside the Release folder.

Orthanc

Orthanc Server Start with Terminal Window

At the first start of the server, a new folder OrthancStorage is created inside the Release directory. The OrthancStorage folder contains the SQLite files index, index-shm and index-wal.

Entering the url localhost:8024 in the Safari address field opens the main window (explorer) of the Orthanc server.

Orthanc Explorer

Orthanc Explorer at localhost

Clicking the upload button opens an new window in the Orthanc server where I added some DICOM files from CD’s (drag and drop).

Orthanc

Uploading DICOM files with Orthanc Server

The DICOM files are saved in sub-folders in the OrthancStorage directory in a flat structure.

I modified the configuration.json file to allow the remote access to the server from another computer located in the same local network.

/**
* Security-related options for the HTTP server
**/
// Whether remote hosts can connect to the HTTP server
"RemoteAccessAllowed" : true,

The remote anonymous access is now possible. When the remote access is not allowed, the server requests a user-id and password when entering the URL in the browser address bar :

http://192.168.168.55:8042/app/explorer.html

Orthanc allows the following actions :

Action Patient Study Series Instance
protect/unprotect x
delete x x x x
send to remote modality x x x x
anonimize x x x
preview x x
download ZIP x x x
download DICOMDIR x x x
download DICOM file x
download JSON file x

Protection

Because of its focus on low-end computers, Orthanc implements disk space recycling: the oldest series of images can be automatically deleted when the available disk space drops below a threshold, or when the number of stored series grows above a threshold. This enables the automated control of the disk space. Recycling is controlled by the MaximumStorageSize and the MaximumPatientCount options in the Orthanc configuration file. It is possible to prevent patient data from being automatically recycled by using the Unprotected/Protected switch that is available in Orthanc Explorer.

Testing the server

When the UnitTests executable is launched from the terminal window in the Release folder, 163 tests from 43 test cases were run. All these 163  tests passed. Two tests were disabled.

Orthanc UnitTests

Orthanc UnitTests

Two new folders were created in the Release folder by the testing process : UnitTestsResults and UnitTestsStorage.

RESTful API

The following list shows the main RESTful commands (links work only in my local network):

  • Patients : http://localhost:8042/patients
  • Studies : http://localhost:8042/studies
  • Series : http://localhost:8042/series
  • Instances : http://localhost:8042/instances
  • Patient Name : http://localhost:8042/patients/ba1682fb-3fc01dc1-acaf1294-c0d61888-69ba054b
  • Study CT Colonne cervicale : http://localhost:8042/studies/d4c42ef2-91794610-dfda2fe3-89fff37f-6d38b159
  • Series Col. Cervicale Mou 2.0 MPR spine multi : http://localhost:8042/series/e7f7f651-aeacf5d4-a3832d08-3c7a3efa-2eff3c3a
  • Instance 4 : http://localhost:8042/instances/8d5edbe5-073a70b9-c46dcaa7-9d54a495-6dc5ed32
  • Download instance.dcm : http://localhost:8042/instances/8d5edbe5-073a70b9-c46dcaa7-9d54a495-6dc5ed32/file
  • Simplified tags : http://localhost:8042/instances/8d5edbe5-073a70b9-c46dcaa7-9d54a495-6dc5ed32/simplified-tags
  • Tags : http://localhost:8042/instances/8d5edbe5-073a70b9-c46dcaa7-9d54a495-6dc5ed32/tags
  • Content : http://localhost:8042/instances/8d5edbe5-073a70b9-c46dcaa7-9d54a495-6dc5ed32/content
  • Preview : http://localhost:8042/instances/8d5edbe5-073a70b9-c46dcaa7-9d54a495-6dc5ed32/preview

A complete grid of the Orthanc RESTful API is available as Google Spreadsheet.

Links

Orthanc Book

Google groups discussions :

Other contributions :

Optional Variables in Apple Swift

Last update: October 26, 2016

Swift is Apples new programming language for iOS, OS X, watchOS, and tvOS app development. The current version is 3.0. Swift provides its own versions of all fundamental data types :

  • Int for integers
  • Double for 32 bit decimals (floating-point values)
  • Float for 64 bit decimals (floating-point values)
  • Bool for Boolean values
  • String for text

Integers are either signed (positive, zero, or negative) or unsigned (positive or zero). Integer literals can be written as:

  • A decimal number, with no prefix
  • A binary number, with a 0b prefix
  • An octal number, with a 0o prefix
  • A hexadecimal number, with a 0x prefix

Floating-point literals can be decimal (with no prefix), or hexadecimal (with a 0x prefix). Decimal floats can also have an optional exponent, indicated by an uppercase or lowercase e.

Swift also provides powerful versions of the three primary collection types :

  • Array
  • Set
  • Dictionary

Swift differentiates between constants and variables. The value of a constant cannot be changed once it is set, whereas a variable can be set to a different value in the future. Constant and variable names can contain almost any character, including Unicode characters.

let π = 3.14159
你好 = "你好世界"
🐶🐮 = "blablabla"

Constants are declared with the keyword “let”.

let myName = "Marco"

Constants are also called immutable because they cannot be changed after you have stored data in them.

Variables are declared with the keyword “var”. Variables are called mutable because you can constantly change the data that they store.

var x = 1.2

There are several possibilities to define a variable or a constant :

implicit :

var yourName = "Oscar"

explicit :

var yourName: String = "Oscar"

separated :

var yourName: String
yourName = "Oscar"

multiple line :

var x=1.2, y=3.4, z=5.6

typealias :

typealias FirstName = String
var hisName: FirstName = "Jeannot"

computed (getter) :

var number: Double {
  get {
    return x + y + z
    }
}

Swift is a type-safe language, which means the language prevents you from passing by mistake a wrong data type to a variable. Data Types can be converted with the functions Int( ), Double( ), Float( ), …

When a variable is declared, it can’t be used until data is stored in it, otherwise the program fails. Initially storing dummy data in a variable can cause errors. Therefore Swift uses the concept of optional variables. If an optional variable contains nothing, it’s considered to hold a value called nil. To create an optional variable, you declare it with its datatype, followed by a question mark :

var ourName : String?

Storing data in an optional variable is not different than storing data in an ordinary variable.

ourName = "Simone"

Retrieving data from an optional variable is however different and requires additional steps. After checking that the optional variable contains data, you have to unwrap it to get the actual data.  Unwrapping is done with the exclamation mark :

print(ourName!)

If you retrieve an optional variable containing a nil value the program will fail. Therefore we must first check that it contains data. This can be done in two ways :

explicit check

if ourName != nil {
   // retrieve value with ourName!
} else {
   // do something else
}

optional binding (constant assignment)

if let rumpelstilzchen = ourName {
  // retrieve value with rumpelstilzchen or ourName!
}

Optional variables are at the heart of many of Swift’s most powerful features. Once you understand the concept, they are very useful to link a user interface item to Swift code with IBOutlet variables.

A common user interface are text fields that are often empty at the program start. If a IBOutlet is defined as optional variable as follows

@IBOutlet weak var labelText: NSTextField?

we need to use the exclamation mark every time we want to access the data stored in this variable, which can be error prone and make the code hard to read. If we define the IBOutlet variable as an implicit unwrapped optional variable with an exclamation mark

@IBOutlet weak var labelText: NSTextField!

we can access it without question mark if it contains a value. In the case of IBOutlets Xcode catches any potential error, but this is not the case for other potential variables where you need to check and unwrap yourself the data.

Orthanc Raspberry Pi

Last update : March 20, 2016

This contribution explains how to implement an Orthanc DICOM PACS Server on a Raspberry Pi (RPI) standalone single-board computer. The Orthanc source code was compiled on a Raspberry Pi 1 model B computer and tested on RPI models B Pi 1, Pi 2 and Pi 3. I use Raspbian Jessie for my RPI’s, a free operating system based on Debian, optimized for the Raspberry Pi hardware. I call the resulting mini PACS server an OrthancPi.

rpi

Raspberry Pi genealogy

Debian Med

An Orthanc package for Debian is available at the Debian website. This package is part of Debian Med, a specific flavour of Debian that is particularly well fit for the requirements for medical practice and biomedical research. The Debian Med package is maintained by the developer of Orthanc, Sébastien Jodogne, a Medical Imaging Engineer at the Medical Physics Department from the University Hospital of Liège (CHU) in Belgium.

The stable Orthanc version for Debian Jessie is 0.8.4. The Orthanc version 1.0 is only available for the testing (Stretch) and for the unstable (SID) Debian distributions. A release for the armhf architecture is part of the Orthanc package. The file list of the orthanc package in the Debian stretch distribution for the armhf architecture is the following :

/etc/init.d/orthanc
/etc/orthanc/orthanc.json
/etc/orthanc/serve-folders.json
/etc/orthanc/worklists.json
/usr/lib/orthanc/libModalityWorklists.so.1.0.0
/usr/lib/orthanc/libServeFolders.so.1.0.0
/usr/sbin/Orthanc
/usr/share/doc/orthanc/NEWS.gz
/usr/share/doc/orthanc/README.Debian
/usr/share/doc/orthanc/changelog.Debian.armhf.gz
/usr/share/doc/orthanc/changelog.Debian.gz
/usr/share/doc/orthanc/changelog.gz
/usr/share/doc/orthanc/copyright
/usr/share/lintian/overrides/orthanc
/usr/share/man/man1/Orthanc.1.gz
/usr/share/orthanc/plugins/libModalityWorklists.so
/usr/share/orthanc/plugins/libServeFolders.so

Orthanc Source Code

RPI’s are based on the ARM architecture and Raspbian releases usually follow the corresponding Debian release, but do deviate in a handful of cases. For this reason I preferred to build Orthanc version 1.0 from the source code, located on Bitbucket, on the Raspberry Pi hardware.

I downloaded the repository and put the content into a folder named Orthanc in the Raspberry Pi /home/pi/ directory. The following packages needed for compilation and linking have been installed first :

sudo apt-get install build-essential unzip cmake mercurial \
uuid-dev libcurl4-openssl-dev liblua5.1-0-dev \
libgoogle-glog-dev libgtest-dev libpng-dev libjpeg-dev \
libsqlite3-dev libssl-dev zlib1g-dev libdcmtk2-dev \
libboost-all-dev libwrap0-dev libjsoncpp-dev libpugixml-dev

I created a new folder OrthancBuild inside the /home/pi/ directory and executed the following commands :

cd OrthancBuild
cmake -DSTATIC_BUILD=ON -DCMAKE_BUILD_TYPE=Release ~/Orthanc
make

During the configuration process, the following files have been downloaded from the website http://www.montefiore.ulg.ac.be/~jodogne/Orthanc/ThirdPartyDownloads/ :

All the files have been saved in a new folder orthanc-default/ThirdPartyDownloads. All the third-party dependencies are statically linked to the Orthanc build. The compilation takes more time (several hours), compared to the default behavior where system wide libraries are used. Statically linked builds are however easier to share and to clone.

The result of the compilation was the generation of the following files :

  • Orthanc (executable)
  • UnitTests (executable)
  • libServeFolders.so.mainline (shared library) -> renamed to libServeFolders.so
  • libModalityWorklist.so.mainline (shared library) -> renamed to libModalityWorklist.so
  • libCoreLibrary.a (AR archive)
  • libServerLibrary.a (AR archive)
  • libOpenSSL.a (AR archive)

Running the UnitTests shows that all 154 tests from 43 test cases passed, 2 tests were disabled.

Orthanc UnitTests

Orthanc UnitTests

Orthanc plugins

I used the same procedure to compile the plugins DICOMweb and WebViewer. The source code was copied into the folders /home/pi/Dicomweb/ and /home/pi/Webviewer/. I created the new folders /home/pi/DicomwebBuild/ and /home/pi/WebviewerBuild and finally executed the commands

cd /home/pi/DicomwebBuild
cmake -DSTATIC_BUILD=ON -DCMAKE_BUILD_TYPE=Release ~/Dicomweb
make

cd /home/pi/WebviewerBuild
cmake -DSTATIC_BUILD=ON -DCMAKE_BUILD_TYPE=Release ~/Webviewer
make

The following third-party libraries are used by the plugins :

Dicomweb Webviewer
boost_1_59_0 boost_1_59_0
GDCM-prefix GDCM-prefix
gtest-1.7.0 gtest-1.7.0
jsoncpp-0.10.5 jsoncpp-0.10.5
pugixml-1.4
zlib-1.2.7
cornerstone-0.8.4
javascript-libs
jquery-ui-1.11.3
jspanel
jsurl-1.8.6
pako-0.2.5
sqlite-amalgamation-3071300

The shared libraries libOrthancDicomWeb.so.mainline and libOrthancWebViewer.so.mainline were created as a result of the compilation and linking process. I renamed these libraries without the mainline suffix.

The results of the UnitTests runs are shown hereafter :

Orthanc DicomWeb UnitTests

Orthanc DicomWeb UnitTests

webviewer_tests

Orthanc WebViewer UnitTests

OrthancPi

The OrthancPi distribution files are assembled as follows in a directory named /home/pi/orthancpi/.

  • Orthanc  (executable)
  • UnitTests (executable)
  • configuration.json
  • /plugins/libServeFolders.so
  • /plugins/libModalityWorklists.so
  • /plugins/libOrthancDicomWeb.so
  • /plugins/libOrthancWebViewer.so.
  • /web/index.html (OrthancPi welcome page)
  • /python/ (empty)
  • /lua/ (empty)
  • /WorklistsDatabase/ (worklist samples)
  • /OrthancStorage/ (empty)

The default configuration.json file is created with the command

cd orthancpi
./Orthanc --config=configuration.json

I modified the configuration file as follows :

{
 // ***
 // General configuration of Orthanc
 // ***

 // The logical name of this instance of Orthanc. This one is
 // displayed in Orthanc Explorer and at the URI "/system".
  "Name" : "OrthancPi",

 // Path to the directory that holds the heavyweight files
 // (i.e. the raw DICOM instances)
  "StorageDirectory" : "OrthancStorage",

 // Path to the directory that holds the SQLite index (if unset,
 // the value of StorageDirectory is used). This index could be
 // stored on a RAM-drive or a SSD device for performance reasons.
  "IndexDirectory" : "OrthancStorage",

 // Enable the transparent compression of the DICOM instances
  "StorageCompression" : false,

 // Maximum size of the storage in MB (a value of "0" indicates no
 // limit on the storage size)
  "MaximumStorageSize" : 0,

 // Maximum number of patients that can be stored at a given time
 // in the storage (a value of "0" indicates no limit on the number
 // of patients)
  "MaximumPatientCount" : 0,
  
 // List of paths to the custom Lua scripts that are to be loaded
 // into this instance of Orthanc
  "LuaScripts" : [
  ],

 // List of paths to the plugins that are to be loaded into this
 // instance of Orthanc (e.g. "./libPluginTest.so" for Linux, or
 // "./PluginTest.dll" for Windows). These paths can refer to
 // folders, in which case they will be scanned non-recursively to
 // find shared libraries.
 
  "Plugins" : [
  "../plugins/libServeFolders.so",
  "../plugins/libOrthancWebViewer.so",
  "../plugins/libOrthancDicomWeb.so",
  "../plugins/libModalityWorklists.so"
  ],
  
"Worklists" : {
    "Enable": true,
    "Database": "../WorklistsDatabase"
  }, 
  
 "ServeFolders" : {
        "/web" : "/home/pi/orthancpi/web"
  },

  "DicomWeb" : {
     "Enable" : true,
     "Root" : "/dicom-web/",
     "EnableWadoo" : true,
     "WadooRoot" : "/wado",
     "Host" : "localhost",
     "Ss1" : false
  },

 // **
 //  Configuration of the HTTP server
 // **

 // Enable the HTTP server. If this parameter is set to "false",
 // Orthanc acts as a pure DICOM server. The REST API and Orthanc
 // Explorer will not be available.
  "HttpServerEnabled" : true,

 // HTTP port for the REST services and for the GUI
  "HttpPort" : 8042,

 // When the following option is "true", if an error is encountered
 // while calling the REST API, a JSON message describing the error
 // is put in the HTTP answer. This feature can be disabled if the
 // HTTP client does not properly handles such answers.
  "HttpDescribeErrors" : true,

 // Enable HTTP compression to improve network bandwidth utilization,
 // at the expense of more computations on the server. Orthanc
 // supports the "gzip" and "deflate" HTTP encodings.
  "HttpCompressionEnabled" : true,

 // **
 // Configuration of the DICOM server
 // **

 // Enable the DICOM server. If this parameter is set to "false",
 // Orthanc acts as a pure REST server. It will not be possible to
 // receive files or to do query/retrieve through the DICOM protocol.
  "DicomServerEnabled" : true,

 // The DICOM Application Entity Title
  "DicomAet" : "ORTHANCPI",

 // Check whether the called AET corresponds during a DICOM request
  "DicomCheckCalledAet" : false,

 // The DICOM port
  "DicomPort" : 4242,

 // The default encoding that is assumed for DICOM files without
 // "SpecificCharacterSet" DICOM tag. The allowed values are "Ascii",
 // "Utf8", "Latin1", "Latin2", "Latin3", "Latin4", "Latin5",
 // "Cyrillic", "Windows1251", "Arabic", "Greek", "Hebrew", "Thai",
 // "Japanese", and "Chinese".
  "DefaultEncoding" : "Utf8",

 // The transfer syntaxes that are accepted by Orthanc C-Store SCP
  "DeflatedTransferSyntaxAccepted"     : true,
  "JpegTransferSyntaxAccepted"         : true,
  "Jpeg2000TransferSyntaxAccepted"     : true,
  "JpegLosslessTransferSyntaxAccepted" : true,
  "JpipTransferSyntaxAccepted"         : true,
  "Mpeg2TransferSyntaxAccepted"        : true,
  "RleTransferSyntaxAccepted"          : true,

 // Whether Orthanc accepts to act as C-Store SCP for unknown storage
 // SOP classes (aka. "promiscuous mode")
  "UnknownSopClassAccepted"            : false,

 // **
 // Security-related options for the HTTP server
 // **

 // Whether remote hosts can connect to the HTTP server
  "RemoteAccessAllowed" : true,

 // Whether or not SSL is enabled
  "SslEnabled" : false,

 // Path to the SSL certificate (meaningful only if SSL is enabled)
  "SslCertificate" : "certificate.pem",

 // Whether or not the password protection is enabled
  "AuthenticationEnabled" : false,

 // The list of the registered users. Because Orthanc uses HTTP
 // Basic Authentication, the passwords are stored as plain text.
  "RegisteredUsers" : {
 // "alice" : "alicePassword"
  },

 // **
 //  Network topology
 // **

 // The list of the known DICOM modalities
  "DicomModalities" : {
 // **
 //    * Uncommenting the following line would enable Orthanc to
 //    * connect to an instance of the "storescp" open-source DICOM
 //    * store (shipped in the DCMTK distribution) started by the
 //    * command line "storescp 2000".
 //   **
 // "sample" : [ "STORESCP", "localhost", 2000 ]
	"Horos" : [ "HOROS", "192.168.123.200", 104 ],
	"dcm4che" : [ "DCM4CHE", "192.168.123.201", 104 ]

// **
//    * A fourth parameter is available to enable patches for a
//     * specific PACS manufacturer. The allowed values are currently
//    * "Generic" (default value), "StoreScp" (storescp tool from
//    * DCMTK), "ClearCanvas", "MedInria", "Dcm4Chee", "SyngoVia",
//    * "AgfaImpax" (Agfa IMPAX), "EFilm2" (eFilm version 2), and
//     * "Vitrea". This parameter is case-sensitive.
//  **
// "clearcanvas" : [ "CLEARCANVAS", "192.168.1.1", 104, "ClearCanvas" ]
  },

 // The list of the known Orthanc peers
  "OrthancPeers" : {
 // **
//     * Each line gives the base URL of an Orthanc peer, possibly
//    * followed by the username/password pair (if the password
//    * protection is enabled on the peer).
//  **
// "peer"  : [ "http://localhost:8043/", "alice", "alicePassword" ]
// "peer2" : [ "http://localhost:8044/" ]
	"OrthancMac" : [ "http://192.168.123.210:8042/" ]
  },

// Parameters of the HTTP proxy to be used by Orthanc. If set to the
// empty string, no HTTP proxy is used. For instance:
//   "HttpProxy" : "192.168.0.1:3128"
//   "HttpProxy" : "proxyUser:proxyPassword@192.168.0.1:3128"
  "HttpProxy" : "",

// Set the timeout for HTTP requests issued by Orthanc (in seconds).
  "HttpTimeout" : 10,

// Enable the verification of the peers during HTTPS requests.
// Reference: http://curl.haxx.se/docs/sslcerts.html
  "HttpsVerifyPeers" : true,

// Path to the CA (certification authority) certificates to validate
// peers in HTTPS requests. From curl documentation ("--cacert"
// option): "Tells curl to use the specified certificate file to
// verify the peers. The file may contain multiple CA
// certificates. The certificate(s) must be in PEM format."
  "HttpsCACertificates" : "",

// **
// Advanced options
// **

// Dictionary of symbolic names for the user-defined metadata. Each
// entry must map an unique string to an unique number between 1024
// and 65535.
  "UserMetadata" : {
 // "Sample" : 1024
  },

// Dictionary of symbolic names for the user-defined types of
// attached files. Each entry must map an unique string to an unique
// number between 1024 and 65535. Optionally, a second argument can
// provided to specify a MIME content type for the attachment.
  "UserContentType" : {
 // "sample" : 1024
 // "sample2" : [ 1025, "application/pdf" ]
  },

// Number of seconds without receiving any instance before a
// patient, a study or a series is considered as stable.
  "StableAge" : 60,

// By default, Orthanc compares AET (Application Entity Titles) in a
// case-insensitive way. Setting this option to "true" will enable
// case-sensitive matching.
  "StrictAetComparison" : false,

// When the following option is "true", the MD5 of the DICOM files
// will be computed and stored in the Orthanc database. This
// information can be used to detect disk corruption, at the price
// of a small performance overhead.
  "StoreMD5ForAttachments" : true,

// The maximum number of results for a single C-FIND request at the
// Patient, Study or Series level. Setting this option to "0" means
// no limit.
  "LimitFindResults" : 0,

// The maximum number of results for a single C-FIND request at the
// Instance level. Setting this option to "0" means no limit.
  "LimitFindInstances" : 0,

// The maximum number of active jobs in the Orthanc scheduler. When
// this limit is reached, the addition of new jobs is blocked until
// some job finishes.
  "LimitJobs" : 10,

// If this option is set to "false", Orthanc will not log the
// resources that are exported to other DICOM modalities of Orthanc
// peers in the URI "/exports". This is useful to prevent the index
// to grow indefinitely in auto-routing tasks.
  "LogExportedResources" : true,

// Enable or disable HTTP Keep-Alive (deprecated). Set this option
// to "true" only in the case of high HTTP loads.
  "KeepAlive" : false,

// If this option is set to "false", Orthanc will run in index-only
// mode. The DICOM files will not be stored on the drive. Note that
// this option might prevent the upgrade to newer versions of Orthanc.
  "StoreDicom" : true,

// DICOM associations are kept open as long as new DICOM commands
// are issued. This option sets the number of seconds of inactivity
// to wait before automatically closing a DICOM association. If set
// to 0, the connection is closed immediately.
  "DicomAssociationCloseDelay" : 5,

  // Maximum number of query/retrieve DICOM requests that are
  // maintained by Orthanc. The least recently used requests get
  // deleted as new requests are issued.
  "QueryRetrieveSize" : 10,

// When handling a C-Find SCP request, setting this flag to "true"
// will enable case-sensitive match for PN value representation
// (such as PatientName). By default, the search is
// case-insensitive, which does not follow the DICOM standard.
  "CaseSensitivePN" : false,
  
// Register a new tag in the dictionary of DICOM tags that are known
// to Orthanc. Each line must contain the tag (formatted as 2
// hexadecimal numbers), the value representation (2 upcase
// characters), a nickname for the tag, possibly the minimum
// multiplicity (> 0 with defaults to 1), and possibly the maximum
// multiplicity (0 means arbitrary multiplicity, defaults to 1).
  "Dictionary" : {
// "0014,1020" : [ "DA", "ValidationExpiryDate", 1, 1 ]
  }
}

I copied the whole orthancpi directory with an USB card reader to different Raspberry Pi modules which were configured to run as headless servers with remote control, using various wifi adapters. The process is explained in my post Rasperry Pi revisited.

To start the OrthancPi server at boot, a file orthanc.desktop has been added to the /home/pi/.config/autostart/ folder. This is the content of this file

[Desktop Entry]
Type=Application
Name=ORTHANC
Exec=/home/pi/orthancpi/Orthanc /home/pi/orthancpi/configuration.json
StartupNotify=false

OrthancPi can also be configured to run as a Debian daemon.

An OrthancPi server will be used in the context of the RadioLogic project, a training tool for radiology. This tool will be used in classrooms without Internet access. The OrthancPi server works as wireless access point. To extend the WiFi range, a  repeater can be used. The RadioLogic tool is web based and optimized to run on iPad’s which are connected to the OrthancPi WLAN. The following figure shows two OrthancPi servers with USB WiFi adapters using  Ralink RT5370 chips.

OrthancPi's with USB WiFi adapters, SDcards and SDcard-reader

OrthancPi’s with USB WiFi adapters, SDcards and SDcard-reader

A user guide for the OrthancPi is available at the RadioLogic website. Disk image files to set up an OrthancPi server in a plug and play way, with different WiFi adapters, are available at the same webpage.

Raspberry Pi Revisited

Last update : March 20, 2016

Referring to my first post about the Raspberry Pi, I am pleased to provide an update about my ongoing projects, with a special focus on a wireless headless operation. Headless means running it without a mouse, keyboard and monitor, via network connections. Wireless means using a WLAN connection with a WiFi dongle.

Raspberry Pi's

Raspberry Pi’s with SDcards and WiFi dongles

Raspbian Jessie

A new Raspbian (the Raspberry Pi Foundation’s official supported operating system) version, based on Debian Jessie, was launched on November 21, 2015. Updates were released on February 9, February 26 and March 18, 2016. I upgraded my Raspberry Pi computers to the February 26 version (kernel 4.1.18+ on RPi 1 models; kernel 4.1.18-v7+ on RPi 2 and 3 models). I used the same procedure as last time : writing the downloaded Raspbian image with the Win32DiskImager tool on my Windows computer to 8GB and 16GB SDcards. The current version of this tool is 0.9.5, released on March 19, 2014.

Raspberry Pi model B

Raspberry Pi model B

It was not possible to overwrite the old Raspbian image on my Raspberry Pi SDcards with the new one. Reformatting the used SDcards with the usual tools (diskpart, SDCard Formatter 4, …) was not successful. Windows sees only the 56 MB FAT32 partition, but not the much larger Linux partition. It was not possible to recover the lost space. After some trials and errors, I finally reformatted the SDcards in my Nikon camera. It worked like a charm. Writing the new Raspbian image to the new formatted SDcards was then no problem.

Raspberry Pi model 2

Raspberry Pi model 2

Configuring Raspbian

After the first booting of the Raspberry Pi computer, the new desktop appears.

Raspian Jessie Desktop

Raspbian Jessie Desktop

The desktop contains only one icon : the Trash. The Raspberry logo is shown in the center. The menu is in the left upper corner, some icons are in the right upper corner. It’s possible to reconfigure the menu list. One new icon is the network configuration tool based on Roy Marples‘s dhcpcd and dhcpcd-ui packages.

The configuration panel allows to expand the filesystem.

Raspberry Pi Configuration

Raspberry Pi Configuration

After expanding and rebooting the system, the File Manager (PCManFM 1.2.3) shows a free space of 3,6 GB on my 8GB SDcard, compared to a free space of 98,1 MB before the expansion. The Raspbian Jessie version allows to set the locale to “lb” for Luxembourg in the localisation tab, and Luxembourg is also included as country in the timezone list. The french-swiss keyboard used in Luxembourg figures now, as expected, among the Switzerland keyboards.

The computer was recognized by my Fritzbox router and the IP address 192.168.178.62 was assigned by the DHCP server.

Updating and checking the Raspbian version

The file /etc/apt/sources.list contains the following source (one line) :

deb http://mirrordirector.raspian.org/raspian/ 
jessie main contrib non-free rpi

I replaced mirrordirector by archive to avoid numerous download fails. To download the source code of packages with apt-get source, the following line should be un-commented in the sources.list file (one line) :

deb-src http://archive.raspian.org/raspian/ 
jessie main contrib non-free rpi

Raspbian Jessie is based on Linux version 8. A lite version without the GUI is separately available. I preferred to install the full version and to remove some large packages like Wolfram, Office and some games with the following command :

sudo apt-get remove --purge wolfram-engine libreoffice* minecraft-pi \
python-minecraftpi python3-minecraftpi

The files /usr/share/raspi-ui-overrides/applications/wolfram-mathematica.desktop and ../wolfram-language.desktop must be deleted to remove the related empty icons in the task bar.

To install the additional packages needed for the headless operation I entered the command :

sudo apt-get update
sudo apt-get install x11vnc hostapd dnsmasq lighttpd haveged

Lists of the resulting installed packages for my project are provided at the following links :

The default Raspbian terminal application is LXTerminal.

To upgrade all Debian packages to the latest version, I launched the well known commands

sudo apt-get update
sudo apt-get upgrade

in the terminal window. Two packages were upgraded. To show the installed versions, we can use the following commands :

  • uname – a        > kernel
  • lsb_release -a       > distribution
  • /opt/vc/bin/vcgencmd version       > firmware
  • cat  /proc/version
  • cat  /proc/cpuinfo     > CPU
  • cat  /proc/meminfo    > memory
  • cat  /proc/partitions    > partitions
  • cat  /etc/debian_version
  • cat  /etc/issue

Show Raspian Versions

Show Raspban versions and system informations

The command dmesg (display message or driver message) prints the message buffer of the kernel. An error “bcm2708_fb soc.fb: Unknown ioctl 0x40187a22” is listed.

dmesg

display the Raspberry Pi kernel message buffer

Remote Control

There are several methods available to remotely control a headless Raspberry Pi computer. The most common are :

  • Secure Shell (SSH)
  • Remote Desktop (RDP)
  • Tight-VNC
  • X11-VNC

SSH

An SSH client is a software program which uses the secure shell protocol to connect to a remote computer. SSH provides a secure channel over an unsecured network in a client-server architecture. There are numerous SSH clients available for the different operating systems. For Windows an often used SSH program is PuTTY. PuTTY is a free and open-source terminal emulator, serial console and network file transfer application which was written and is maintained primarily by Simon Tatham.

Putty

Secure Shell Terminal PuTTY for Windows

The following security alert is displayed by the PuTTY terminal at the first connection to a new server.

Alert

PuTTY security alert

The next figure shows the welcome message sent by the Raspberry Pi after a successful login. The default user name is pi and the default password is raspberry.These parameters can be changed in the Raspbian configuration.

Putty

PuTTY welcome message

The Apple Mac computers have an integrated secure shell in the standard terminal program. A connection can be established with the following command :

ssh username@server

os

Secure shell in a MacBook Air

I use the WebSSH app for my iOS devices and the JuiceSSH app for my Android tablets.

RDP

Remote Desktop Protocol (RDP) is a proprietary protocol developed by Microsoft, which provides a user with a graphical interface to connect to another computer over a network connection. The user employs RDP-client software for this purpose, while the other computer must run RDP-server software.

To install the remote desktop server application XRDP (version 0.6.1-2) on Raspberry Pi, I launched the command

sudo apt-get install xrdp

The next figure shows the Remote Desktop Connection Panel on Windows :

XRDP

XRDP Logon settings

RDP Clients exist not only for Windows and Windows Mobile, but also for OS X (version 8.0.24) , Linux, iOS (version 8.1.17) and Android.

The problem with european keyboards explained in my former Raspberry Pi contribution persist and is even more difficult to solve on tablets. For this reason I discarded the RDP solution for my future projects.

Tight-VNC

Tight-VNC is a cross-platform free and open-source remote desktop software application that uses and extends the remote framebuffer (RFB) protocol of Virtual Network Computing (VNC) to control another computer’s screen remotely. It was created by Constantin Kaplinsky.

Most tutorials about remote desktops refer to the Tight-VNC-Server as favorite solution. One disadvantage of this application is that it uses only virtual desktops, which is not optimal for a headless operation of a computer. Therefore I discarded the Tight-VNC-Server for my projects, but i use the Tight-VNC-Client on Windows as viewer to work with an X11-VNC-Server.

X11-VNC

X11-VNC allows remote access from a remote client to a computer hosting an X Window (X11) session and the x11vnc server software, continuously polling the X server’s frame buffer for changes. X11-VNC does not create an extra display for remote control. Instead, it uses the existing X11-display shown on the monitor in real time.

To install an X11-VNC-server on Raspberry Pi, we enter the command

sudo apt-get install x11vnc

To start the server the first time we use the command

x11vnc -usepw -forever -display :0

A password (= raspberry) is defined at this first launch, verified and saved in the /home/pi/.vnc/ directory. The window 0 refers to the visible desktop and is related to the port number 5900. Additional virtual desktops can be configured with the display numbers 1, 2, 3 … and are associated with the port numbers 5901, 5902, 5903 … To launch the VNC-server automatically when the Raspberry Pi boots, we create an auto-start file

/home/pi/.config/autostart/x11vnc.desktop

with the following content :

[Desktop Entry]
Type=Application
Name=X11VNC
Exec=x11vnc -usepw -forever -display :0
StartupNotify=false

A VNC viewer is installed at a remote computer to access the Raspberry Pi desktop. I use the free Tight-VNC-Viewer for Windows (version 2.7.10 released on July 24, 2013) and the RealVNC viewer for iOS (version 2.4.1 released on December 2, 2015). A VNC viewer is also available for Android (version 2.0.0.016450 released on February 11, 2016) and other operating systems. A VNC client is integrated in OS X an can be opened in Safari with the command

vnc://IP address:port number

The VNC-server takes the display size from the resolution of the connected HDMI monitor. In case of headless operation, the display size on the VNC viewer is very small. To adapt the display size to the iPad (my preferred VNC viewer), I uncommented and modified the following lines in the configuration file /boot/config.txt.

hdmi_force_hotplug=1
hdmi_group=2
hdmi_mode=16
hdmi_drive=2

For security reasons I configured the VNC-server to be only accessible in the local network.

WLAN Adapters

To set up a WiFi connection to access the Raspberry Pi wirelessly, we need a WiFi dongle. I use the following 150Mbps Wireless N Nano USB adapters for my Raspberry Pi projects :

The Raspberry Pi 3 model has an onboard WiFi chip. The command lsusb shows the ID of the dongles, here for the official Raspberry WiFi adapter.

lsusb

lsusb result for Raspberry dongle : Bus 001 Device 004 = Broadcom Corp. ID 0a5c:bd1e

The command lsmod shows which loadable kernel modules are currently loaded.

lsmod

lsmod result for the Raspberry WiFi dongle

The modules related to the Broadcom WiFi dongle are brcmfmac, brcmutil and cfg80211. Detailed informations about these modules are obtained with the command modinfo modulename :

modinfo

modinfo results for the Raspberry WiFi dongle

The associated preinstalled drivers and utilities are

/lib/modules/4.1.18+/kernel/drivers/net/wireless/brcm80211/brcmfmac/brcmfmac.ko
/lib/modules/4.1.18+/kernel/drivers/net/wireless/brcm80211/brcmutil/brcmutil.ko
/lib/modules/4.1.18+/kernel/net/wireless/cfg80211.ko

In the case of a RPi 2 or 3 device, the module is /4.1.18-V7+/.

The command iw list shows the features of the installed WiFi dongle.

iw list results

iw list results for the Raspberry WiFi dongle

Among the listed features, the supported interface modes are the most important. The support of AP means that the WiFi dongle can be used as WLAN access point.

The command dmesg (display message or driver message) prints the message buffer of the kernel. The result shows an issue with the brcmfmac driver for the official Raspberry WiFi dongle.

brcmfmac

brcmfmac errors issued by dmesg command

[ 11.060813] brcmfmac: brcmf_c_preinit_dcmds: 
Firmware version = wl0: Apr 3 2014 04:43:32 
version 6.10.198.66 (r467479) FWID 01-32bd010e
[ 11.105542] brcmfmac: brcmf_cfg80211_reg_notifier: not a ISO3166 code
[ 14.284071] brcmfmac: brcmf_add_if: ERROR: netdev:wlan0 already exists
[ 14.284233] brcmfmac: brcmf_add_if: ignore IF event

Nevertheless the official WiFi dongle seems to work as expected.

Running the commands lsusb, lsmod and iwlist for the other 3 WiFi dongles and the onboard WiFi chip allows me to dress the following table :

Dongle Chipset ID WPA driver AP support
D-Link DWA-131 Realtek RTL8192CU 2001:330d 8192cu.ko yes
TP-Link TL-WN725N Realtek RTL8188EUS 0bda:8179 8188eu.ko yes
Raspberry WiFi Broadcom BCM43143 0a5c:bd1e brcmfmac.ko yes
Racksoy Mini Stick Ralink RT5370 148f:5370 rt2800usb.ko yes
RPI 3 onboard chip Broadcom BCM43438 ————- brcmfmac.ko yes

8192cu

lsusb result for the Wifi dongle D-LINK DWA-131 (module 8192cu)

The command modinfo 8192cu confirms that the dongle with ID 2001:330d is supported by the preinstalled driver 8192.ko located at

/lib/modules/4.1.18+/kernel/drivers/net/wireless/rtl8192cu/8192cu.ko

The WiFi dongles Raspberry, Racksoy and D-Link DWA-131 work out of the box in my Raspberry Pi. The following figure shows the Raspian Desktop with the activated Wifi icon. The two pasted message panels show the informations displayed when the mouse hovers the WiFi icon : the first case with additional wired Ethernet connection, the second case without Ethernet connection.

WiFi

Raspbian WiFi information panel

The next figure shows the information displayed in my Fritzbox gateway concerning the WLAN and the Ethernet connections of the Raspberry Pi :

WiFi

Raspberry Pi connections listed in the Fritzbox home-network panel

The fourth WiFi dongle (TP-Link TL-WN725N) uses the Realtek rtl8188EUS chip. Out of the box, the dongle worked, but with a very low signal indicator, although the Raspberry Pi was near my WLAN gateway. The lsmod command shows a driver r8188eu among the currently loaded kernel modules. This driver r8188eu.ko is located in the folder

/lib/modules/4.1.18+/kernel/drivers/staging/rtl8188eu/

The Linux Staging tree is used to hold stand-alone drivers and filesystems that are not ready to be merged into the main portion of the Linux kernel tree, at this point in time, for various technical reasons. The correct driver named 8188eu.ko is not included in the Raspbian Jessie version. TP-Link and Realtek provide source files to compile the driver for specific Linux distributions. An installation guide is included in the zip-compressed driver file. Precompiled drivers for the Raspberry Pi are provided by the community. I used such a precompiled driver for my Linux version 4.1.18+, available at the following link :

https://dl.dropboxusercontent.com/u/80256631/8188eu-20160219.tar.gz

The precompiled package with the 8188eu.ko driver contains a script install.sh to automatize the installation process. I preferred to do it manually. I installed the included driver 8188eu.ko into a new created folder rtl8188 inside the wireless driver directory with the commands

sudo install -p -m 644 8188eu.ko 
/lib/modules/4.1.18+/kernel/drivers/net/wireless/rtl818x/rtl8188
sudo depmod 4.1.18+

Finally I copied the included file 8188eu.conf, blacklisting the staging driver r8188 to the directory

/etc/modprobe.d/

modprobe is a Linux program used to add a loadable kernel module to the Linux kernel or to remove a module from the kernel.

After rebooting the dongle works as expected. For practical reasons I linked copies of the files 8188eu.ko and 8188eu.conf in the present post.

WPA_Supplicant

To connect the Raspberry to a remote WLAN Access Point, a software must run to provide WPA key negotiation with a WPA Authenticator and EAP authentication with an Authentication Server. The most common program for these tasks is wpa_supplicant, a free IEEE 802.11i software implementation developed by Jouni Malinen. In computer networking, a supplicant is an entity at one end of a point-to-point LAN segment that seeks to be authenticated by an authenticator attached to the other end of that link.

wpa_supplicant is a daemon and only one instance of it may run on a machine, all other modifications of security settings are made with the text-based frontend application wpa_cli. wpa_cli is used to query current status, change configuration, trigger events, and request interactive user input. wpa_supplicant is pre-installed in Raspbian Jessie.

wpa_cli status

wpa_cli status

wpa_cli works two ways: interactive and non-interactive

A list of some useful wpa_cli commands is shown below :

  • wpa_cli status
  • wpa_cli terminate

The following command can be used to restart the WiFi connection :

sudo /etc/init.d/networking restart

The wpa configuration file located at /etc/wpa_supplicant/wpa_supplicant.conf has the following content :

ctrl_interface=DIR=/var/run/wpa_supplicant GROUP=netdev
update_config=1
network={
ssid="36-Vullesang-2.4GHz"
psk="secretkey"
key_mgmt=WPA-PSK
}

Hostapd

To use a WiFi dongle in AP mode on Rasperry, you need hostapd or a similar application. wpa_supplicant allows basic AP configuration, but does not include support for most of the AP parameters. Comparing the hostapd.conf with the wpa_supplicant.conf example provides a picture of the difference.

The hostapd module is not pre-installed in Raspbian Jessie. The installation is done as usually with the command

sudo apt-get install hostapd

The version check after the successful installation shows version number 2.3.

hostapd version

hostapd version check

hostapd is developed and maintained by the author of wpa_supplicant, Jouni Malinen from Finland.

I edited the related configuration file

/etc/hostapd/hostapd.conf

as follows for an open network :

# WLAN Router Configuration
interface=wlan0
# driver= autoselected
ssid=radiologic
ignore_broadcast_ssid=0
channel=6 
hw_mode=g 
wmm_enabled=1 
auth_algs=1

To protect and encrypt the network, the following parameters are added to the hostapd.conf file :

# WLAN Encryption 
wpa=2 
rsn_preauth=1 
rsn_preauth_interfaces=wlan0 
wpa_key_mgmt=WPA-PSK 
rsn_pairwise=CCMP 
wpa_passphrase=123456789

Here is a link to my hostapd.conf file. Some explanations about the different configuration parameters used are listed below :

  • # : lines starting with an hash are considered as comments
  • interface : name of the interface to listen on
  • driver : usually detected by the system; in case of failure the name of the driver corresponding to the used dongle must be specified (nl80211, rtl871xdrv, …)
  • ssid : name of the network seen by other devices
  • ignore_broadcast_ssid : define if the network name is visible (broadcasted) or hidden
  • channel : WiFi channel used by the network; valid channels range from 1 to 11 or from 1 to 14, depending on the location
  • hw_mode : wireless mode : A, B and G are available; these are the last characters of the IEEE 802.11 standard. The most common is G (2,4 GHz).
  • wmm_enabled : WiFi multimedia to enhance quality of service (QoS)
  • auth_algs : specification of the authentication algorithm; 1 = OSA
  • country_code : used to set regulatory domain (transmit power, available channels)
  • ieee80211d : set the regulatory limits based on the country code
  • ieee80211n : optional activation of the IEEE 802.11n standard
  • wpa : security settings: 1=wpa; 2=wpa2; 3=wpa & wpa2
  • rsn_preauth :pre-authentication to speed up roaming
  • rsn_preauth_interfaces : list of interfaces from which pre-authentication frames are accepted
  • wpa_key_mgmt : management of the wpa2 WLAN keys; WPA-PSK or WPA-EA
  • rsn_pairwise : encryption algorithm for wpa2; new CCMP or old TKIP
  • wpa_pairwise : encryption algorithm for wpa
  • wpa_passphrase : password specified for the network
  • logger-syslog : instructions about error logging
  • max_num_sta : maximal number of clients accepted by the WLAN
  • deny_mac_file : prevent connections from devices with a MAC address specified in a file

The complete list of hostapd parameters is available at the website of the developer.

The Raspberry WiFi dongle works out of the box with the default hostapd driver nl80211. The Racksoy WiFi dongle works with the autoselected driver rt2800.

Hostapd supporting driver rtl871xdrv

The two other WiFi dongles D-Link DWA-131 and TP-Link TL-WN725N are not supported by the standard hostapd module with the included drivers. Both dongles use Realtek chipsets needing a specific driver, named rtl871xdrv. There are numerous posts and tutorials available at the web dealing with this problem, but only few provide correct and relevant solutions related to the current Raspbian Jessie version.

After some Trial and Error, I ended up with the following procedure :

  1. download the version 2.5 of the hostapd source https://w1.fi/releases/hostapd-2.5.tar.gz from the website https://w1.fi/hostapd/ of Jouni Malinen
  2. extract the archive at /home/pi/hostapd-2.5/
  3. clone the github repository https://github.com/pritambaral/hostapd-rtl871xdrv at /home/pi/hostapd-rtl871xdrv/ with the command
    sudo git clone https://github.com/pritambaral/hostapd-rtl871xdrv
  4. install the modules libnl1, libnl-dev and libssl-dev with the command
    sudo apt-get install libnl1 libnl-dev libssl-dev
  5. change directory to /home/pi/hostapd-2.5/
  6. apply the patch code with the command
    sudo patch -Np1 -i /home/pi/hostapd-rtl871xdrv/rtlxdrv.patch

    Patching the hostapd source

    Patching the hostapd source files

  7. enable the driver in the file .config with the commands
    cd hostapd
    cp defconfig .config
    echo CONFIG_DRIVER_RTW=y >> .config
  8. compile the hostapd module, inside the hostapd folder, with the following command
    sudo make install
  9. check the new installed hostapd version

hostapd version 2.5

hostapd version 2.5 for Realtek rtl871xdrv

The last step is to change the driver name as rtl871xdrv in the hostapd.conf file and to reboot the Raspberry Pi with a Realtek WiFi dongle. After terminating wpa_cli and starting hostapd, we get the confirmation that the Realtek dongles are now working.

hostapd

hostapd launch with driver rtl871xdrv

Running Hostapd

Depending on the used WiFi dongle, we use the native hostapd version 2.3 or the new compiled version 2.5. Before associating hostapd with the wlan0 interface, we have to disassociate this interface with wpa_supplicant by entering the command

sudo wpa_cli terminate

To start the WLAN-Host, we run the command

sudo hostapd /etc/hostapd/hostapd.conf

Adding the optional parameter -dd (after hostapd) in the above command provides a detailed report about the process, which can be very helpful in case of problems. After a few moments the WiFi-panel in the Raspian desktop shows that the wlan0 interface is ssociated with the SSID “radiologic”. The interface is configured as AdHoc network with an self-assigned IP address in the range 169.254.0.0/16.

WiFi panel when hostapd is started

WiFi panel when hostapd is started

I used an iPad as WLAN client to test the WLAN-Host. The SSID “radiologic” is displayed in the list of available WiFi networks as secured WLAN. After entering the defined password “123456789”, the connection is established. The next figure shows the related messages displayed in the Raspbian terminal window.

WLAN-Host messages for two connections and disconnections with an iPad

WLAN-Host messages for two connections and disconnections with an iPad

hostapd can be terminated by pressing simultaneously the keys  “Ctrl” and “c” .

To start hostapd at boot, we need to do some additional tasks. First we must uncomment and complete the parameter DAEMON_CONF in the file /etc/default/hostapd as follows :

DAEMON_CONF="/etc/hostapd/hostapd.conf"

We need to insert the same parameter in the init file /etc/init.d/hostapd.

Next we enable starting of hostapd at booting with the command

sudo systemctl enable hostapd

Enable autostart of hostapd at booting

Enable autostart of hostapd at booting

The new systemctl command synchronizes the booting process with the old legacy sysvinit command using update-rc.d. After a reboot we can check the status of the hostapd service with the command

service hostapd status

or

systemctl status hostapd

Show status of the hostapd service

Show status of the hostapd service

The following commands are used to stop, start, restart or disable hostapd :

sudo systemctl stop hostapd
sudo systemctl start hostapd
sudo systemctl restart hostapd
sudo systemctl disable hostapd

Hostapd needs random data to encrypt the WLAN. In computing, the randomness of data is called entropy. When the entropy is too low, “Add randomness” messages are displayed.

entropy

Raspberry messages related to randomness (entropy)

The entropy level can be checked with the command

cat /proc/sys/kernel/random/entropy_avail

When the returned value is less than 1.000, the entropy is unsufficient for secure cryptographic processes, which is often the case in small systems like the Raspberry Pi. Fortunately there is a solution :  HArdware Volatile Entropy Gathering and Expansion (HAVEGE).

The HAVEGE project is an attempt to provide an easy-to-use, unpredictable random number generator based upon an adaptation of the HAVEGE algorithm. The havege module is installed with the command

sudo apt-get install haveged

Another critical point related to hostapd is the power-save feature of most WiFi dongles. While this is a strong advantage when the WiFi dongle is in infrastructure mode (outbound) where the device is reactivated by the user, this is a great risk in AP mode when the computer works headless. In power-save mode, the WiFi dongle is no longer accessible by an external client and the only solution is to reboot the computer by unplugging and re-plugging the power supply.

We can check the status of power management with iwconfig.

iwconfig

Check the power management status of the WiFi dongle with iwconfig

To prevent the Wifi dongle from entering the power-save mode, we can add the command

wireless-power off

in the /etc/network/interfaces file.

Another possibility is to create configurations files in the directory /etc/modprobe.d/.

Examples for Realtek drivers :

8188eu.conf

options 8188eu rtw_power_mgnt=0

8192cu.conf

options 8192cu rtw_power_mgnt=0

Networking setup

Until now, the WiFi adapter has an auto-assigned IP address and the clients don’t receive an IP address when connecting to the WLAN, which is not a workable solution. We need a static IP address for wlan0 and a DHCP-server to attribute IP addresses to the WLAN clients.

Many tutorials about Raspberry Pi deal with static IP addresses to simplify the access to the RPI when the routing is managed by a DHCP-server. Most of them refer to the legacy ifupdown configuration file /etc/network/interfaces, which is obsolete with Raspbian Jessie using the DHCP-client dhcpcd developed by Roy Marples. The network configuration should be done in the file /etc/dhcpcd.conf. If a static IP address is required for the eth0 interface, a more simple way is to set it in the router of the local network. In my specific case this is a Fritzbox 7390. The best way however is to use the hostname of the Raspberry Pi to access it in the local network. The default hostname is raspberrypi. The hostname can be easily changed in the raspi configuration. The hostname is saved in the files /etc/hosts and /etc/hostnames.

The default configuration of /etc/network/interfaces to be used with dhcpcd is shown below:

# interfaces(5) file used by ifup(8) and ifdown(8)
# Please note that this file is written to be used with dhcpcd
# For static IP, consult /etc/dhcpcd.conf and 'man dhcpcd.conf'
# Include files from /etc/network/interfaces.d:
source-directory /etc/network/interfaces.d
auto lo
iface lo inet loopback
iface eth0 inet manual
allow-hotplug wlan0
iface wlan0 inet manual
wpa-conf /etc/wpa_supplicant/wpa_supplicant.conf

The content of the default configuration of the /etc/dhcpcd file is the following :

# A sample configuration for dhcpcd.
# See dhcpcd.conf(5) for details.
# Allow users of this group to interact with dhcpcd via the control socket.
#controlgroup wheel
# Inform the DHCP server of our hostname for DDNS.
hostname
# Use the hardware address of the interface for the Client ID.
clientid
# or
# Use the same DUID + IAID as set in DHCPv6 for DHCPv4 ClientID as per RFC4361.
#duid
# Persist interface configuration when dhcpcd exits.
persistent
# Rapid commit support.
# Safe to enable by default because it requires the equivalent option set
# on the server to actually work.
option rapid_commit
# A list of options to request from the DHCP server.
option domain_name_servers, domain_name, domain_search, host_name
option classless_static_routes
# Most distributions have NTP support.
option ntp_servers
# Respect the network MTU.
# Some interface drivers reset when changing the MTU so disabled by default.
#option interface_mtu
# A ServerID is required by RFC2131.
require dhcp_server_identifier
# Generate Stable Private IPv6 Addresses instead of hardware based ones
slaac private
# A hook script is provided to lookup the hostname if not set by the DHCP
# server, but it should not be run by default.
nohook lookup-hostname

The lo interface (loopback) serves communication with localhost and is started automatically at boot. The IP address for the eth0 interface is requested by dhcpcd and provided by the LAN-router. The configuration for the wlan0 interface is provided by the /etc/wpa_supplicant/wpa_supplicant.conf file.

The status of the dhcpcd client is requested with the command

sudo systemctl status dhcpcd

dhcpcd status

Status of the dhcpcd client

For the headless operation of the Raspberry Pi with a WLAN Access Point I use a minimal network configuration :

/etc/network/interfaces

# Legacy interface (ifupdown) file used with dhcpcd
auto lo
iface lo inet loopback
iface eth0 inet manual

/etc/dhcpcd.conf

# DHCPCD configuration
hostname
clientid
persistent
option rapid_commit
option domain_name_servers, domain_name, domain_search, host_name
option classless_static_routes
option ntp_servers
require dhcp_server_identifier
slaac private
nohook lookup-hostname
interface wlan0
inform 192.168.123.1
static routers=192.168.123.1

A static IP address (192.168.123.1) can be attributed to wlan0 by means of the WiFi Network Panel opened by right clicking the WiFi icon in the task bar.

WiFi

WiFi Popup Menu to manage panels

The data inserted in the WiFi Networks Settings are saved in the /etc/dhcpcd.conf file as shown above.

Wifi

Network preferences wlan0 interface options

DNSMASQ

One piece of the puzzle is still missing : a Dynamic Host Configuration Protocol (DHCP) Server to provide IP addresses to the WLAN clients. There are several dhcp-server packages available for Raspbian. I selected dnsmasq, a very useful module to set up a complete WLAN router. dnsmasq is a Domain Name System (DNS) forwarder and a DHCP-server for small computer networks, which are easily configurable, with low usage of system resources.

dnsmasq is installed with the command

sudo apt-get install dnsmasq

The configuration is done in the file /etc/dnsmasq.conf. Here is a link to the content of the default dnsmasq.conf file. My minimal configuration is the following :

# DNSMASQ Configuration
interface=wlan0
no-dhcp-interface=eth0
dhcp-range=192.168.123.2,192.168.123.99,12h

The DHCP-server is restricted to the wlan0 interface, the eth0 interface is excluded. The range of IP addresses to attribute to the WLAN clients is bounded by 2 and 99 in the sub-network 192.168.123.0. The lease time is 12 hours.

dnsmasq is managed with the same type of commands as hostapd :

sudo systemctl start dnsmasq
sudo systemctl stop dnsmasq
sudo systemctl restart dnsmasq
sudo systemctl enable dnsmasq 
sudo systemctl disable dnsmasq 
sudo systemctl status dnsmasq

DNSMASQ

Status of the dnsmasq server

To test the correct access with WLAN clients to the Raspberry Pi, we will use the installed web-server lighttpd. The configuration files for the web-server are located in the directory /etc/lighttpd/. The web pages are located in the folder /var/www/html/. By entering the URL

http://192.168.123.1

in a browser after logging into the radiologic WLAN, we can display the index web page. A screenshot of the default html index page is shown hereafter :

Default web

Default web page of the lighttpd web server

I replaced this page with the following minimal html script :

<!DOCTYPE HTML>
<html>
<head>
<meta http-equiv="Content-Type" content="text/html; charset=utf-8">
<title>Welcome Page</title>
<style type="text/css">
h1, h3 {text-align:center}
</style>
</head>
<body>
<h1>Welcome</h1>
<h3> to the Rasperry Pi WLAN</h3>
</body>
</html>

The following photo shows the result on various mobile devices accessing the radiologic WLAN.

iPad, iPhone, Samsung, LG and Blackberry mobile devices conncetd to the Blackberry Pi WLAN

iPad, iPhone, Samsung, LG and Blackberry mobile devices connected to the RPi WLAN

Currently the clients can only access the embedded web server. If we want that the WLAN clients have access to the global Internet or to other services, we need to add more network configuration parameters or specific applications. This will be a topic of further contributions.

Service Management

As a last step we check that all programs are running without errors and that the performance of the system is correct. First we need to understand the boot process.

Debian separates the legacy boot process (based on System V init)  into seven runlevels labeled as 0, 1, 2, 3, 4, 5, 6 and S. For each runlevel a file rcx.d (x = 0, 1, 2, …) exist in the directory /etc/ containing symbolic links to targets located in /etc/init.d/. The runlevels are defined as follows :

  • 0 : (halt) stop all services and make the system ready for shutdown
  • 1 : (minimal mode) stop all services and put the system in single-user rescue mode
  • 2 – 4 : multiuser network enabled text mode
  • 5 : multiuser network enabled graphical mode
  • 6 : (reboot) stop all services, make the system ready for reboot
  • S : (single) these scripts are executed once

When we enable a service to auto-start, we are adding it to a runlevel.

Default Debian installation does not make any difference between runlevels 2-5. Number 2 is the default runlevel at start. In a normal boot the levels progress up to 5. Runlevels S  and 1 are used for maintenance. Runlevels can be edited manually by editing control scripts in /etc/init.d and symbolic links in /etc/rc0.d … /etc/rc6.d. The runlevel can also be changed at runtime with the command telinit [runlevel 2-5]. The current runlevel is indicated with the command runlevel.

Looking at the list of the services included in the /etc/init.d/ folder, we discover among others the installed programs dnsmasq, dhcpcd, haveged, hostapd and lighttpd.

init.d

Content of the folder /etc/init.d/

Here is an extract from the init.d README file :

BEGIN INIT INFO
# Provides: skeleton
# Required-Start: $remote_fs $syslog
# Required-Stop: $remote_fs $syslog
# Should-Start: $portmap
# Should-Stop: $portmap
# X-Start-Before: nis
# X-Stop-After: nis
# Default-Start: 2 3 4 5
# Default-Stop: 0 1 6
# X-Interactive: true
# Short-Description: Example initscript
# Description: This file should be used to construct scripts to be
# placed in /etc/init.d.
### END INIT INFO

For each program defined as script in the /etc/init.d/ folder we can specify the runlevels for start and stop and the dependencies with other programs. The next figure shows a real example of an init-script related to the dnsmasq service :

init.d dnsmasq

init script related to dnsmasq in the /etc/init.d/ folder

We see that the virtual boot facilities $network, $remote_fs and $syslog must be started or stopped before the dnsmasq service. Creating init scripts manually is an error-prone task. For this reason the legacy System V (SysV) init program has now been replaced by new init systems. Raspbian Jessie is using systemd as service manager. We have already seen the related tool systemctl to start, stop, enable and disable programs.

In systemd, the targets of most actions are units, which are resources that systemd knows how to manage. Units are categorized by the type of resource they represent and they are defined with unit files. The systemd files are located in the directories /lib/systemd/system/ and /etc/systemd/system/.

Some useful systemd commands are listed below :

systemctl is-active application.service
systemctl is-enabled application.service
systemctl is-failed application.service
systemctl list-units
systemctl list-units --all
systemctl cat application.service
systemctl list-dependencies application.service
systemctl show application.service
sudo systemctl mask application.service
sudo systemctl unmask application.service
sudo systemctl edit application.service
systemctl get-default

For most commands the .service suffix can be omitted. Some real commands concerning hostapd are shown in the next figure :

results of some systemd systemctl commands

Results of some systemctl commands for hostapd

systemd has some great built-in tools to check and tune the boot time. The commands

systemd-analyze
systemd-analyze blame

will print the boot time respectively print the list of the most time-consuming services in decreasing order.

systemd-analyze results

systemd-analyze results

The command

systemd-analyze plot > init_plot.svg

creates an xml svg file which can be rendered in a browser. It displays in a graphical way when all the services start.

init_plot.svg file rendered in browser; click to enlarge

init_plot.svg file rendered in browser; click to enlarge

systemd has also a powerful tool to view and manipulate system logs named journald. The related configuration file is located in /etc/systemd/journald.conf. Some useful commands are :

journalctl
journalctl --all 
journalctl --since=yesterday

journald provides various filters using time constraints. Logs can be viewed in UTC or local time at will. The following journald commands deal with time and date.

timedatectl list-timezones
sudo timedatectl set-timezone zone
timedatectl status

journalctl

systemd tools : timedatectl and journalctl

journald provides other filter options than time constraints : units, users, groups, processes, pathes, priorities, … The journal display can be customized in various formats. The amount of space occupied by the journal on the SD card can be shown with the the command

journalctl --disk-usage

Backup and Cloning

When a bad shutdown has corrupted the file system, the Raspberry Pi can be a frustrating experience. It’s therefore useful to wait for the complete shut down of the RPi before unplugging the power supply. To shutdown or reboot the Raspberry Pi, we can use the menu “Shutdown” in the VNC-desktop

Shutdown

End Raspberry session with shutdown, reboot or logout

or the commands

sudo shutdown
sudo reboot

It’s also important to make at regular times a backup of the Raspberry Pi SDcard. Backups are possible on Windows 7 systems (or later) with the Win32DiskImager tool. First an image of the source card is saved to a file on the Windows PC. In an second step this image is copied to a backup SDcard. Backup’s can also be done with the Raspberry Pi itself by using an SDcard reader with USB interface.

Cloning a SDcard is the same procedure as doing a backup, but the goal is different. Cloning allows to distribute a complete mirror of a working RPi system with operating system, applications and data. This way it’s easy to copy and multiply an existing solution.

Sometimes a cloned image file can’t be copied to an SDcard with the same capacity, because SDcards can vary a little bit in size. There are several tutorials on the net how to solve this problem by shrinking the image file, for example one by Andrew Aokley, another one on the Wonky Gibbon Ramblings Blog.

I used the following procedure on my Debian computer :

df -h
cd /home/mbarnig/Desktop/
sudo dd if=/dev/sdb2 of=myimage.img bs=4M
sudo dd if=myimage.img of=/dev/sdb2 bs=4M conv=notrunc,noerror

Links

The following list provides links to websites with additional informations about the Raspberry Pi :

DICOM TransferSyntaxUID

Referring to my recent post about the DICOM standard, the list of all valid transfer syntaxes is shown below. A DICOM transfer syntax defines how DICOM objects are serialized to transmit them through a network or to save them into a file.

The DICOM transfer syntax is specified by the TransferSyntaxUID located in element number (0002, 0010). There exist 35 different DICOM transfer syntaxes, but 14 have been retired from earlier standard versions and will not be supported in future DICOM releases.

The 21 valid DICOM transfer syntaxes are listed in the following table :

TransferSyntaxUID Transfer Syntax Name Comments
1.2.840.10008.1.2 Implicit VR Endian Default
1.2.840.10008.1.2.1 Explicit VR Little Endian
1.2.840.10008.1.2.1.99 Deflated Explicit VR Big Endian
1.2.840.10008.1.2.2 Explicit VR Big Endian
1.2.840.10008.1.2.4.50 JPEG Baseline (Process 1) Default Lossy JPEG 8-bit
1.2.840.10008.1.2.4.51 JPEG Baseline (Process 2 & 4) Default Lossy JPEG 12-bit
1.2.840.10008.1.2.4.57 JPEG Lossless, Nonhierarchical (Processes 14)
1.2.840.10008.1.2.4.70 JPEG Lossless, Nonhierarchical First- Order Prediction
1.2.840.10008.1.2.4.80 JPEG-LS Lossless
1.2.840.10008.1.2.4.81 JPEG-LS Near-Lossless
1.2.840.10008.1.2.4.90 JPEG 2000 Lossless Only
1.2.840.10008.1.2.4.91 JPEG 2000
1.2.840.10008.1.2.4.92 JPEG 2000 Multicomponent Lossless Only
1.2.840.10008.1.2.4.93 JPEG 2000 Multicomponent
1.2.840.10008.1.2.4.94 JPIP Referenced
1.2.840.10008.1.2.4.95 JPIP Referenced Deflate
1.2.840.10008.1.2.5 RLE Lossless
1.2.840.10008.1.2.6.1 RFC 2557 MIME Encapsulation
1.2.840.10008.1.2.4.100 MPEG2 Main Profile Main Level
1.2.840.10008.1.2.4.102 MPEG-4 AVC/H.264 High Profil Level 4.1
1.2.840.10008.1.2.4.103 MPEG-4 AVC/H.264 BD High Profil Level 4.1