Native iOS app’s are built with the platform SDK provided by Apple (Xcode/Objective-C / Swift). The main advantage of native applications is their performance because they are compiled into machine code.
Mobile Web iOS app’s are built with server-side technologies (PHP, Node.js, ASP.NET) that are mobile-optimized to render HTML well on iPhones and iPads. Mobile app’s load within the mobile browser Safari like every other website. They generally require an Internet connection to work, but it’s also possible to use cache technologies to use them off-line and you can install them with an icon on the iOS home screen. Mobile Web app’s for iOS are faster and easier to develop and to maintain than native iOS app’s.
Hybrid iOS app’s
Hybrid iOS app’s are somewhere between native and web app’s. The bulk of hybrid iOS app’s is written with cross-compatible web technologies (HTML5, CSS and JavaScript), the same languages used to write web app’s. Hybrid app’s run inside a native container on the device using the UIWebView or WKWebView classes. Some native code is used however to allow the app to access the wider functionality of the device and to produce a more refined user experience. The advantage of this approach is obvious: only a portion of native code has to be re-written to make the app work on another type of device, for instance on Android, Blackberry or Windows Mobile.
Some developer consider hybrid iOS app’s as beeing the best of both worlds. Great examples of hybrid iOS app’s are Facebook and LinkedIn.
Hybrid iOS app tools
There are numerous tools available to create hybrid app’s, not only for iOS, but for all mobile platforms. The most important tools to embed HTML5, CSS and Javascript in mobile app’s are :
- PhoneGap : a mobile development framework created by Nitobi, which was purchased by Adobe in 2011. The latest version is 4.0.0.
- Apache Cordova : a free and open-source platform for building native mobile applications using HTML, CSS and JavaScript, underlying PhoneGap. Apache Cordova graduated in October 2012 as a top level project within the Apache Software Foundation (ASF). The latest version is 5.0.0.
- BridgeIt : an open source mobile technology sponsored by ICEsoft Technologies Inc.
- MoSync : free, easy-to-use, open-source tools for building cross-platform mobile apps (MoSync Reload 1.1 and MoSync SDK 3.3.1).
- Ionic : the final release of Ionic 1.0.0 (uranium-unicorn) was released on May 12, 2015.
- CocoonJS : a platform to test, accelerate, deploy and monetize your HTML5 apps and games on all mobile devices with many interesting features to help you deliver great web products faster.
- ChocolateChip-UI : the tool uses standard Web technologies and is built on top of the popular & familiar jQuery library.
- Sencha-Touch : the leading (very expensive) cross-platform mobile web application framework based on HTML5 and JavaScript for creating universal mobile apps.
- Kendo UI : everything for building web and mobile apps with HTML5 and JavaScript.
- AppGyver (Steroids, Supersonic, Composer) : a combination of great CSS defaults (from the Ionic Framework) with the best native APIs (from PhoneGap), adding a boatload of extra features on top.
There are also some tools and platforms available which use other technologies than HTML5 +CSS + Javascript :
- Titanium : write in JavaScript, run native everywhere at the speed of mobile, with no hybrid compromises.
- Xamarin : share the same C# code on iOS, Android, Windows, Mac and more.
- RhoMobile Suite : gain the ease of consumer smartphone platforms, without sacrificing the critical data functionality of enterprise solutions.
- Corona : designed to enable super-fast development. You develop in Lua, a fast and easy-to-learn language with elegant API’s and powerful workflows.
- Meteor : discover the easiest way to build amazing web and mobile apps in JavaScript.
WebViews
The tools to create hybrid app’s give you access to the underlying operating system calls or to underlying hardware functionality. Howver you do not really need these tools if you want only deploy a web app as a native app. All you need is the bare minimal code to launch a Web View and load your Web App as local resources.
UIWebView
To embed web content in an iOS application you can use the UIWebView class. To do so, you simply create a UIWebView object, attach it to a window, and send it a request to load web content. You can also use this class to move back and forward in the history of webpages, and you can even set some web content properties programmatically.
The steps to create a minimal demo to load this web content from an external webserver are the following :
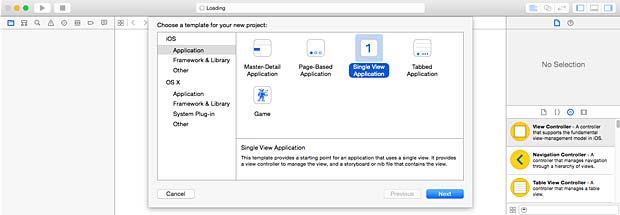
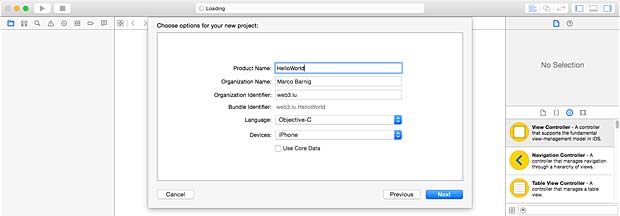
- Create an Xcode Swift project with a single view application.
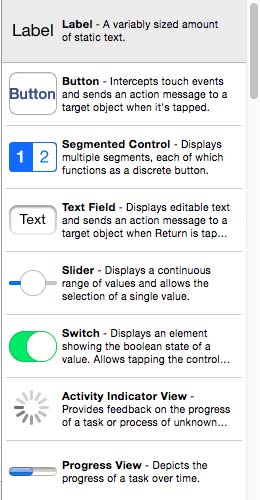
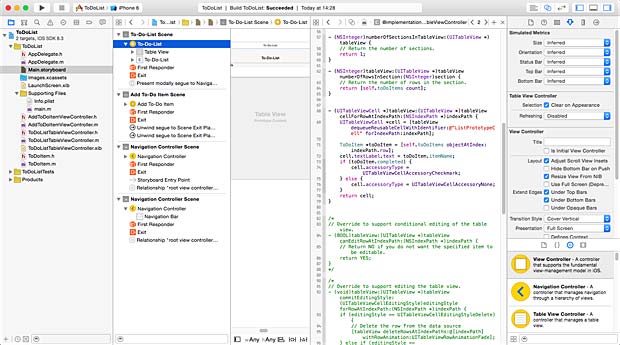
- Open the Main.storyboard file and drag the WebView UI element from the object library to the Interface Builder view.
- Open the assistant editor to display the ViewController.swift file, ctrl-click-drag the WebView behind the class ViewController text line to create an IBOutlet named mywebView :
@IBOutlet weak var mywebView: UIWebView! - Define the url of the remote website :
let url = "http://www.canchy.eu" - Add the following code to the viewDidLoad function :
let requestURL = NSURL(string:url) let request = NSURLRequest(URL: requestURL!) mywebView.loadRequest(request) - Run the project :
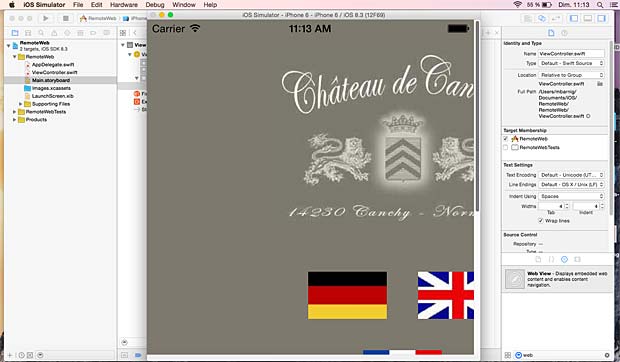
Remote website displayed in iOS Simulator
The website loads, but it looks awful. The reason is that the UIWebView doesn’t handle things that Safari does by default. Telling the program to scale pages is easy. We need to add the following line of code :
mywebView.scalesPageToFit = trueThe whole script of the ViewController.swift file looks now as follows :

ViewController.swift script for RemoteWeb
The layout is still not perfect, but you can now pinch the view to zoom in and out. Holding down the alt key and click-dragging the view allows you to perform this action in the simulator. We will enhance the scaling in a further chapter.
Note that for a very simple app like the present one it’s not necessary to import the webkit framework. UIWebView has about a dozen methods you can use, but to get about 160 methods you need the webkit classes.

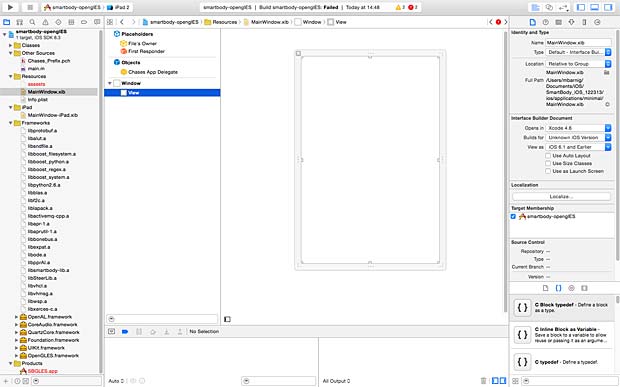
Project window with local web content
To include the web content into the iOS app, we add the folder canchy with html files, css files, javascript files, images and photos into the project window.
The three first steps to create a minimal demo to load local web content are the same as those for the remote content.
The next steps are the following :
4. Define the path for the local content with the NSBundle.mainBundle() method :
- pathForResource
- ofType
- inDirectory
5. Create an URL object with this path with the NSURL.fileURLWithPath() method
6. Create a Request object with this URL with the NSURLRequest() method.
7. Scale the page with the scalesPageToFit method.
8. Load the Request object with the loadRequest() method.
9. Run the project.
The result is the same as with the remote content. The layout is not adapted to the screen. We will fix that in the last chapter.
The complete script of the ViewController.swift file is shown below :
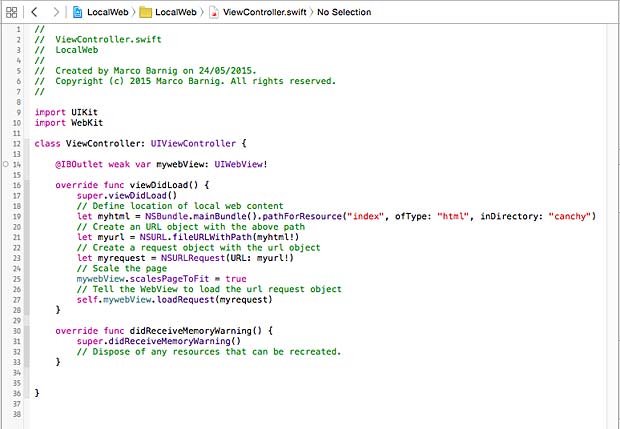
ViewController.swift script for local web content
WKWebView
With iOS 8 and Mac OSX Yosemite, Apple released the new WKWebView class, which is faster and more performant than the UIWebView class. WKWebView uses the same Nitro Javascript engine as the Safari browser.
To create an hybrid iOS app with the WKWebView class, the procedure to access content on an external web-server is the same as for the UIWebView class. Only the code in the ViewController.swift file is slightly different.
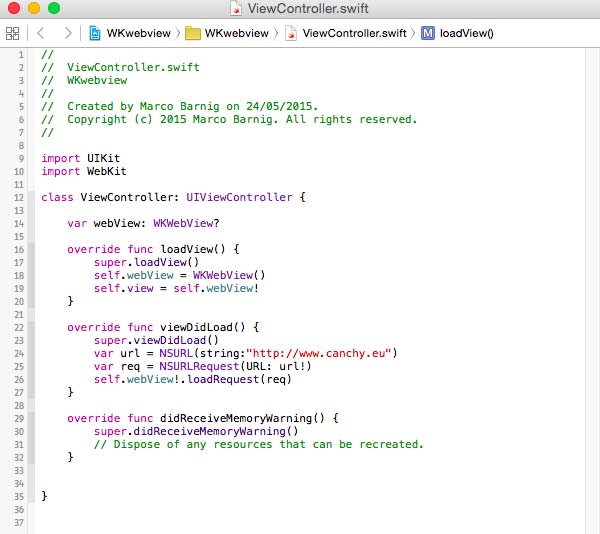
ViewController.swift script for remote web content with WKWebView
We need to import the WebKit framework, because the WKWebView class is now part of the WebKit itself.
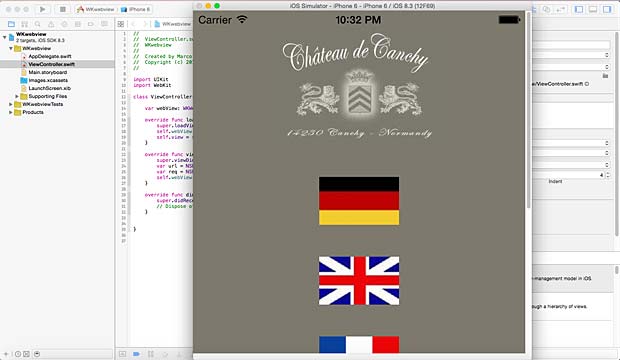
Remote website displayed in iOS Simulator
By default the website display in WKWebView is better adapted to the screen size, compared to the UIWebView.
The worst issue of the WKWebView class is that it doesn’t allow loading local files from the file:// protocol like the UIWebView class. There are some workarounds available, most of them use an embedded local HTTP server to serve the local files. The most renowned solutions are the following :
XWebView uses a very tiny embedded http server, whereas the Cordova WKWebView Engine uses the more versatile GCDWebServer.
GCDWebServer
GCDWebServer is a modern and lightweight GCD (Grand Central Dispatch) based HTTP 1.1 server designed to be embedded in OS X & iOS app’s. It was written from scratch by Pierre-Olivier Latour (swisspol) with the following features :
- four core classes: server, connection, request and response
- no dependencies on third-party source code
- full support for both IPv4 and IPv6
- HTTP compression with gzip
- chunked transfer encoding
- JSON parsing and serialization
- fully asynchronous handling of incoming HTTP requests
WKWebView versus UIWebView
Both WKWebView and UIWebView in iOS8 support WebGL which allows rendering 3D and 2D graphics on WebView. The performance gains are significant (greater than 2x) in WebGL applications when using WKWebView, compared to UIWebView.
You can use the WebView Rendering App available in Apple AppStore to test any website performance between UIWebView and WkWebView. An In-App debug console for your UIWebView & WKWebView classes is available at Github.
CORS
If a javascript on a webpage displayed in UIWebView or WKWebView is running from domain abc.com and would like to request a resource via AJAX (XmlHttpRequest or XDomainRequest) from domain efg.com, this is a cross-origin request. Historically, for security reasons, these types of requests have been prohibited by browsers.
The Cross Origin Resource Sharing (CORS) specification, now a W3C recommendation, provides a browser-supported mechanism to make web requests to another domain in a secure manner. To allow AJAX requests across domain boundaries, you need to add the following headers to your server :
Access-Control-Allow-Origin.*
Access-Control-Allow-Headers : Accept, Origin, Content-Type
Access-Control-Allow-Methods : GET, POST, PUT, DELETE, OPTION
Size the web views
Xcode provides an auto layout function. By clicking the second icon (pin) from the left in the storyboard, a popup window opens to set the spacing contraints to the nearest neighbours. By clicking the dotted red lines leading from the small square at the top to four textboxes, you can define these constraints. I set the top border to 20 points and the right and left border to 16 points.
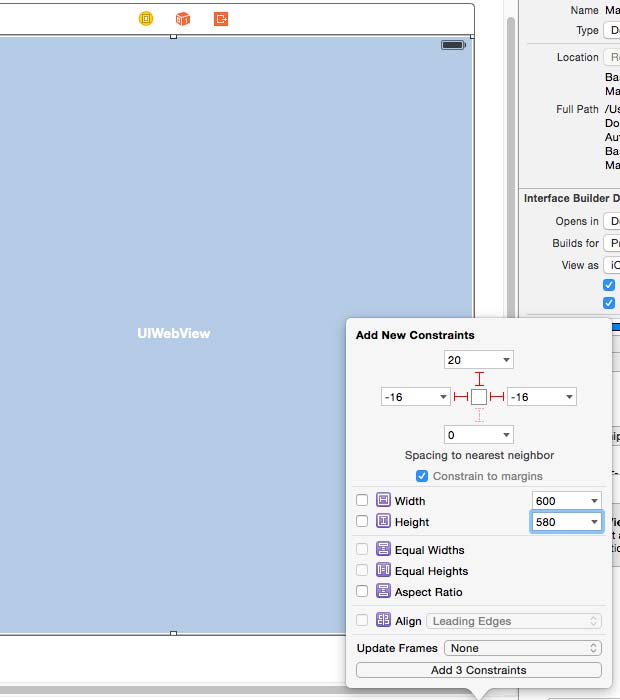
Adding constraints to execute the auto layout function in the storyboard
By clicking the button “Add 3 Constraints” the values are entered and displayed with the selected values in the View Controller Scene.
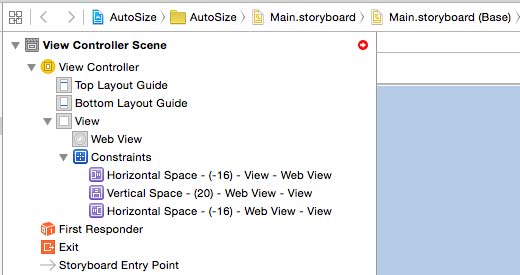
Viewing the layout constraints in the View Controller Scene
The result is a correct display of the webpage in the iOS Simulator with a free toolbar of 20 points at the top of the web view.

Webpage view with auto layout
Links
- 30 Examples Of Mobile Optimized Websites, by Bogdan Raduta
- Multiple phone web-based application framework, Wikipedia
- Apache Cordova Tutorial: Developing Mobile Applications with Cordova, by Filip Petkovski
- NSURLProtocol Tutorial, by Rocir Santiago
- WebKit on the iPhone, by Alexander Clauss
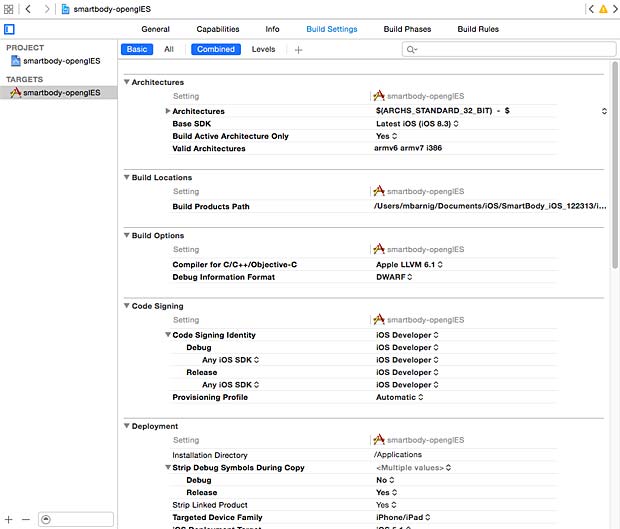
 The primary mechanism of the

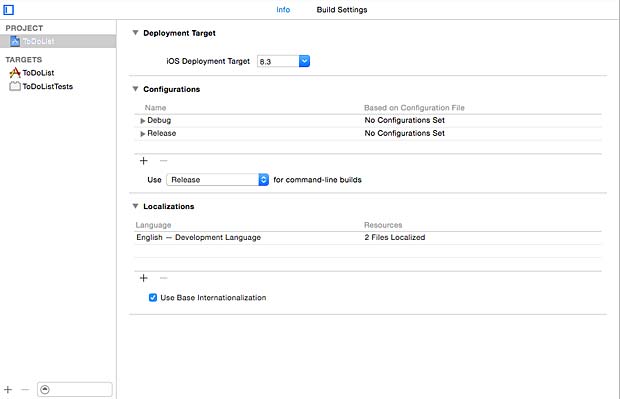
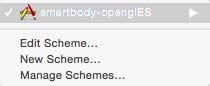 To tell the Xcode IDE which configuration to use during a particular build is determined by a scheme. A scheme unites a target with a build configuration. A new project commes by default with a single scheme named after the project.