CBR and VBR in mp4 H264 video files

CBR versus VBR in video encoding

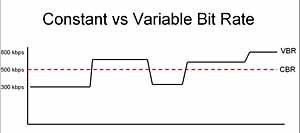
When referring to codecs, CBR (constant bitrate) encoding means that the rate at which a codec’s output data should be consumed is constant. As opposed to constant bitrate, VBR (variable bitrate) vary the amount of output data per time segment. VBR allows you to set a maximum and minimum bitrate. The advantages of VBR are that it produces a better quality-to-space ratio compared to a CBR file of the same data. The bits available are used more flexibly to encode the sound or video data more accurately, with fewer bits used in less demanding passages and more bits used in difficult-to-encode passages.

The disadvantages are that it takes more time to encode, as the process is more complex. VBR may  pose problems when streaming over a  web connection since it is the maximum bit rate that matters, not the average.

The generally accepted best practice is to use CBR when producing for streaming delivery, and VBR when producing for progressive download.


AVC (H264) video settings

Last update : August 21, 2013

It’s not easy to configure an AVC (H264) codec to create videos which will play on different devices and stream from various servers on the web, including Amazon S3 Cloudfront. Some basic informations about the different frame types of AVC are given at the post Smart editing of MPEG-4/H264 videos. The following list gives some informations about the common H264 parameters :

CABAC : stands for Context Adaptive Binary Arithmetic Coding. Improves encoding efficiency at the expense of playback/decoding efficiency. The default option is on, unless the encoded video is to be played back on devices with limited decoding power (for example iPod). CABAC is only supported by the main and higher profiles.

Trellis : Trellis is only available with CABAC on. It improves quality, while maintaining a small file size but it will increase conversion time slightly. The default value is on.

Encoding mode :

  • Single Pass – Bitrate: encodes the video once  with a set constant bitrate for each frame
  • Single Pass – Quantizer: encodes the video with a set quantizer (higher quantizer => lower quality) for each frame. The default value is 26, the maximum value  is 51.
  • Single Pass – Quality: encodes the video with a set quality rating for each frame
  • Two Pass:  encodes the video twice (once to determine it’s properties, another to ensure the selected output file size is reached with maximum efficiency). This is the most common setting.
  • Multi Pass: Same as Two Pass except for extra encoding passes to ensure even better quality/accurate file size. During multipass encoding, the video results of the first pass are saved into a log file. In a second step the encoding is done based on the logfile data.

Bit Rate : the average bitrate varies between 0 and 5000 Kbits/s; the default values are 800 Kbits/s for low quality, 1000 Kbit/s for medium quality and 1200 Kbits/s for high quality.

  • Keyframe Boost  : High values give better visual quality but also bigger file sizes. The default value for I-Frames is 40%. Values vary from 0 to 70.
  • B-Frame reduction : these frames are responsible for the interpretation of motion in the video. This setting determines the reduction of quality in B-frames in favor of P-frames (predicted picture). The default vallue is 30%, the range varies from 0 to 60%. For cartoons higher values are recommended.
  • Bitrate variability : This attribute indicates in how far the bitrate is allowed to vary in relation to what is set as target bitrate. A variable bitrate tells the encoder to vary bitrate as needed, based on the information in the frames. The default value is 60%, the range varies from 0 to 100%.

Quantization limits : these values are only used when the Single Pass – Quantizer encoding mode is selected.

  • Min QP : Values vary from 0 to 50, the default value is 10.
  • Max QP : Values vary from 0 to 51, the default value is 51
  • Max QP step : Values vary from 0 to 50, the default value is 4.

Scene cuts : this option sets how H264 determines when a scene change has occurred and hence when a key frame is needed.

  • Scene cut threshold : The default value is 40. A higher value will allow H264 to be less sensitive to scene changes. A lower value is recommended for dark videos.
  • Min IDR frame interval : IDR means Instantaneous Decode Refresh, a parameter to indicate the amount of frames in between before the encoder can detect a new scene change. Setting this to high will result in not detecting enough scene changes. Setting it too low results in an unnecessary high bitrate. The range varies from 0 to 100.000, the default value is 25.
  • Max IDR frame interval : Setting this too low results in too many keyframes and as such wasting bitrate for nothing. The range varies from 0 to 100.000, the default value is 250.

Partitions : During the encoding process, the encoder will break down the video into so-called Macroblocks. Then it will search for similar blocks in order to discard redundant data. The macroblocks can be subdivided into 16×8, 8×16, 8×8, 4×8, 8×4, and 4×4 partitions. The partition searches increase accuracy and compression efficiency. As a general rule, the more search types are performed, the better and stronger the compression will be while maintaining a high quality output.

  • 8×8 transform : the 8×8 Adaptive DCT transform is a very powerful compression technique but it is not compatible with every device. It makes the video High Profile AVC.
  • 8×8, 8×16 and 16×8 P-Frame search : This settings enables the 8×8 partitions on P-Frames and thus improves the visual quality of these frames.
  • 8×8, 8×16 and 16×8 B-Frame search : This settings enables the 8×8 partitions on B-Frames and thus improves the visual quality of these frames.
  • 4×4, 4×8 and 8×4 P-Frame search : This settings enables the 4×4 partitions on P-Frames, but usually the quality improvement will be negligible. Therefore this option is not worth the additional encoding time and thus can safely be turned off.
  • 8×8 intra search : This settings enables the 8×8 partitions on I-Frames and thus improves the visual quality of these frames, but it requires the 8×8 Adaptive DCT Transform.
  • 4×4 intra search : This settings enables the 4×4 partitions on I-Frames and thus improves the visual quality of these frames.

B-Frames :

  • Use as a reference : alows a B-Frame to reference another B-Frame to provide better quality. Only useful when using more than 2 consecutive B-Frames.
  • Adaptive : Turns on adaptive B-frames, which allows H264 to determine the number of B-frames to use. The default value is on. This option is only available when at least 1 B-frame has been set.
  • Bidirectional ME :  allows predictions based on motion both before and after the B-frames. Default value is on.
  • Weighted bipredictional :  allows B-Frames to be predicted more heavily from P-Frames which results in improved accuracy and therefore a more efficient encoding. Default value is on. This option is only available when at least 1 B-frame has been set.
  • Direct B-Frame mode : temporal or spatial : The default value is temporal. The spatial mode handles better animated content.
  • Max consecutive : the number of consecutive B-Frames. The values vary from 0 to 5, the default value is 3.
  • Bias : Sets how much bias H264 should give the usage of B-frames (higher means more use of B-frames). Setting this to 100 is the equivalent of not selecting the “Adaptive” option.The default value is 0, possible values vary from -100 to +100.

Motion estimation :

  • Partition decision : This controls the precision with which the motion in the video is estimated. Values range from 1 to 6. The default value is 5. A setting of 6 is even better but it strongly increases the amount of time needed for the conversion.
  • Method : The better the method, the more efficient compression and high quality output. Hexagonal Search is the default setting. Uneven Multi-hexagon is meant for powerful computers, while Exhaustive search works only on super computers.
  • Range : this field is disabled when you select Hexagonal Search. It only works with the powerful methods and it specifies the motion search in the pixels. The more pixels are examined, the more processor power is needed, but the better the outcome. The values vary from 0 to 64, the default value is 16.
  • Max Ref Frames : This value indicates how many previous frames can be referenced by a P-frame or B-frame. The higher this value, the better the quality at the expense of speed. The values vary from 0 to 16, the default value is 0.
  • Mixed references : offers the codec greater freedom to make references on a smaller scale. This option is only available when the Max Ref Frames value is greater than 1.
  • Chroma ME : uses the color information in the video to estimate motions, which increases the visual quality. It is recommended to set this option on.

Misc. options :

  • Threads : This sets the number of CPU threads to use in encoding. Default value is 1.
  • Noise reduction : this setting depends if there is noise in the video images or not. Videos with noise appear grainyNoise Reduction filters out that noise and the more noise you have, the higher you need to set the value. Varies from 0 to 65535. Default value is 0.
  • Deblocking filter : A deblocking filter is a video filter applied to blocks in decoded video to improve visual quality and prediction performance by smoothing the sharp edges which can form between macroblocks when block coding techniques are used. The strength (values from -6 to +6) and threshold (values from -6 to +6) of the filter are set. The default values are 0 and 0.

The AVC specifications define a number of different profiles specifying which compression features of H.264 are allowed or forbidden. In addition to the profiles, the AVC specifications also define a number of levels  putting further restrictions on other properties of the video. These restrictions include the maximum resolution, the maximum bitrate, the maximum framerate. The common notation for Profiles and Levels is “Profile@Level”, for example Main@3.1.

The most common profiles for webstreaming are baseline (BP) and main (MP). Some differences in the features for these profiles are shown hereafter :

Compression features Baseline Profile Main Profile
B-Frames no yes
CABAC no yes
FMO, ASO, RS yes no
PicAFF, MBAFF no yes

The next table shows the maximum values for some common levels :

Level Number Video bitrate Resolution & frame rate
1.3 768 Kbit/s 352×288 ; 30 fps
2.2 4 Mbit/s 352×576 ; 25 fps
3.1 14 Mbit/s 720×576 ; 25 fps
4.0 20 Mbit/s 1920×1080 ; 30 fps

To display mp4 videos in all browsers and devices, especially in IE9, it’s necessary to include the right MIME type. If the videos are stored on Amazon AWS S3, the default content type is “application/octet-stream”. It’s easy to change the content type in video/mp4 in the properties-Metadata menus.

Further informations about AVC are available at the following websites :

Smart editing of MPEG-4/H264 videos

Last update : August 31, 2013

To edit a video, you need to cut & join numerous clips. This process is called smart editing and is particularly difficult if the video is encoded with H264.

H.264/MPEG-4 Part 10 or AVC (Advanced Video Coding) is is a block-oriented motion-compensation-based codec standard developed by the ITU-T Video Coding Experts Group (VCEG) together with the ISO/IEC Moving Picture Experts Group (MPEG).

H.264 is used in Blu-ray Discs, cable television services, real-time videoconferencing, mobile devices, … The standard defines 17 sets of capabilities, which are referred to as profiles, targeting specific classes of applications.

The highly compressed video file formats like MPEG-2 or MPEG-4 were exclusively designed for playback or distribution… not for editing. The term “compressing”  is misleading, because these video file formats are made in a similar fashion and achieve their very high compression rates by throwing away information. They rely on a system of deleting data that is unnecessarily repeated in frame after frame of the videos. The data is replaced by a reference to an earlier or later frame.

In MPEG-2 streams there are three types of pictures :

  • I-Pictures (Intra-coded picture) : these are easiest to think of as a complete picture and are slightly compressed like a JPEG photo file is compressed.
  • P-Pictures (Predicted picture) : these are incomplete pictures and only contain the infomation that has changed since the last I-Picture or the last P-Picture.
  • B-Pictures (Bi-predictive picture) : these ones are the most highly compressed because they can use information from previous I- or P-Pictures and forward I- or P-Pictures for reference in playback.

The following picture (courtesy Wikipedia) shows the relations between  I, P and B frames.

I, P and B frames

The I, P, and B pictures are arranged in groups of pictures (GOP) in a way so that the video file can be played back by a video device or software. There are generally two types of GOP’s : short GOP’s and long GOP’s. The sequence of the transmitted frames is not linear; P-frames are send before the related B-frames.

The following picture shows a typical sequence of a short GOP (I =blue, P = red, B  = yellow). The term VOP (video object plane) is used in relation with the video codecs (IVOP, PVOB, BVOP).

Short GOP sequence

You easily understand that cutting or joining such video sequences without disturbing the sequence of frames or the synchronization with the sound can be very complex.

In the case of  MPEG-4 streams it’s even more difficult.

The granularity of the establishment of prediction types in MPEG-4 is brought down to a lower level called the slice level of the representation. A slice is a spatially distinct region of a picture that is encoded separately from any other region in the same picture. In that standard, instead of I pictures, P pictures, and B pictures, there are I slices, P slices, and B slices. Motion estimation provides for the searching of sub-macro blocks of variable size, from 16×16 down to 4×4 blocks. Motion vectors allow up to quarter pixel accuracy for luminance, and up to 1/8th pixel for chrominance. MPEG-4 carries out intra-prediction for intra coded blocks before the transform, performed on either 4×4 or 16×16 blocks and allowing up to 9 directional modes for direction dependent prediction. Residual data transforms are executed on 4×4 blocks with modified integer discrete cosine transform (DCT) which avoids rounding errors. The employment of an adaptive in-loop filter increases subjective quality of video. The standard provides two alternative and more efficient processes of entropy coding. Context-adaptive variable length coding (CAVLC) utilizes multiple variable length codeword tables for transform coefficient encoding considering spatial neighborhood of the coded block. Context-adaptive binary arithmetic coding (CABAC) in addition provides highly efficient automatic adjustment for underlying probability model of encoded data. Long GOP’S are usual in MPEG-4.

Cutting and joining MPEG-4 videoclips without re-encoding (lossless) to keep a high quality and without creating visual or audial drops at the edges of the movies is very challenging. Only a few software tools are capable to do such a task which is called “smart editing“.
smart editing

MPEG-4 editor tool Machete

QuickTime pro MPEG-4 player & editor


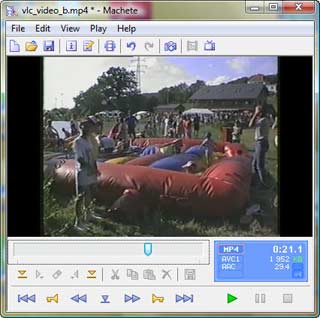
A very simple MPEG-4 editor is Machete from Machetesoft. It’s a try-before buy-program, the current version is 4.0 build 33 released on March 22, 2013. The software is available at regnow for 15,99 euros.

Cutting videoclips or inserting other videoclips with Machete is only possible at the location of key-frames (I-pictures). Unfortunately a typical MPEG-4 videoclip has only very few key-frames (every 5 to 10 seconds).

A wellknown MPEG-4 player and editor is the pro-version of QuickTime from Apple. The current version is 7.7.3, build 1680.64. The selected part of a videoclip can be trimmed with the menu  “Edit > Trim to Selection”. The trimmed videoclip can be saved with the same parameters without re-compression with the menu “File > Export …;  Exporter > MPEG-4 sequence ; options >video and audio format > pass through”. A videoclip can be copied to the clipboard and added to another movie with the same features. I expected a clean export to MPEG-4 without affecting the audio or video streams, but this is not the case.
AvsPmod Editor with AviSynth

A very powerful and versatile video post-production tool is AviSynth, created by Ben Rudiak-Gould. It’s not a software you may usually think of programs (.exe and GUI), but it’s a video processing engine that works in the background. AviSynth uses scripts which tell the program what to do and what video to produce.

A Wiki on the main website provides some documentation and user guides about AviSynth. A more comprehensive documentation is available at the website of AnimeMusicVideos.org, a community dedicated to the creation, discussion, and general enjoyment of fan-made anime music videos. The AviSynth tutorial is part of a very useful documentation “Technical Guides to All Things Audio and Video” available on the same website.

The AviSynth syntax to program video scripts is available at the official wiki-website.

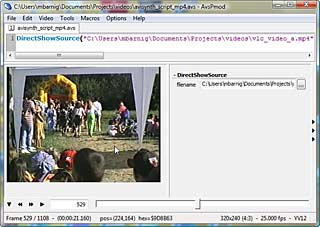
A package (AMVapp v3.1) including a lot of accessories and complementary software tools,  described in the technical guides, is available at the AimeMusicVideos website. One of the tools is a text editor specifically designed for making AviSynth, called AvsP. It has been written in Python by qwerpoi. The most recent version is 2.0.2 released on October 27th, 2007. An enhanced version called AvsPmod has been created by Zarxrax, the latest version is 2.5.1 released on June 25, 2013.

The AvsPmod editor shows not only the resolution, framerate, colorspace, frame number, time-code and aspect ratio of the videoclip in the bottom bar, but also the position and color of the videopixel defined by the mouse pointer. To play back the video in real-time, you need an external directshow media player (for example Windows Media Player) which is activated with the AvsPmod preview button (4th button from the left). The VLC-player doesn’t work because it’s not a directshow player.
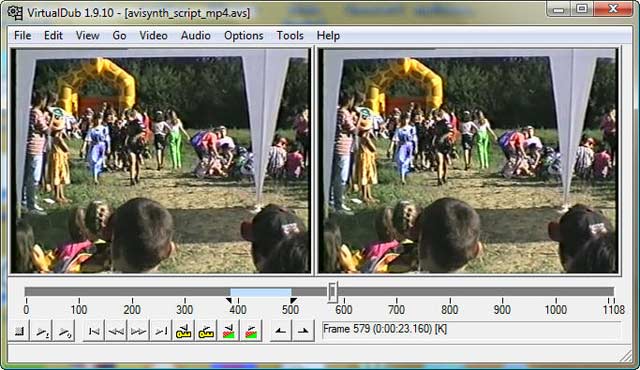
VirtualDub

VirtualDub is a video capture/processing utility for 32-bit and 64-bit Windows platforms, written by Avery Lee and licensed under the GNU General Public License (GPL). The current stable version is v1.9.11. An unofficial VirtualDub support forum is available at the website. A modified version of VirtalDub called VirtualDubMod has been discontinued since 2005.

To play and edit MPEG-4 videos in VirtualDub, specific plugins and filters are required. The most straightforward solution is to combine VirtualDub with AviSynth and AvsPmod.

Avidemux 2.5

Avidemux2.5 is a free video editor designed for simple cutting, filtering and encoding tasks. It supports many file types using a variety of codecs. The tool is available for Linux, BSD, Mac OS X and Microsoft Windows under the GNU GPL license. The current version is 2.6.5 released on August 29, 2013. A detailed up-to-date documentation is available on the wiki-website.

The tool shows for each frame the type of picture (I, P or B). To save a selection of a clip in the default copy mode without re-encoding, the  marker A and B must be key-frames (I-pictures). An automatic search for key-frames and for black-frames (pictures without content, often inserted between movies and commercials) is provided. To join videoclips use the menu “File > Append”. The Smart-Copy feature doesn’t work for videos encoded with the H264 codec. For some other codecs you’re asked whether you want to use Smart-Copy or not if you cut your video, and the first frame of a segment is not an I-frame, and you try to save it .

Womble MPEG Video Wizard DVD 5.0

Womble MPEG Video Wizard DVD 5.0 is a commercial MPEG editor with DVD authoring and full MPEG-4 and AC-3 encoder support. The price for a single user personal license is $99. A free trial download is available. The features of this program are smart rendering, no re-encoding, fast HD MPEG editing with frame accuracy, automatic Ad detection and removal, movie conversion to iPod’s and PSP’s, intuitive User Interface (UI) and batch processing.

The current release is 5.0.1.108 from June 2013.

A tutorial “How to Edit Out Commercials? ” is available at the Womble website.
Another commercial video editing tool is SmartCutter from FameRing. The company states that SmartCutter is the world’s first H.264 AVCHD MPEG2 frame accurate cutter without re-encoding! The price is 40$, a free trial is available. Other tools as a video browser and a video framer or bundled versions are also offered. The current version is 1.8.1 released on August 28, 2013.

A tutorial how to edit H.264/AVCHD/MPEG2 videos without re-encoding is available oh the FameRing website. The name FAME stands for Frame Accurate Movie EngineeRing.
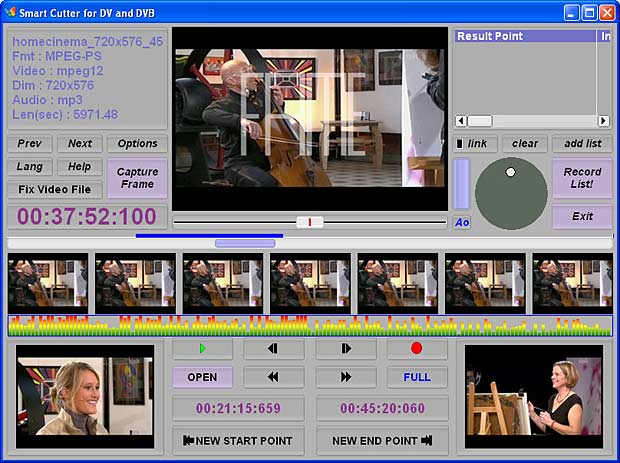
Smart Cutter from FameRing

The record function of the VLC media player can be used to do a simple cutting of video clips.

My favorite editing tools are now AVS Video Remaker and AVS Video Editor from AVS4YOU, a project of Online Media Technologies Ltd, an english IT high-tech company, founded in 2004 and specialized in developing innovative video and audio solutions for end-users and professional developers. AVS4YOU is a collection of software tools (currently there are 20 tools available) for which you can purchase either an unlimited access license or a one-year access license and use aLL of the tools with that license.

I did a lot of tests with other low-price commercial and shareware video-editors and I experienced serious problems with most of them when loading my MPEG-4/H264 test videos.