Last update : September 15, 2014

Meshlab 1.3.1
MeshLab is an advanced 3D mesh processing software system which is well known in the more technical fields of 3D development and data handling. As free and open-source software it is used both as a complete package, and also as libraries powering other software. MeshLab is available for most platforms. The MeshLab system started in late 2005 as a part of the FGT course of the Computer Science department of University of Pisa and most of the code of the first versions was written by a handful of willing students. The official website is meshlab.sourceforge.net, the latest version is V1.3.3 released on April 2, 2014 and available at the following link.
The lead developer of Meshlab and main designer of the VCG library is Paolo Cignoni.
MeshLab for iOS (former name MeshPad) is an advanced 3D model viewer for iOS. MeshLab is also available for Android. It is recommended by ReconstructMe to process the Kinect scan files.
MeshLab user guide
One of the weak points of MeshLab is the lack of documentation. I created a quick user guide based on the video tutorials available at Youtube.
Project
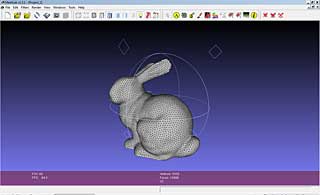
A project assembles meshes, textures, and rasters. The main screen of MeshLab shows the model, the mesh name, the number of vertices and faces, the camera field of view (FOV) and the number of frames per second (FPS). A mesh is imported in the menu File>Import Mesh into a new project.
Navigation
The navigation is based on the concept of a trackball. Pressing the left mouse button and dragging the trackball allows to rotate the model. Pressing the control key and dragging the model allows to pan the model. Pressing the shift key and dragging the model up or down allows to zoom the model in or out. Zooming can also be done with the mouse wheel. The field of view of the camera is changed by pressing the shift key and using the mouse wheel (FOV : ortho / 6.2 – 90). By double clicking a point of the model the center of the trackball will be set to this point. By pressing control+h you can reset the trackball center to its original position. The menu Help>on screen quick help (Function key F1) shows all the navigation commands.
Lighting
Lighting can be switched on and off in the Menu Render>Lighting>Light on/off or with the yellow Light icon. By pressing control+shift and dragging the model the light direction can be changed. The direction is shown with yellow lines. With the menu Render>Lighting>Double Side Lighting you select a right and left light source. The light color can be changed in the menu Tools>Options. The parameters fancyBLightDiffuseColor and fancyBLightDiffuseColor allow to select different colors for both lights. The effect is enabled with the menu Render>Lighting>Fancy Lighting. The Tools>Options menu allows also to change the top, background, ambient, specular, diffuse and area color, or to reset them to the original colors.
Feedback
If a second model is loaded, the on-screen information is updated and the total number of vertices and faces is also shown. A pop-up window shows the two models, the selected one is marked yellow. A feedback about the actions and filters applied is displayed in the lower part of this window. Attributes and other informations like the number of selected faces are also shown on-screen.
Preview and Help
MeshLab has no undo function, but most filters have a preview function which can be checked before application. Filters have also an individual help button which provides useful information about its features and parameters.
Selection
Selection of faces is an important feature of the program. It is activated by the menu Edit>Select faces in a rectangular region or with the corresponding icon. Press the alt key to select only the visible faces on the model. Press the control key to add selections or the shift key to do substractions.You can combine the alt key with the other keys to work only on the visible faces. To change the position of the model press the Esc key to show the trackball. Press again the Esc key to return to the selection mode.
Selection of vertexes works the same way as for faces. Use the menu Edit>Select Vertexes or the corresponding icon to activate this state. The same is true for the menu Edit>Select connected components in a region which allows to deal with isolated geometries. You can also use the brush (menu Edit>Z-painting) to select faces. Painting is different from the selection tools : only the visible faces are selected and all painted areas are added. The menu Filters>Selection offers numerous other selection tools (by color, quality, edges, length, …).
Snapshots
Use the menu File>Save snapshot or the camera icon to take pictures of the displayed model. There are several options : transparent background, screen multiplier to get high resolution images, tiled images, snap all layers.
Decimation
To simplify a mesh use the filter Remeshing, Simplification and Reconstruction>Quadric Edge Collapse Decimation.
Alignment
